Yamaha PSR-540 Owner's Manual - Page 104
Naming User Styles, Clearing User Style Data, Ed Menu=Name, Nam=UserStyle1, Ed Menu=Clear
 |
View all Yamaha PSR-540 manuals
Add to My Manuals
Save this manual to your list of manuals |
Page 104 highlights
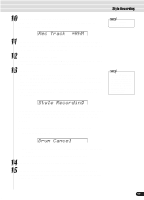
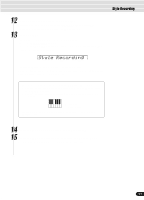
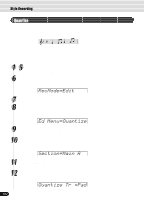
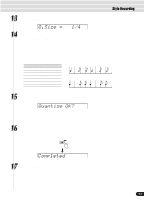
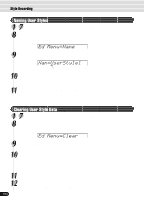
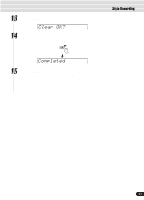
Style Recording Naming User Styles 1 7- Use the same operation as in "Quantize" (page 102). 8 Select "Name". Use the data dial, the [+/YES] button or the [-/NO] button. Ed Menu=Name 9 Press the [NEXT] button to display the Name screen. Nam=U_serStyle1 cursor 10 Enter the desired name for the style. Use the keyboard to enter the name (page 21). Up to 12 letters or characters can be used. 11 Press the [RECORD] button to exit from the Record mode. For information on leaving the recording mode, see page 100. Clearing User Style Data 1 7- Use the same operation as in "Quantize" (page 102). 8 Select "Clear". Use the data dial, the [+/YES] button or the [-/NO] button. Ed Menu=Clear 9 Press the [NEXT] button to display the Section selection screen. 10 Select a Section to be cleared. Use the data dial, the [+/YES] button or the [-/NO] button. When "All Sect" is selected as the section to be cleared, all style data (which includes all sections and all tracks) will be deleted. In this case, go to step #13, skipping over steps #11 and #12. 11 Press the [NEXT] button to display the Track selection screen. 12 Select a Track to be cleared. Use the data dial, the [+/YES] button or the [-/NO] button. 104 102
-
 1
1 -
2
-
3
-
4
-
5
-
6
-
7
-
8
-
9
-
10
-
11
-
12
-
13
-
14
-
15
-
16
-
17
-
18
-
19
-
20
-
21
-
22
-
23
-
24
-
25
-
26
-
27
-
28
-
29
-
30
-
31
-
32
-
33
-
34
-
35
-
36
-
37
-
38
-
39
-
40
-
41
-
42
-
43
-
44
-
45
-
46
-
47
-
48
-
49
-
50
-
51
-
52
-
53
-
54
-
55
-
56
-
57
-
58
-
59
-
60
-
61
-
62
-
63
-
64
-
65
-
66
-
67
-
68
-
69
-
70
-
71
-
72
-
73
-
74
-
75
-
76
-
77
-
78
-
79
-
80
-
81
-
82
-
83
-
84
-
85
-
86
-
87
-
88
-
89
-
90
-
91
-
92
-
93
-
94
-
95
-
96
-
97
-
98
-
 99
99 -
 100
100 -
 101
101 -
 102
102 -
 103
103 -
 104
104 -
 105
105 -
 106
106 -
 107
107 -
 108
108 -
 109
109 -
110
-
111
-
112
-
113
-
114
-
115
-
116
-
117
-
118
-
119
-
120
-
121
-
122
-
123
-
124
-
125
-
126
-
127
-
128
-
129
-
130
-
131
-
132
-
133
-
134
-
135
-
136
-
137
-
138
-
139
-
140
-
141
-
142
-
143
-
144
-
145
-
146
-
147
-
148
-
149
-
150
-
151
-
152
-
153
-
154
-
155
-
156
-
157
-
158
-
159
-
160
 |
 |
