AIWA XR-M35 Operating Instructions
AIWA XR-M35 Manual
 |
View all AIWA XR-M35 manuals
Add to My Manuals
Save this manual to your list of manuals |
AIWA XR-M35 manual content summary:
- AIWA XR-M35 | Operating Instructions - Page 1
For assistance and information, call toll free I-800 -BUY-AIWA. L (United States and Puerto Rico) 88-CL3-903-11 980307 BYK- H-7 m aiiif DIGITAL AUDIO - AIWA XR-M35 | Operating Instructions - Page 2
Instructions, and as marked on the DO NOT REMOVE COVER (OR BACK). NO USER-SERVICEABLE PARTS INSIDE. REFER SERVICING TO QUALIFIED SERVICE information on proper graunding of the mast, supporting structure, and the lead-in wire to the NEC SECTION 81 0-20) ELECTRIC SERVICE EQUIPMENT NEC-NATIONAL - AIWA XR-M35 | Operating Instructions - Page 3
Instructions and become familiar with the operating procedures. Check your system and accessories XR-M35 Compact disc stereo cassette receiver SX-M35 (L, R) speakers Remote control MAINTENANCE 18 SPECIFICATIONS 19 TROUBLESHOOTING GUIDE 20 PARTS INDEX 20 Operating Instructions, etc. Owner's - AIWA XR-M35 | Operating Instructions - Page 4
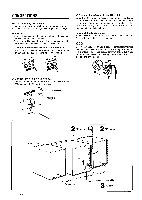
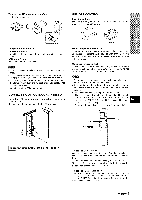
CONNECTIONS Before connecting the AC cord The rated voltage of your unit shown on the rear panel is 120 V AC. Check that the rated voltage matches your local voltage. IMPORTANT q Connect the speakers, antennas, and all optional equipment first. Then connect the AC cord in the end. q There are no - AIWA XR-M35 | Operating Instructions - Page 5
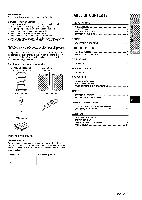
5 meters (16 feet). When this distance decreases, replace the batteries with new ones. Using the remote control The instructions in this manual refer mainly to the buttons on the main unit. Buttons on the remote control with the same names as those on the main unit can be used as well. q The - AIWA XR-M35 | Operating Instructions - Page 6
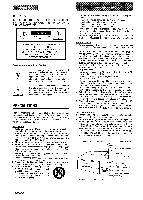
may open and close to reset the unit. 1 Press the CLOCK button while pressing the SHIFT button on the remote control. 2 Within 4 seconds, press the 11 button. The hour flashes. Illumination guides Whenever the AC cord is connected or one of the function buttons is pressed, the buttons for that - AIWA XR-M35 | Operating Instructions - Page 7
or left to select one of the three levels, or off position within 10 seconds. The TBASS level does not change cyclically. When using the remote control, press the T-BASS button repeatedly. ma Low frequency sound may be distorted when the T-BASS system is used fora disc or tape in which Iowfrequency - AIWA XR-M35 | Operating Instructions - Page 8
MANUAL TUNING When an FM stereo broadcast contains noise Press the BAND/MODE TUNER button while pressing button on the remote control. "MONO" appears on the display. Noise is reduced, although reception is monaural. the SHIFT BANDI MODE 1 TUNER 2 SHIFT 1 Press the TUNER/BAND button - AIWA XR-M35 | Operating Instructions - Page 9
total of 32 preset stations. (Each band has a maximum of 20 available preset stations. ) When a station is stored, a preset beginning from 1 in consecutive order for each band. PRESET NUMBER TUNING Use the remote control to select the preset number directly. 1 Press the TUNER/BAND button to select - AIWA XR-M35 | Operating Instructions - Page 10
play time display, repeat the above again. Selecting a track with the remote control Press the numberd buttons and the +10 button to select a track and off. I I Total number of tracks Music calender (only the first 20 tracks are displayed) Total playing time PLAYING DISCS Load a disc. Press the - AIWA XR-M35 | Operating Instructions - Page 11
track cannot be skipped. The unit returns to the beginning of the current track only. q When you select a track with the numbered buttons on the remote control during the random play mode, the selected track stal'ts to play and the random play mode is cancelled. REIPEAT PLAY A single track or all - AIWA XR-M35 | Operating Instructions - Page 12
OPERATION TAPEIREV MODE II EJECT MULTI JOG MODE PLAYING BACK A TAPE Insert a tape 7 Press the MODE button repeatedly until "DOLBY" appears on the display. Then, turn the MULTI JOG dial right or left to turn Dolby NR on or off to match the playback tape within 10 seconds. INSERTING TAPES . You can - AIWA XR-M35 | Operating Instructions - Page 13
MUSIC SENSOR If there is a 4-second or longer blank between each track, a search for the beginning of the current or next track during playl]ack can be done easily. When the D indicator on the display is appearing, press the * button to move to the next track or the - AIWA XR-M35 | Operating Instructions - Page 14
the II button. (Applicable when the source is TUNER, MD, VI DEO/AUX.) To resume recording, press again. To start recording with the remote control First press the q button, and then press the > button within 2 seconds. INSERTING BLANK SPACES Insertion of 4-second blank spaces enables activation of - AIWA XR-M35 | Operating Instructions - Page 15
tape must be recorded from the beginning of either side. Use the remote control from steps 3 to 5. 1 Insert the tape into the deck, is displayed, and load the disc. }'OUcan pressthe FUNCTION button on the remote control repeatedly to display "CD". 3 Press the EDIT/CHECK button once pressing the - AIWA XR-M35 | Operating Instructions - Page 16
. 2 Presws the CD button on the main unit so that "CD" is displayed, and load the disc. You can press the FUNCTION button on the remote control repeatedly to display "CD". 3 Press the EDIT/CHECK button twice while pressing the SHIFT button. "EDIT" lights up and "PRGM" flashes on the display. 4 Press - AIWA XR-M35 | Operating Instructions - Page 17
applicable for TUNER, MD and ViDEO/AUX (with an external timer) sources only. Press the TIMER button repeatedly while pressing the SHIFT button on the remote control so that @ and ~ appear on the display, and press the 11 button. Repeat the steps shown above from step 2 and insert the tape to be - AIWA XR-M35 | Operating Instructions - Page 18
off automatically at a specified time. Use the remote control. 7 Press the SLEEP button while pressing SUPER WOOFER Refer to the operating instructions of the connected equipment for details. L jack. When connecting a turntable Use an Aiwa turntable equipped with a built-in equalizer amplifier. CD - AIWA XR-M35 | Operating Instructions - Page 19
cleaning cass-ette or a moistened swab, wait until the cleaned parts are completely dry before inserting the tapes. To demagnetize the heads The narrow the output range of recorded tapes and increase noise. After 20 to 30 hours use, demagnetize the heads with any commercially available - AIWA XR-M35 | Operating Instructions - Page 20
XR-M35 for a Class B digital device, pursuant to Part 15 of the FCC Rules. These limits are installed and used in accordance with the instructions, may cause harmful interference to radio by turning the equipment off and on, the user is encouraged to try to correct the interference by - AIWA XR-M35 | Operating Instructions - Page 21
TROUBLESHOOTING GUIDE If the unit fails to perform as described in these Operating Instructions, check the following guide. GENERAL TheI-e is no 2. PARTS INDEX Instructions about each part on the main unit or remote control are indicated on the pages listed below. (in alphabetic order) Parts BAND - AIWA XR-M35 | Operating Instructions - Page 22
DO NOT REMOVE COVER (OR BACK). NO USER-SERVICEABLE PARTS INSIDE. REFER SERVICING TO QUALIFIED SERVICE PERSONNEL." Explication de Ios simbolos graficos: A el techo, a menos que se especifique 10contrario en el Manual de Instrucciones. Enerqia Electrica 1 Fuentes de alimentacion - Conecte solamente - AIWA XR-M35 | Operating Instructions - Page 23
COMPONENTS 20 Antena AM Manual de Instrucciones, etc. Registro del propietario Pa>a su conveniencia, anote el numero del modelo y de serie (Ios encontrara en la parte trasera del aparato) en el espacio prcpuesto ma:; abajo. Por favor refierase a ellos cuando contacte con su distribuidor Aiwa en - AIWA XR-M35 | Operating Instructions - Page 24
CONEXIONES Antes de conectar el cable de alimentacion de CA La tension nominal de su unidad indicada en el panel posterior es de 120V CA. Compruebe que esta tension coincide con la de la red local, IMPORTANTE q Conecte primero Ios altavoces, antenas y todos Ios demas equipos opcionales, Luego - AIWA XR-M35 | Operating Instructions - Page 25
et gancho en la ranura. CONTROL REMOTO Insertion de Ias baterias Quite la tapa de Ias bater(as, ubicada en la parte trasera del control remoto, e inserte dos control remoto Las instrucciones de este manual se refieren principalmente a Ios botones de la unidad principal. Los botones del control - AIWA XR-M35 | Operating Instructions - Page 26
completar la configuration. El minuto para de parpadear en la pantalla y el reloj comienza desde 00 segundos. Para configurar el reloj sin el control remoto 1 Apague la unidad si esta encendida. Tras ello, si aparece la pantalla de demostracion, presione el boton DEMO para cancelarla. 2 Presione el - AIWA XR-M35 | Operating Instructions - Page 27
la derecha o izquierda para seleccionar uno de Ios tres niveles o a la position de apagado antes de que pasen 10 segundos. Al usar el control remoto, presione el boton EQ repetidamente. AJUSTE DEL SONIDO DURANTE LA GRABACION La salida de volumen y tono de Ios altavoces o auriculares weden variarse - AIWA XR-M35 | Operating Instructions - Page 28
SINTONIZACION MANUAL Cuando una emision en FM estereo contenga ruido Presione el boton BAND/MODE TUNER mientras presiona el boton SHIFT del control remoto. "MONO" aparecera en la pantalla. El ruido se reduce aunque la recepci6n sea monoaural. BANDI MODE TUNER SHIFT 1 Presione el boton TUNER/BAND - AIWA XR-M35 | Operating Instructions - Page 29
unidad puede memorizar un total de 32 emisoras. (Cada bandatiene un maximo de 20 emisoras de preajuste disponibles,) Cuando se memoriza una emisora, a esa emisora se Presione el boton - AIWA XR-M35 | Operating Instructions - Page 30
de ~istas Calendario de musics (solo se visualizaran Ias primeras 20 pistas) Tiempo de reproduction total REPRODUCTION Introduzca un disco. DE repita el anterior procedimiento nuevamente. Seleccion de una pista con el control remoto Presione Ios botones numericos y el boton +1 O para seleccionar - AIWA XR-M35 | Operating Instructions - Page 31
Se podran programar introducido. un maximo de 30 pistas del disco Use el control remoto Si presiona el boton E antes de iniciar el paso 2, se ng 12, presione Ios botones +1 O, y 2. Para seleccionar la pista ng 20, presione Ios botones +10, +loyo, Numero de pista seleccionada Ntimero de - AIWA XR-M35 | Operating Instructions - Page 32
OPERACION s TAPEIREV MODE u,> II EJECT MULTI JOG MODE - AIWA XR-M35 | Operating Instructions - Page 33
SENSOR MUSICAL Si existe un hueco de 4 segundos o mas entre cada pista, puede realizarse facilmente una btisqueda hacia el principio de la pista actual o siguiente durante la reproduction. Cuanda, aparezca e! indicador D en la pantalla, presione el boton ~ para ir a la siguiente pista o el boton 4+ - AIWA XR-M35 | Operating Instructions - Page 34
fuente para grabacion sea TUNER, MD, VIDEO/AUX). Para reanudar la grabacion, presione de nuevo el boton. Para iniciar la grabacion con el control remoto Presione primero el boton . y Iuego presione el boton > antes de que pasen 2 segundos. INSERCION DE ESPACIOS EN BLANCO La insertion de espacios - AIWA XR-M35 | Operating Instructions - Page 35
desde otro punto que no sea el principio de cada cara de la cinta. Utilice el control remoto para Ios pasos de 3 a 5, 1 Coloque la cinta en la platina, y "CD" y cargue un disco. Puede presionar el boton FUNCTION del control remoto repetidamente para que se visualice "CD" en pantalla. 3 Presione - AIWA XR-M35 | Operating Instructions - Page 36
pistas. m La grabacion con edition programada no puede comenzar otro punto que no sea el principio de cada cara de la cinta. desde Utilice el control remoto para Ios pasos de 3 a 8, 1 Coloque la cinta en la platina, y active o desactive el Dolby NR mediante el boton MODE y el seletor MULTI JOG - AIWA XR-M35 | Operating Instructions - Page 37
son TUNER, MD y VIDEO/AUX temporizador externo). cuando (con lun Presione el boton TIMER dos veces mientras presiona el boton SHIFT en el control remoto para que aparezcan en pantalla 0 y ~ y presione el boton II. Repita Ios pasos indicados anteriormente desde el paso 2 e inserte la cinta en la - AIWA XR-M35 | Operating Instructions - Page 38
especifique. en el memento que se Use el control remoto. 7 Presione el boton SLEEP mientras aprieta VIDEO/AUX LINE OUT SUPER WOOFER Consulte el Manual de Instrucciones del equipo conectado para obtener mas por separado. q Consulte con su centro Aiwa local si desea obtener equipo optional. TOMAS - AIWA XR-M35 | Operating Instructions - Page 39
cabezales y Ios puntos por donde pasa la cinta con un casete Iimpiacabezas Iiquido o con un palillo con algodon htimedo, espere a que Ias partes que ha Iimpiado se hayan secado completamente antes de introducer una cinta. Para desmagnetizar Ios cabezales Los cabezales pueden magnetizarse despues de - AIWA XR-M35 | Operating Instructions - Page 40
ESPECIFICACIONES Unidad principal XR-M35 Seccion del sintonizador de FM Gama de sintonizacion 87,5 MHz a 108 comprobado y determinado que cumple con Ios Iimites de dispositivo digital de clase B, segun la parte 15 de Ias Normas de la FCC. Estos Iimites se han disefiado para ofrecer una - AIWA XR-M35 | Operating Instructions - Page 41
PROBLEMAS Si la lJnidad no funciona como se describe en este Manual de Instrucciones, compruebe la guia siguiente: GENERALIDADES No hay sonido la unidad principal o del control remoto se indican en Ias paginas mostradas a continuation (En orden alfabetico) Partes BAND/MODE TUNER CD s 2. ESPANOL 20 - AIWA XR-M35 | Operating Instructions - Page 42
). NO USER-SERVICEABLE PARTS INSIDE. REFER SERVICING TO QUALIFIED SERVICE PERSONNEL." Explication un plafond, a moins que Ies instructions d'utilisation ne Ie precisent. Alimentation mise a la terre correcte du mat, de la structure de support et du fil d'amenee allant a I'unite de decharge de I' - AIWA XR-M35 | Operating Instructions - Page 43
instructions d'utilisation et de vousfamiliariser avec Ies methodes d'utilisation. Veriliei! votre chaine et ses accessoires Recepteur radio/platine cas,se:te/lecteur de disques compacts stereo XR-M35 SX-M35 ..m 19 GUIDE DE DEPISTAGE DES DEFAUTS 20 INDEX 20 u Instructions d'utilisation - AIWA XR-M35 | Operating Instructions - Page 44
CONNEXIONS Avant de connecter Ie cordon secteur La tension nominale indiquee sur Ie panneau arriere de votre appareil est de 120V c.a. Verifiez si cette tension nominale correspond bien a la tension locale. IMPORTANT q Connectez tout d'abord Ies haut-parleurs, Ies antennes et tout Ie materiel - AIWA XR-M35 | Operating Instructions - Page 45
sur I'unite principal. Lorsque cette distance commence a diminuer, remplacez Ies piles par des neuves. Utilisation de la telecommande Les instructions donnees clans ce manuel mentiorment principalement Ies touches sur I'unite principal. II est egalement possible d'utiliser Ies touches sur la - AIWA XR-M35 | Operating Instructions - Page 46
AVANT L'UTILISATION REGLAGE DE L'HORLOGE Ivlwul- CLOCK SHIFT ++, - II u .. Pour aliumer I'appareil: Appuyez sur I'une des touches de fonction (TAPE, TUNER, VIDEO/AUX, CD, MD). La lecture du disque ou de la cassette inseree commence ou bien la station captee precedemment est regue (Fonction de - AIWA XR-M35 | Operating Instructions - Page 47
REGLAGE IN SON EQ T-BASS ACCENTUATION DES GRAVES Le systeme T-BASS ameliore Ie realisme du son a basses frequencies. Appuyez a plusieurs reprises sur la touche MODE jusqu'a ce que "T-BASS" apparaisse sur I'affichage. Puis tournez le cadran MULTI JOG vers la droite ou vers la gauche afin de - AIWA XR-M35 | Operating Instructions - Page 48
ACCORD MANUEL :m; 1- w 2" - BANDI MODE TUNER -SHIFT -J 1 Appuyez plusieurs foissur latouche TUNER/ BAND- afin de seiectionner la bande desiree. n Si I'appareil est eteint, la station captee precedemment sera re~ue (Fonction de lecture directe). Lorsque vous utilisez la telecommande, appuyez - AIWA XR-M35 | Operating Instructions - Page 49
PRfF1~GLAGE DES STATIONS . o-9, +10 L'appareil peut memoriser au maximum 32 stations prereglees. (20 static}ns au maximum sent disponibles sur chaque bande.) Lorsqu'une station est memorisee, un numero de prereglage est attrib\Je a cette station. Utilisez ce - AIWA XR-M35 | Operating Instructions - Page 50
la face portant I'etiquette tournee vers Ie haut puis refermez Ie compartment. 1 i Nombre total de pistes 1 OPEN/CLOSE Repertoire des pistes (seules Ies 20 premieres pistes sent affichees) Temps total de lecture LECTURE D'UN DISQUE Inserez un disque, Appuyez sur la touche - AIWA XR-M35 | Operating Instructions - Page 51
LECTURE ALEATOIRE Toutes I,ss pistes sur Ie disque peuvent &re Iues de fagon aleatoira. A,ppuyez sur la touche RANDOM tout en appuyant .eur la Itouchr? SHIFT sur la telecommande. "RANDCIM" est alors affiche. Pour annuler la lecture aleatoire, repetez la m6me operation. Utilisez la telecommande 1 - AIWA XR-M35 | Operating Instructions - Page 52
UTILISATION LECTURE D'UNE CASSETTE Inserez une cassette. TAPEIREV MODE +,- MULTI JOG MODE 1 Appuyez a plusieurs reprises sur la touche MODE jusqu'a ce que "DOLBY" apparaisse sur I'affichage. Puis tournez Ie cadran MULTI JOG vers la droite ou vers la gauche clans Ies 10 secondes qui suivent pour - AIWA XR-M35 | Operating Instructions - Page 53
13ETECTEUR DE IVIUSIQUE S'il y a w espace vide entre chaque piste, il est facile de chercher, pendant la lecture, Ie commencement de la piste en tours de lecture CJUde la piste suivante. Gfuand 11'indicateurD apparalt sur I'affichage, appuyez sur la touche ~- pour passer a la piste suivante ou sur - AIWA XR-M35 | Operating Instructions - Page 54
ENREGISTREMENT DE BASE Cette section explique comment effectuer un enregistrant en utilisant Ie syntoniseur, Ie Iecteur de disque compact, I'enregistreur MD ou un appareil externe. Quand un enregistreur MD ou un autre appareil optionnel est connecte a cette chalne, vous pouvez egalement - AIWA XR-M35 | Operating Instructions - Page 55
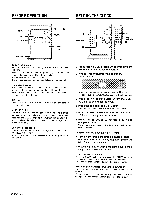
ENRKWTREMENT AVEC NIONITAGE Al Longueur de la bande 3 4 3 E 5 5 2 s La fonction de montage Al permet d'enregistrer des disques compacls saris se soucier de la Iongueur de la bande ni de la Iongueur des pistes. Quand vous inserez un disque compact, I'apparell calcule automatiquement la - AIWA XR-M35 | Operating Instructions - Page 56
ENREGISTREMENT AVEC MONTAGE PROGRAMME 3,7 4,5 3,7 M 8 8 s 6 Repetez I'operation 5 pour Ies autres pistes pour la face A de la bande. II est impossible de programmer une piste dent Ie temps de lecture est plus long que Ie temps qui reste sur la bande. Piste selectionnee Numero du programme - AIWA XR-M35 | Operating Instructions - Page 57
REGLAGE DE LA MIIWTERIE 1 1 1,2,3,4 2,4 3 6 L'appareil peut ~tre allume chaque jour a une heure specifiee grace a la minuierie incorporee. Preparation Assurez-vousque I'hor[oge est reglee a la bonne heure (consultez la Ipage 51. Utilisez la telecommande. 1 Appu'yez a plusieurs reprises sur la - AIWA XR-M35 | Operating Instructions - Page 58
MD @@ am VIDEO/AUX mm LINE OUT .m LjLd----supERw Consultez Ies instructions d'utilisation de I'appareil connecte pour avoir plus de details. q Les raccordement adequats. q Renseignez-vous aupres de votre distributeur Aiwa local pour conna~tre Ies appareils optionnels disponibles. PRISES - AIWA XR-M35 | Operating Instructions - Page 59
Ies t&es deviennent magnetisees apres une Iongue perioded'utilisationC. ela peutreduirela qualitedu son des cassettes enregistrees et augmenter Ie bruit. Apres 20 a 30 heures d'utilisation, demagnetisez Ies tetes avec un demagnetiseur quelconque, que vous pouvez trouver clans Ie commerce. Soin des - AIWA XR-M35 | Operating Instructions - Page 60
SPECIFICATIONS Unite principal XR-M35 Partie syntoniseur FM Gamme d'accord Sensibility utilizable (IHF) " Haut-parleurs Impedance Niveau de pression acoustique de sortie Dimensions (Lx H x P) Poids SX-M35 A 2 voies, a basse reflexe (type a blindage magnetique) Woofer: 130 mm type conique Tweeter - AIWA XR-M35 | Operating Instructions - Page 61
appi~reil ne fonctionne pas comme decrit clans ces instructic)ns d'utilisation, consultez Ie guide ci-dessous. GENERALITES II n'y a pas de apres Ies instructions concernant chaque fonction sur I'unite principal ou sur la telecommande. (Par ordre alphabetique) Parts BAND/MODE I'operation 2. FRAP@W 20 - AIWA XR-M35 | Operating Instructions - Page 62
. - AIWA XR-M35 | Operating Instructions - Page 63
- AIWA XR-M35 | Operating Instructions - Page 64
Printed in China AIWA CO.,LTD.
-
 1
1 -
 2
2 -
 3
3 -
 4
4 -
 5
5 -
 6
6 -
 7
7 -
8
-
9
-
10
-
11
-
12
-
13
-
14
-
15
-
16
-
17
-
18
-
19
-
20
-
21
-
22
-
23
-
24
-
25
-
26
-
27
-
28
-
29
-
30
-
31
-
32
-
33
-
34
-
35
-
36
-
37
-
38
-
39
-
40
-
41
-
42
-
43
-
44
-
45
-
46
-
47
-
48
-
49
-
50
-
51
-
52
-
53
-
54
-
55
-
56
-
57
-
58
-
59
-
60
-
61
-
62
-
63
-
64
 |
 |
88-CL3-903-11
980307 BYK- H-7
For assistance
and information,
call
toll
free
I-800
-BUY-AIWA.
L
(United
States and Puerto Rico)
m
aiiif
DIGITAL
AUDIO