AIWA XR-M35 Operating Instructions - Page 4
Connections
 |
View all AIWA XR-M35 manuals
Add to My Manuals
Save this manual to your list of manuals |
Page 4 highlights
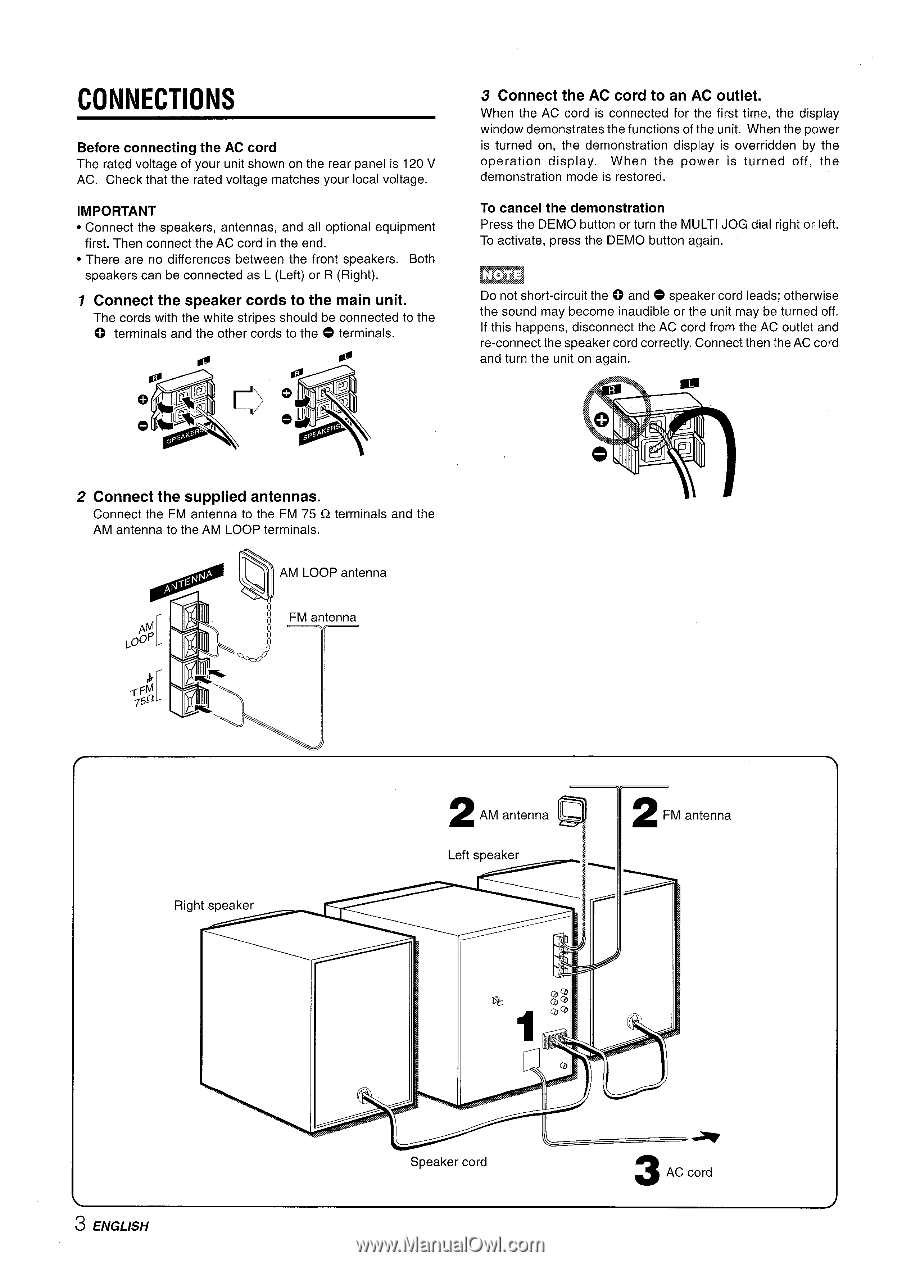
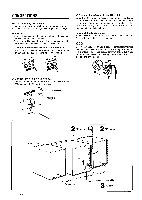
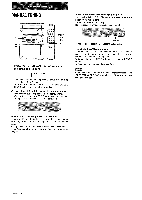
CONNECTIONS Before connecting the AC cord The rated voltage of your unit shown on the rear panel is 120 V AC. Check that the rated voltage matches your local voltage. IMPORTANT q Connect the speakers, antennas, and all optional equipment first. Then connect the AC cord in the end. q There are no differences between the front speakers. Both speakers can be connected as L (Left) or R (Right). 1 Connect the speaker cords to the main unit. The cords with the white stripes should be connected to the ~ terminals and the other cords to the O terminals. @ d Q o 3 Connect the AC cord to an AC outlet. When the AC cord is connected for the first time, the display window demonstrates the functions of the unit. When the power is turned on, the demonstration display is overridden by the operation display. When the power is turned off, the demonstration mode is restored. To cancel the demonstration Press the DEMO button or turn the MULTI JOG dial right or left. To activate, press the DEMO button again. Do not short-circuit the ~ and O speaker cord leads; otherwise the sound may become inaudible or the unit may be turned off. If this happens, disconnect the AC cord from the AC outlet and re-connect the s~eaker cord correctlv.. Connect then the AC cord and turn the unit on again. 2 Connect the supplied antennas. Connect the FM antenna to the FM 75 Q terminals AM antenna to the AM LOOP terminals. and the 2 AM antenna D ~T FM antenna 3 ENGLISH Speaker cord 3 AC cord
-
 1
1 -
 2
2 -
 3
3 -
 4
4 -
 5
5 -
 6
6 -
 7
7 -
 8
8 -
 9
9 -
 10
10 -
11
-
12
-
13
-
14
-
15
-
16
-
17
-
18
-
19
-
20
-
21
-
22
-
23
-
24
-
25
-
26
-
27
-
28
-
29
-
30
-
31
-
32
-
33
-
34
-
35
-
36
-
37
-
38
-
39
-
40
-
41
-
42
-
43
-
44
-
45
-
46
-
47
-
48
-
49
-
50
-
51
-
52
-
53
-
54
-
55
-
56
-
57
-
58
-
59
-
60
-
61
-
62
-
63
-
64
 |
 |