Alpine INE-Z928HD Navigation User's Manual (english) - Page 53
Navigate to a location stored in a picture - pictures
 |
View all Alpine INE-Z928HD manuals
Add to My Manuals
Save this manual to your list of manuals |
Page 53 highlights
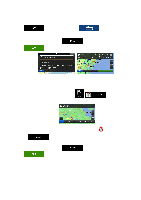
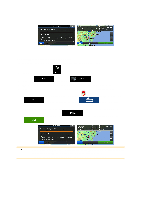
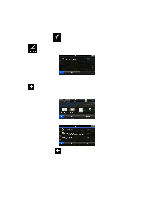
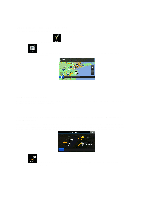
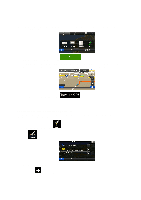
3.1.8 Navigate to a location stored in a picture You can also set the location stored in a picture as your destination. Do as follows: 1. In the Navigation menu, tap . 2. Open the menu and tap . 3. The list of picutres stored on the microSD card appears. Select one picture from the list. 4. A full screen map appears with the selected point in the middle. If necessary, tap the map somewhere else to modify the destination. The Cursor ( ) appears at the new location. Tap destination. to confirm the destination, or tap to select a different 5. After a short summary of the route parameters, the map appears showing the entire route. The route is automatically calculated. Tap to modify route parameters, or tap and start your journey. Note! Only geotagged JPG files contain location information. That is why these kind of files can only be used in navigation. Other picture files do not appear in the list. Files must be located on an inserted microSD card, in a "pictures" folder. 53
-
 1
1 -
2
-
3
-
4
-
5
-
6
-
7
-
8
-
9
-
10
-
11
-
12
-
13
-
14
-
15
-
16
-
17
-
18
-
19
-
20
-
21
-
22
-
23
-
24
-
25
-
26
-
27
-
28
-
29
-
30
-
31
-
32
-
33
-
34
-
35
-
36
-
37
-
38
-
39
-
40
-
41
-
42
-
43
-
44
-
45
-
46
-
47
-
 48
48 -
 49
49 -
 50
50 -
 51
51 -
 52
52 -
 53
53 -
 54
54 -
 55
55 -
 56
56 -
 57
57 -
 58
58 -
59
-
60
-
61
-
62
-
63
-
64
-
65
-
66
-
67
-
68
-
69
-
70
-
71
-
72
-
73
-
74
-
75
-
76
-
77
-
78
-
79
-
80
-
81
-
82
-
83
-
84
-
85
 |
 |
