Apple M7710LL User Guide - Page 49
Installing Applications
 |
View all Apple M7710LL manuals
Add to My Manuals
Save this manual to your list of manuals |
Page 49 highlights
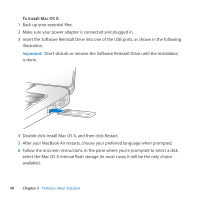
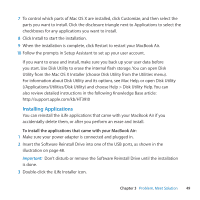
7 To control which parts of Mac OS X are installed, click Customize, and then select the parts you want to install. Click the disclosure triangle next to Applications to select the checkboxes for any applications you want to install. 8 Click Install to start the installation. 9 When the installation is complete, click Restart to restart your MacBook Air. 10 Follow the prompts in Setup Assistant to set up your user account. If you want to erase and install, make sure you back up your user data before you start. Use Disk Utility to erase the internal flash storage. You can open Disk Utility from the Mac OS X Installer (choose Disk Utility from the Utilities menu). For information about Disk Utility and its options, see Mac Help, or open Disk Utility (/Applications/Utilities/Disk Utility) and choose Help > Disk Utility Help. You can also review detailed instructions in the following Knowledge Base article: http://support.apple.com/kb/HT3910 Installing Applications You can reinstall the iLife applications that came with your MacBook Air if you accidentally delete them, or after you perform an erase and install. To install the applications that came with your MacBook Air: 1 Make sure your power adapter is connected and plugged in. 2 Insert the Software Reinstall Drive into one of the USB ports, as shown in the illustration on page 48. Important: Don't disturb or remove the Software Reinstall Drive until the installation is done. 3 Double-click the iLife Installer icon. Chapter 3 Problem, Meet Solution 49
-
 1
1 -
2
-
3
-
4
-
5
-
6
-
7
-
8
-
9
-
10
-
11
-
12
-
13
-
14
-
15
-
16
-
17
-
18
-
19
-
20
-
21
-
22
-
23
-
24
-
25
-
26
-
27
-
28
-
29
-
30
-
31
-
32
-
33
-
34
-
35
-
36
-
37
-
38
-
39
-
40
-
41
-
42
-
43
-
 44
44 -
 45
45 -
 46
46 -
 47
47 -
 48
48 -
 49
49 -
 50
50 -
 51
51 -
 52
52 -
 53
53 -
 54
54 -
55
-
56
-
57
-
58
-
59
-
60
-
61
-
62
-
63
-
64
-
65
-
66
-
67
-
68
-
69
-
70
-
71
-
72
 |
 |