Brother International MFC-790CW Quick Setup Guide - English - Page 18
Connect the USB cable - usb port
 |
UPC - 012502620501
View all Brother International MFC-790CW manuals
Add to My Manuals
Save this manual to your list of manuals |
Page 18 highlights
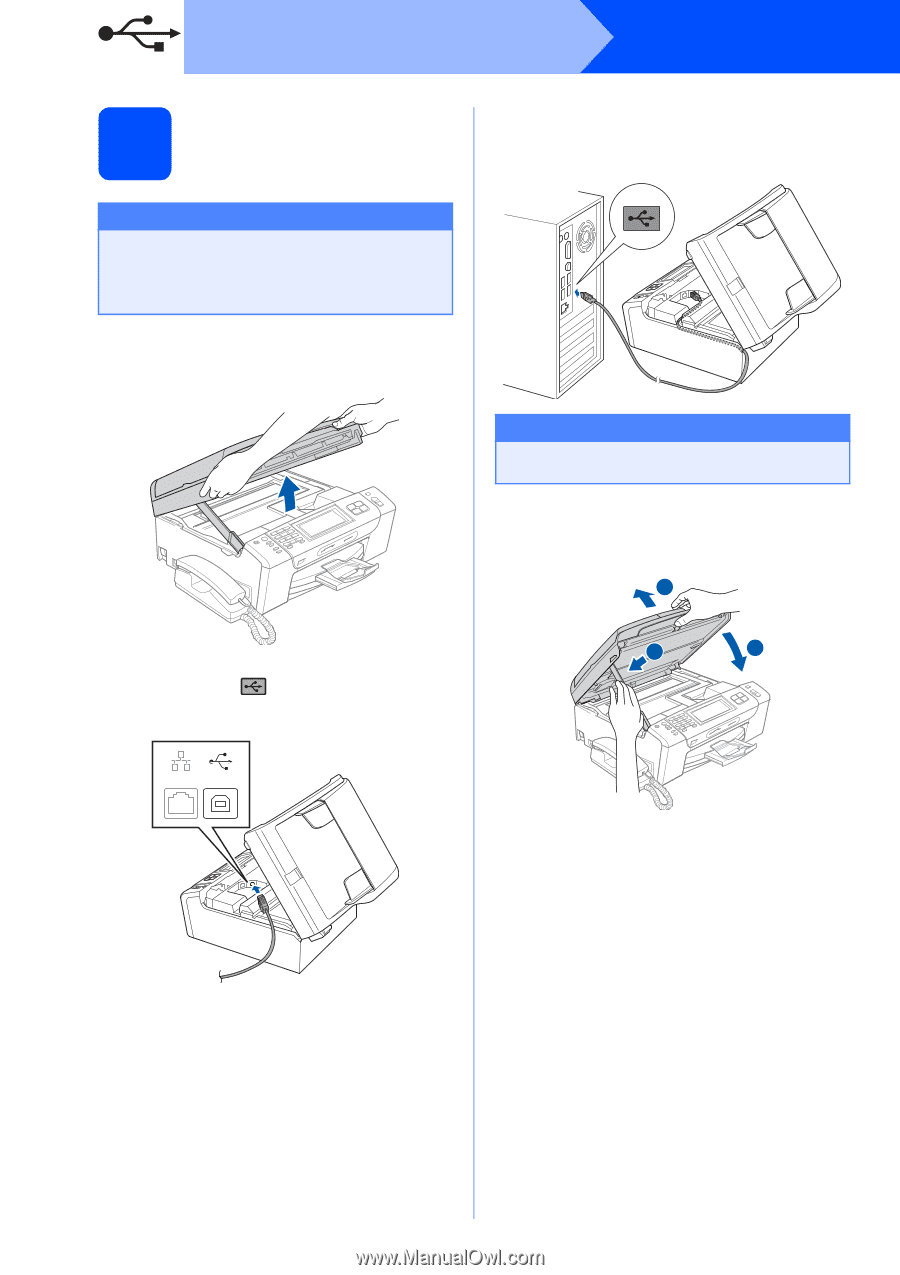
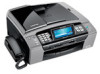
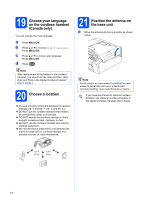
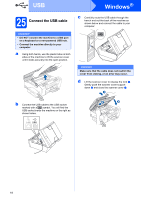
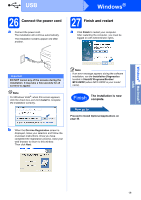
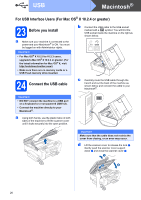
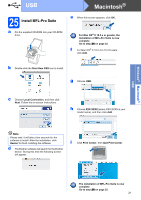
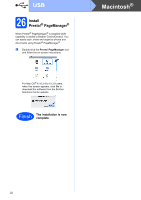
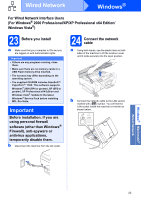
USB 25 Connect the USB cable Important • DO NOT connect the machine to a USB port on a keyboard or a non-powered USB hub. • Connect the machine directly to your computer. a Using both hands, use the plastic tabs on both sides of the machine to lift the scanner cover until it locks securely into the open position. Windows® c Carefully route the USB cable through the trench and out the back of the machine as shown below and connect the cable to your computer. Important Make sure that the cable does not restrict the cover from closing, or an error may occur. d Lift the scanner cover to release the lock a. Gently push the scanner cover support down b and close the scanner cover c. 1 b Connect the USB cable to the USB socket marked with a symbol. You will find the USB socket inside the machine on the right as shown below. 2 3 LAN USB 18
-
 1
1 -
2
-
3
-
4
-
5
-
6
-
7
-
8
-
9
-
10
-
11
-
12
-
 13
13 -
 14
14 -
 15
15 -
 16
16 -
 17
17 -
 18
18 -
 19
19 -
 20
20 -
 21
21 -
 22
22 -
 23
23 -
24
-
25
-
26
-
27
-
28
-
29
-
30
-
31
-
32
-
33
-
34
-
35
-
36
-
37
-
38
-
39
-
40
-
41
-
42
-
43
-
44
-
45
-
46
-
47
-
48
-
49
-
50
 |
 |