Brother International MFC-8460n Software Users Manual - English - Page 71
Supported file types, File, Duplex two-sided Scanning
 |
UPC - 012502617365
View all Brother International MFC-8460n manuals
Add to My Manuals
Save this manual to your list of manuals |
Page 71 highlights
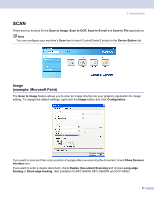
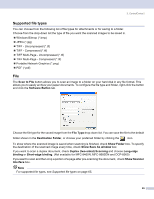
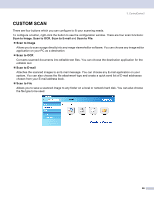
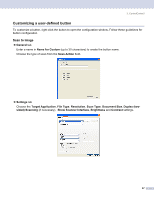
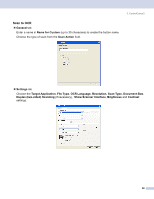
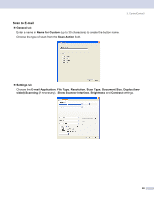
3. ControlCenter2 Supported file types 3 You can choose from the following list of file types for attachments or for saving to a folder. Choose from the drop-down list the type of file you want the scanned images to be saved in. „ Windows Bitmap (*.bmp) „ JPEG (*.jpg) „ TIFF - Uncompressed (*.tif) „ TIFF - Compressed (*.tif) „ TIFF Multi-Page - Uncompressed (*.tif) „ TIFF Multi-Page - Compressed (*.tif) „ Portable Network Graphics (*.png) „ PDF (*.pdf) File 3 The Scan to File button allows you to scan an image to a folder on your hard disk in any file format. This allows you to easily archive your paper documents. To configure the file type and folder, right-click the button and click the Software Button tab. Choose the file type for the saved image from the File Type drop-down list. You can save the file to the default folder shown in the Destination Folder, or choose your preferred folder by clicking the icon. To show where the scanned image is saved when scanning is finished, check Show Folder box. To specify the destination of the scanned image every time, check Show Save As window box. If you want to scan a duplex document, check Duplex (two-sided) Scanning and choose Long-edge binding or Short-edge binding. (Not available for MFC-8460N, MFC-8660DN and DCP-8060) If you want to scan and then crop a portion of a page after pre-scanning the document, check Show Scanner Interface box. Note For supported file types, see Supported file types on page 65. 65
-
 1
1 -
2
-
3
-
4
-
5
-
6
-
7
-
8
-
9
-
10
-
11
-
12
-
13
-
14
-
15
-
16
-
17
-
18
-
19
-
20
-
21
-
22
-
23
-
24
-
25
-
26
-
27
-
28
-
29
-
30
-
31
-
32
-
33
-
34
-
35
-
36
-
37
-
38
-
39
-
40
-
41
-
42
-
43
-
44
-
45
-
46
-
47
-
48
-
49
-
50
-
51
-
52
-
53
-
54
-
55
-
56
-
57
-
58
-
59
-
60
-
61
-
62
-
63
-
64
-
65
-
 66
66 -
 67
67 -
 68
68 -
 69
69 -
 70
70 -
 71
71 -
 72
72 -
 73
73 -
 74
74 -
 75
75 -
 76
76 -
77
-
78
-
79
-
80
-
81
-
82
-
83
-
84
-
85
-
86
-
87
-
88
-
89
-
90
-
91
-
92
-
93
-
94
-
95
-
96
-
97
-
98
-
99
-
100
-
101
-
102
-
103
-
104
-
105
-
106
-
107
-
108
-
109
-
110
-
111
-
112
-
113
-
114
-
115
-
116
-
117
-
118
-
119
-
120
-
121
-
122
-
123
-
124
-
125
-
126
-
127
-
128
-
129
-
130
-
131
-
132
-
133
-
134
-
135
-
136
-
137
-
138
-
139
-
140
-
141
-
142
-
143
-
144
-
145
-
146
-
147
-
148
-
149
-
150
-
151
-
152
-
153
-
154
-
155
-
156
-
157
-
158
-
159
-
160
-
161
-
162
-
163
-
164
-
165
-
166
-
167
-
168
-
169
-
170
-
171
-
172
-
173
-
174
-
175
-
176
-
177
-
178
-
179
-
180
-
181
-
182
-
183
-
184
 |
 |
