Brother International MFC-8460n Software Users Manual - English - Page 92
Scan to FTP using FTP Server Profiles, to begin the scanning process. - default login
 |
UPC - 012502617365
View all Brother International MFC-8460n manuals
Add to My Manuals
Save this manual to your list of manuals |
Page 92 highlights
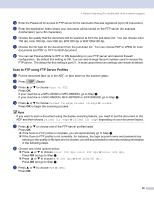
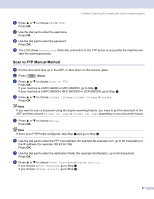
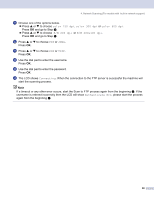
4. Network Scanning (For models with built-in network support) d Enter the Password for access to FTP server for the Username that was registered (up to 32 characters). e Enter the destination folder where your document will be stored on the FTP server (for example /brother/abc/) (up to 60 characters). f Choose the quality that the document will be scanned at from the pull-down list. You can choose color 150 dpi, color 300 dpi, color 600 dpi, B/W 200 dpi or B/W 200x100 dpi. g Choose the file type for the document from the pull-down list. You can choose PDF or JPEG for color documents and PDF or TIFF for B/W document. h You can set Passive Mode to OFF or ON depending on your FTP server and network firewall configuration. By default this setting is ON. You can also change the port number used to access the FTP server. The default for this setting is port 21. In most cases these two settings can remain at default. Scan to FTP using FTP Server Profiles 4 a Put the document face up in the ADF, or face down on the scanner glass. b Press (Scan). c Press a or b to choose Scan to FTP. Press OK. If your machine is a MFC-8460N or MFC-8660DN, go to Step e. If your machine is a MFC-8860DN, MFC-8870DW or DCP-8065DN, go to Step d. d Press a or b to choose 2sided (L)edge, 2sided (S)edge or 1sided. Press OK to begin the scanning process. Note If you want to scan a document using the duplex scanning feature, you need to put the document in the ADF and then choose 2sided (L) edge or 2sided (S) edge depending on your document layout. e Press a or b to choose one of the FTP server profiles listed. Press OK. „ If the Scan to FTP profile is complete, you will automatically go to Step k. „ If the Scan to FTP profile is not complete, for instance, the login account name and password are missing or the quality or file type are not chosen, you will be promoted to enter any missing information in the following steps. f Choose one of the options below: „ Press a or b to choose color 150 dpi, color 300 dpi or color 600 dpi. Press OK and go to Step g. „ Press a or b to choose B/W 200 dpi or B/W 200x100 dpi. Press OK and go to Step h. g Press a or b to choose PDF or JPEG. Press OK. 86
-
 1
1 -
2
-
3
-
4
-
5
-
6
-
7
-
8
-
9
-
10
-
11
-
12
-
13
-
14
-
15
-
16
-
17
-
18
-
19
-
20
-
21
-
22
-
23
-
24
-
25
-
26
-
27
-
28
-
29
-
30
-
31
-
32
-
33
-
34
-
35
-
36
-
37
-
38
-
39
-
40
-
41
-
42
-
43
-
44
-
45
-
46
-
47
-
48
-
49
-
50
-
51
-
52
-
53
-
54
-
55
-
56
-
57
-
58
-
59
-
60
-
61
-
62
-
63
-
64
-
65
-
66
-
67
-
68
-
69
-
70
-
71
-
72
-
73
-
74
-
75
-
76
-
77
-
78
-
79
-
80
-
81
-
82
-
83
-
84
-
85
-
86
-
 87
87 -
 88
88 -
 89
89 -
 90
90 -
 91
91 -
 92
92 -
 93
93 -
 94
94 -
 95
95 -
 96
96 -
 97
97 -
98
-
99
-
100
-
101
-
102
-
103
-
104
-
105
-
106
-
107
-
108
-
109
-
110
-
111
-
112
-
113
-
114
-
115
-
116
-
117
-
118
-
119
-
120
-
121
-
122
-
123
-
124
-
125
-
126
-
127
-
128
-
129
-
130
-
131
-
132
-
133
-
134
-
135
-
136
-
137
-
138
-
139
-
140
-
141
-
142
-
143
-
144
-
145
-
146
-
147
-
148
-
149
-
150
-
151
-
152
-
153
-
154
-
155
-
156
-
157
-
158
-
159
-
160
-
161
-
162
-
163
-
164
-
165
-
166
-
167
-
168
-
169
-
170
-
171
-
172
-
173
-
174
-
175
-
176
-
177
-
178
-
179
-
180
-
181
-
182
-
183
-
184
 |
 |