Brother International HL-1440 Users Manual - English - Page 82
Replacing the Drum Unit
 |
UPC - 689466270150
View all Brother International HL-1440 manuals
Add to My Manuals
Save this manual to your list of manuals |
Page 82 highlights
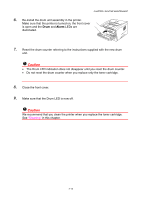
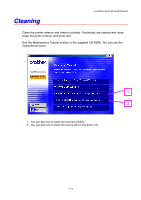
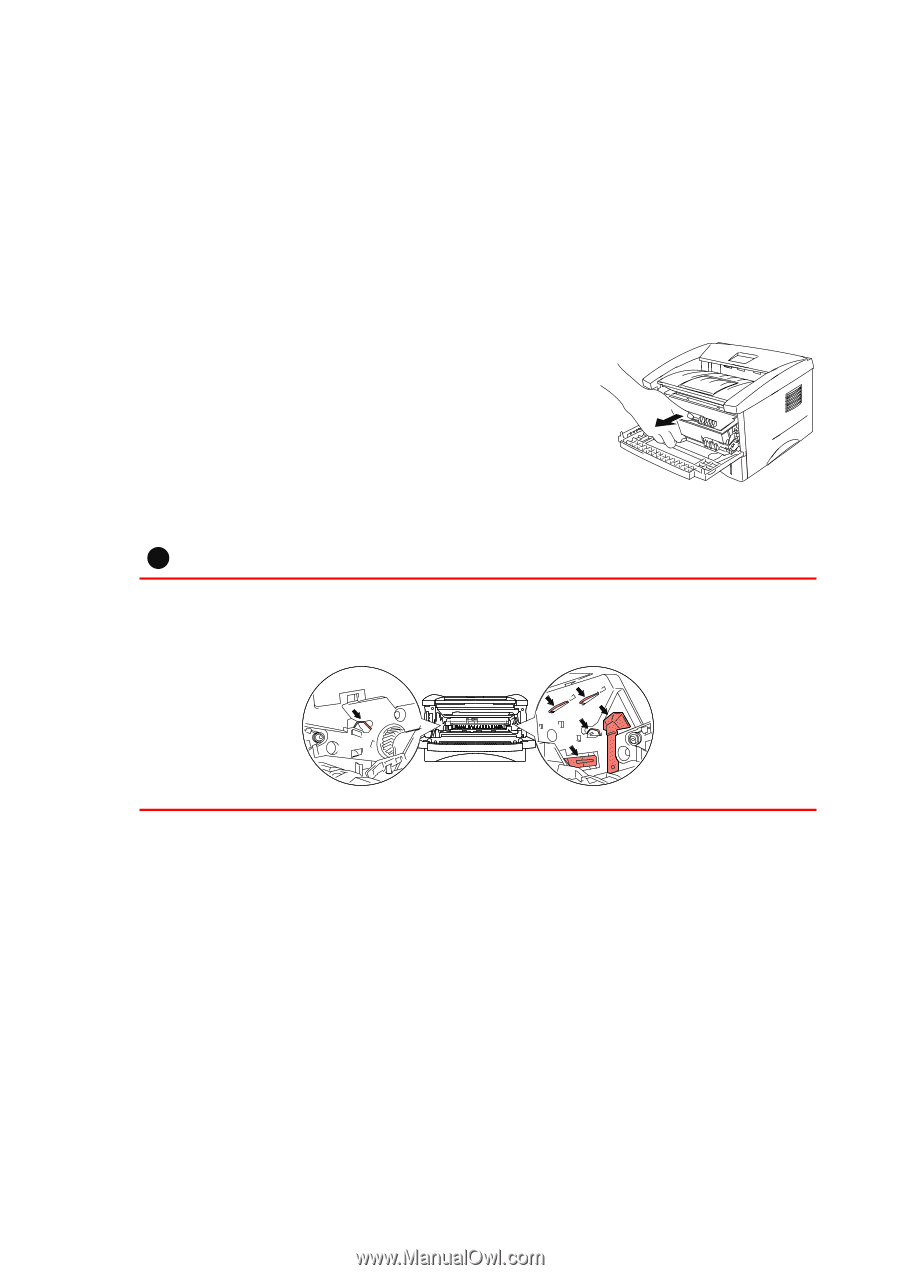
Replacing the Drum Unit CHAPTER 5 ROUTINE MAINTENANCE Follow these steps to replace the drum unit. You can also view the drum unit replacement method in the instructional movie on the supplied CD-ROM: 1. Open the front cover. 2. Pull out the drum unit assembly. ! Caution We recommend that you place the Drum unit assembly on a piece of disposable paper or cloth in case you accidentally spill or scatter toner. To prevent damage to the printer from static electricity, do not touch the electrodes shown below. 5-10
-
 1
1 -
2
-
3
-
4
-
5
-
6
-
7
-
8
-
9
-
10
-
11
-
12
-
13
-
14
-
15
-
16
-
17
-
18
-
19
-
20
-
21
-
22
-
23
-
24
-
25
-
26
-
27
-
28
-
29
-
30
-
31
-
32
-
33
-
34
-
35
-
36
-
37
-
38
-
39
-
40
-
41
-
42
-
43
-
44
-
45
-
46
-
47
-
48
-
49
-
50
-
51
-
52
-
53
-
54
-
55
-
56
-
57
-
58
-
59
-
60
-
61
-
62
-
63
-
64
-
65
-
66
-
67
-
68
-
69
-
70
-
71
-
72
-
73
-
74
-
75
-
76
-
 77
77 -
 78
78 -
 79
79 -
 80
80 -
 81
81 -
 82
82 -
 83
83 -
 84
84 -
 85
85 -
 86
86 -
 87
87 -
88
-
89
-
90
-
91
-
92
-
93
-
94
-
95
-
96
-
97
-
98
-
99
-
100
-
101
-
102
-
103
-
104
-
105
-
106
-
107
-
108
-
109
-
110
-
111
-
112
-
113
-
114
-
115
-
116
 |
 |
CHAPTER 5 ROUTINE MAINTENANCE
5–10
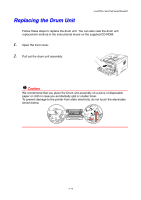
Replacing the Drum Unit
Follow these steps to replace the drum unit.
You can also view the drum unit
replacement method in the instructional movie on the supplied CD-ROM:
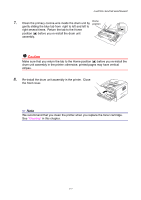
1.
Open the front cover.
2.
Pull out the drum unit assembly.
!
Caution
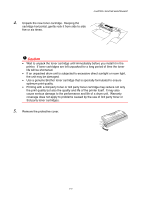
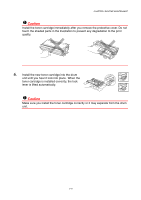
We recommend that you place the Drum unit assembly on a piece of disposable
paper or cloth in case you accidentally spill or scatter toner.
To prevent damage to the printer from static electricity, do not touch the electrodes
shown below.