Brother International LS 2125 Users Manual - English - Page 34
Points zigzag
 |
UPC - 012502609773
View all Brother International LS 2125 manuals
Add to My Manuals
Save this manual to your list of manuals |
Page 34 highlights
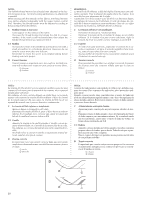
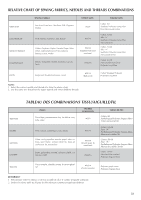
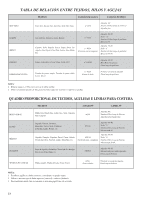
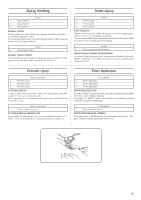
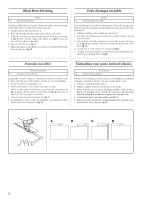
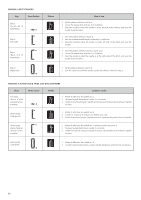
Zigzag Stitching Points zigzag 2 (Zigzag Stitch) 3 (Zigzag Stitch) 4 (Zigzag Stitch) Pattern ZIGZAG STITCH Set the pattern selection dial to the appropriate Zigzag Stitch (2, 3 or 4) with the desired width. It is recommended to sew using the Straight Stitch at the beginning and end of the Zigzag Stitches. 2 (Point zigzag) 3 (Point zigzag) 4 (Point zigzag) Modèle POINT ZIGZAG Régler le sélecteur de modèle de point sur le point zigzag approprié (2,3 ou 4), avec la largeur souhaitée. Il est recommandé de faire quelques points droits d'arrêt au début et à la fin d'une couture en points zigzag. Pattern 5 (Zigzag (Satin) Stitch) Modèle 5 (Point zigzag (point de bourdon) ZIGZAG (SATIN) STITCH The Satin Stitch can be used for making decorative stitches. Set the pattern selection dial to the Zigzag (Satin) Stitch (5). POINT ZIGZAG (POINT DE BOURDON) Le point de bourdon peut servir comme point fantaisie décoratif. Régler le sélecteur de modèle de point sur le point zigzag (point de bourdon) (5). Puntadas zigzag Ponto ziguezague Número de puntada 2 (Puntada zigzag) 3 (Puntada zigzag) 4 (Puntada zigzag) PUNTADA ZIGZAG Coloque el selector de puntadas en la posición de puntada zigzag adecuada (2,3 ó 4), con el ancho deseado. Se recomienda coser con puntada recta al principio y al final de una costura de zigzag. Número de puntada 5 Costuras zigzag (de realce) PUNTADA ZIGZAG (DE REALCE) Las puntadas de realce pueden servir como puntadas decorativas. Coloque el selector de puntadas en la puntada zigzag (de realce) (5). Nº do dereuho 2 (Ponto ziguezague) 3 (Ponto ziguezague) 4 (Ponto ziguezague) PONTO ZIGUEZAGUE Coloque o botão selector do padrão no ponto ziguezague pretendido (2, 3 ou 4), com a largura desejada. Aconselha-se a utilizar o ponto reto no início e no final das costuras efetuadas com pontos ziguezague. Nº do dereuho 5 Ponto ziguezague (Cheio) PONTO ZIGUEZAGUE (CHEIO) Este ponto pode ser utilizado para executar pontos decorativos. Coloque o seletor no ponto ziguezague (Cheio) (5). 26
-
 1
1 -
2
-
3
-
4
-
5
-
6
-
7
-
8
-
9
-
10
-
11
-
12
-
13
-
14
-
15
-
16
-
17
-
18
-
19
-
20
-
21
-
22
-
23
-
24
-
25
-
26
-
27
-
28
-
 29
29 -
 30
30 -
 31
31 -
 32
32 -
 33
33 -
 34
34 -
 35
35 -
 36
36 -
 37
37 -
 38
38 -
 39
39 -
40
-
41
-
42
-
43
-
44
-
45
-
46
-
47
-
48
-
49
-
50
-
51
-
52
-
53
-
54
-
55
-
56
-
57
-
58
-
59
-
60
-
61
-
62
-
63
-
64
-
65
-
66
-
67
 |
 |