Brother International SE-400 Users Manual - English - Page 130
any slack in the fabric by hand. The goal is
 |
View all Brother International SE-400 manuals
Add to My Manuals
Save this manual to your list of manuals |
Page 130 highlights
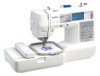
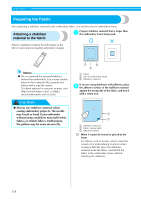
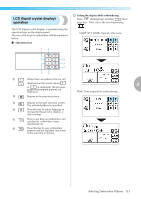
EMBROIDERY Gently remove the fabric from the frame e without loosening the adjustment screw. Tighten the adjustment screw while removing g any slack in the fabric by hand. The goal is to have a drum-like sound when the stretched fabric is struck lightly. Memo z This precautionary step will help reduce pattern distortion while embroidering. Press the inner frame in from the top of the f fabric again, lining up on the inner frame and on outer frame. ■ Using embroidery sheets If the embroidery sheet attached to the embroidery frame is used, the embroidery can be sewn in exactly the right position on the fabric. Embroidery sheet (medium) Embroidery sheet (small) [option] 3 12 54 a Outer frame b Inner frame c Fabric (right side) d Stabilizer material e Ledge of outer frame • Press down firmly until the inner frame is securely pressed against the ledge of the outer frame. Embroidery sheet (large) [option] Make a mark with a chalk pen at the center of a the position for the pattern to be embroidered. a b a Embroidery pattern b Mark 128
-
 1
1 -
2
-
3
-
4
-
5
-
6
-
7
-
8
-
9
-
10
-
11
-
12
-
13
-
14
-
15
-
16
-
17
-
18
-
19
-
20
-
21
-
22
-
23
-
24
-
25
-
26
-
27
-
28
-
29
-
30
-
31
-
32
-
33
-
34
-
35
-
36
-
37
-
38
-
39
-
40
-
41
-
42
-
43
-
44
-
45
-
46
-
47
-
48
-
49
-
50
-
51
-
52
-
53
-
54
-
55
-
56
-
57
-
58
-
59
-
60
-
61
-
62
-
63
-
64
-
65
-
66
-
67
-
68
-
69
-
70
-
71
-
72
-
73
-
74
-
75
-
76
-
77
-
78
-
79
-
80
-
81
-
82
-
83
-
84
-
85
-
86
-
87
-
88
-
89
-
90
-
91
-
92
-
93
-
94
-
95
-
96
-
97
-
98
-
99
-
100
-
101
-
102
-
103
-
104
-
105
-
106
-
107
-
108
-
109
-
110
-
111
-
112
-
113
-
114
-
115
-
116
-
117
-
118
-
119
-
120
-
121
-
122
-
123
-
124
-
 125
125 -
 126
126 -
 127
127 -
 128
128 -
 129
129 -
 130
130 -
 131
131 -
 132
132 -
 133
133 -
 134
134 -
 135
135 -
136
-
137
-
138
-
139
-
140
-
141
-
142
-
143
-
144
-
145
-
146
-
147
-
148
-
149
-
150
-
151
-
152
-
153
-
154
-
155
-
156
-
157
-
158
-
159
-
160
-
161
-
162
-
163
-
164
-
165
-
166
-
167
-
168
-
169
-
170
-
171
-
172
 |
 |
