Canon MF4690 MF4690 Easy Sending Guide - Page 25
From [Type], select the e-mail address you want to send to., Make sure the settings are correct
 |
UPC - 013803076820
View all Canon MF4690 manuals
Add to My Manuals
Save this manual to your list of manuals |
Page 25 highlights
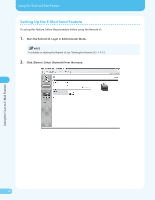
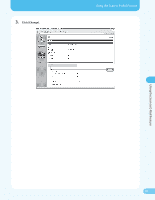
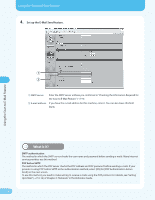
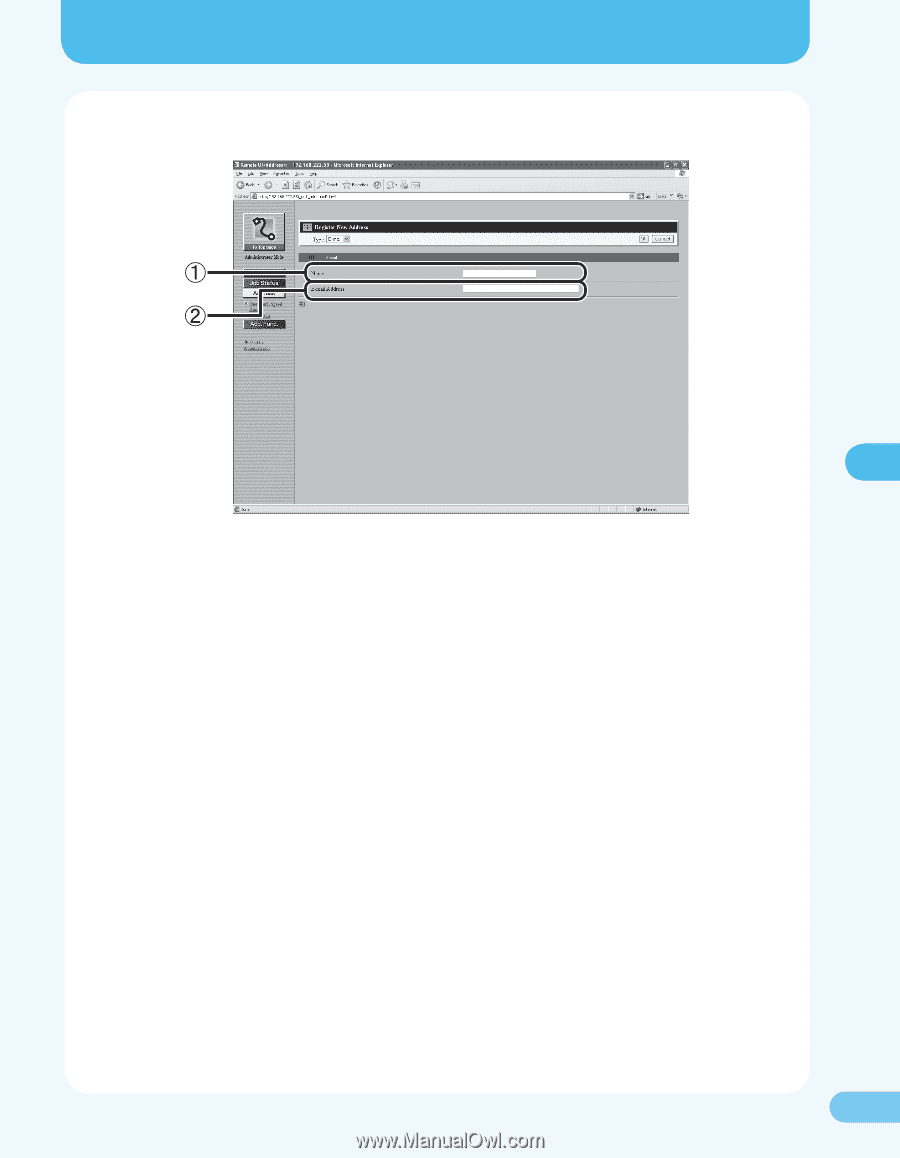
Using the Scan to E-Mail Feature 4. From [Type], select the e-mail address you want to send to. Using the Scan to E-Mail Feature ① Name: Enter a recipient's name (max. 16 characters, including spaces). ② E-mail address: Enter the recipient's e-mail address. (In this step, please enter your e-mail address so that you can check if the E-Mail is Delivered.) For details on how to check it, see "Checking If the E-Mail Is Delivered," (→ P. 27). 5. Make sure the settings are correct, and then press [OK]. That completes the registration of the address. Please proceed to "Sending E-Mails," (→ P. 25). 24
-
 1
1 -
2
-
3
-
4
-
5
-
6
-
7
-
8
-
9
-
10
-
11
-
12
-
13
-
14
-
15
-
16
-
17
-
18
-
19
-
 20
20 -
 21
21 -
 22
22 -
 23
23 -
 24
24 -
 25
25 -
 26
26 -
 27
27 -
 28
28 -
 29
29 -
 30
30 -
31
-
32
-
33
-
34
-
35
-
36
 |
 |
24
24
Using the Scan to E-Mail Feature
Using the Scan to E-Mail Feature
4.
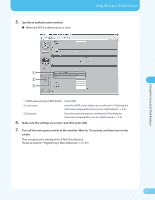
From [Type], select the e-mail address you want to send to.
①
Name:
Enter a recipient’s name (max. ±6 characters, including spaces).
②
E-mail address:
Enter the recipient’s e-mail address.
(In this step, please enter your e-mail address so that you can check if the E-Mail is
Delivered.)
For details on how to check it, see “Checking If the E-Mail Is Delivered,” (
→
P. 27).
5.
Make sure the settings are correct, and then press [OK].
That completes the registration of the address.
Please proceed to “Sending E-Mails,” (
→
P. 25).