Canon PowerShot A470 Direct Print User Guide - Page 42
Changing the Size of the Trimming Frame, Rotating the Trimming Frame, Moving the Trimming Frame,
 |
View all Canon PowerShot A470 manuals
Add to My Manuals
Save this manual to your list of manuals |
Page 42 highlights
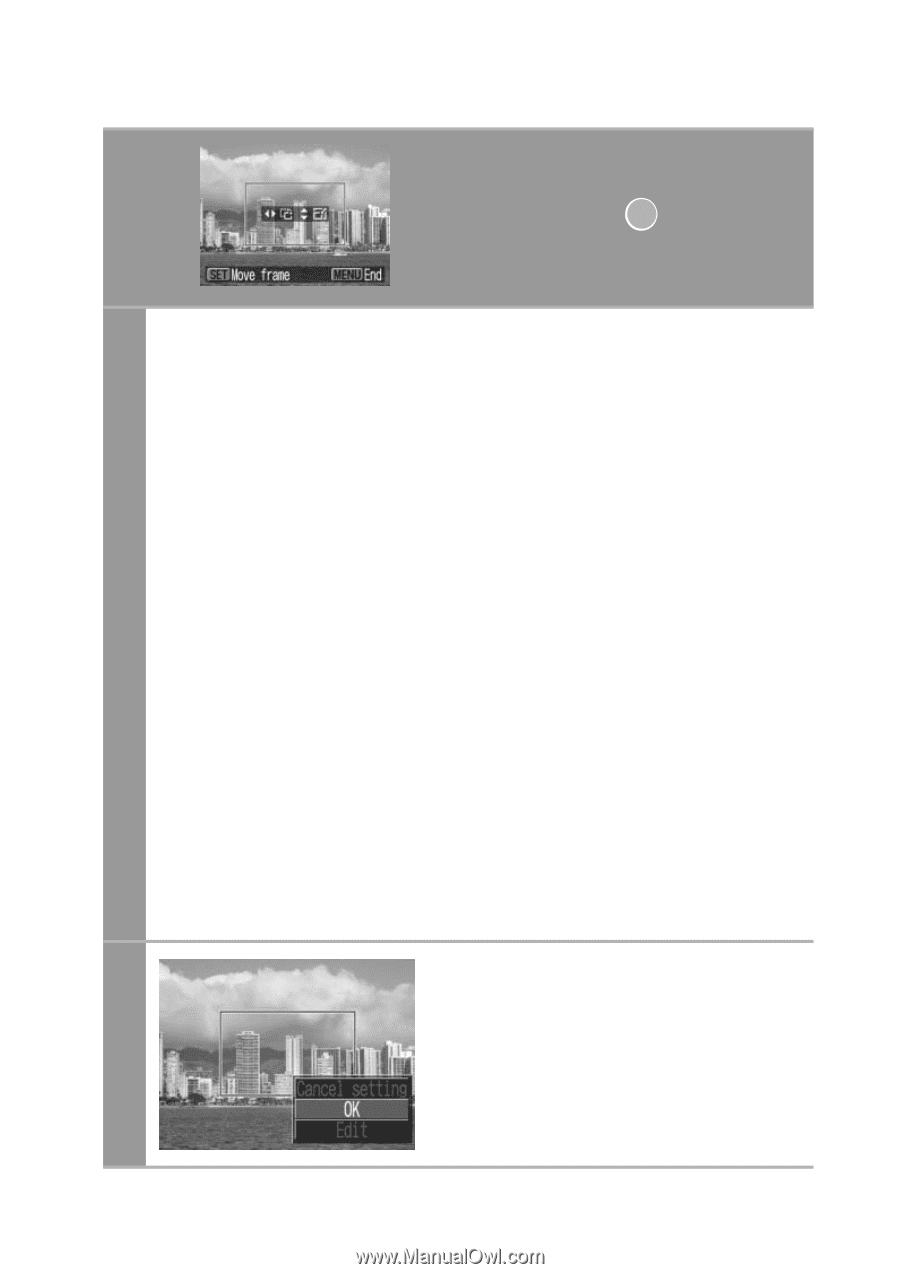
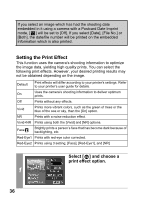
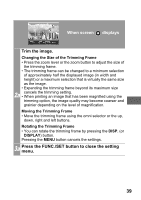
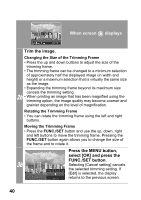
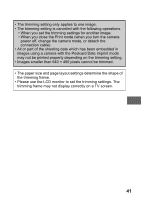
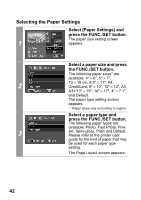
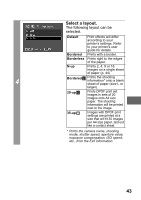
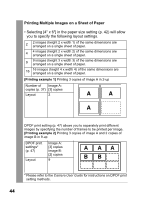
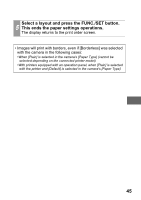
When screen b displays Trim the image. Changing the Size of the Trimming Frame • Press the up and down buttons to adjust the size of the trimming frame. • The trimming frame can be changed to a minimum selection of approximately half the displayed image (in width and height) or a maximum selection that is virtually the same size as the image. • Expanding the trimming frame beyond its maximum size cancels the trimming setting. 2b • When printing an image that has been magnified using the trimming option, the image quality may become coarser and grainier depending on the level of magnification. Rotating the Trimming Frame • You can rotate the trimming frame using the left and right buttons. Moving the Trimming Frame • Press the FUNC./SET button and use the up, down, right and left buttons to move the trimming frame. Pressing the FUNC./SET button again allows you to change the size of the frame and to rotate it. Press the MENU button, select [OK] and press the FUNC./SET button. 3b Selecting [Cancel setting] cancels the selected trimming setting. If [Edit] is selected, the display returns to the previous screen. 40
-
 1
1 -
2
-
3
-
4
-
5
-
6
-
7
-
8
-
9
-
10
-
11
-
12
-
13
-
14
-
15
-
16
-
17
-
18
-
19
-
20
-
21
-
22
-
23
-
24
-
25
-
26
-
27
-
28
-
29
-
30
-
31
-
32
-
33
-
34
-
35
-
36
-
 37
37 -
 38
38 -
 39
39 -
 40
40 -
 41
41 -
 42
42 -
 43
43 -
 44
44 -
 45
45 -
 46
46 -
 47
47 -
48
-
49
-
50
-
51
-
52
-
53
-
54
-
55
-
56
-
57
-
58
-
59
-
60
-
61
-
62
-
63
-
64
-
65
-
66
-
67
-
68
-
69
-
70
-
71
-
72
-
73
-
74
-
75
-
76
-
77
-
78
-
79
-
80
-
81
-
82
 |
 |