Canon PowerShot A470 Direct Print User Guide - Page 63
Printing by Specifying the Print Size ID Photo, Print
 |
View all Canon PowerShot A470 manuals
Add to My Manuals
Save this manual to your list of manuals |
Page 63 highlights
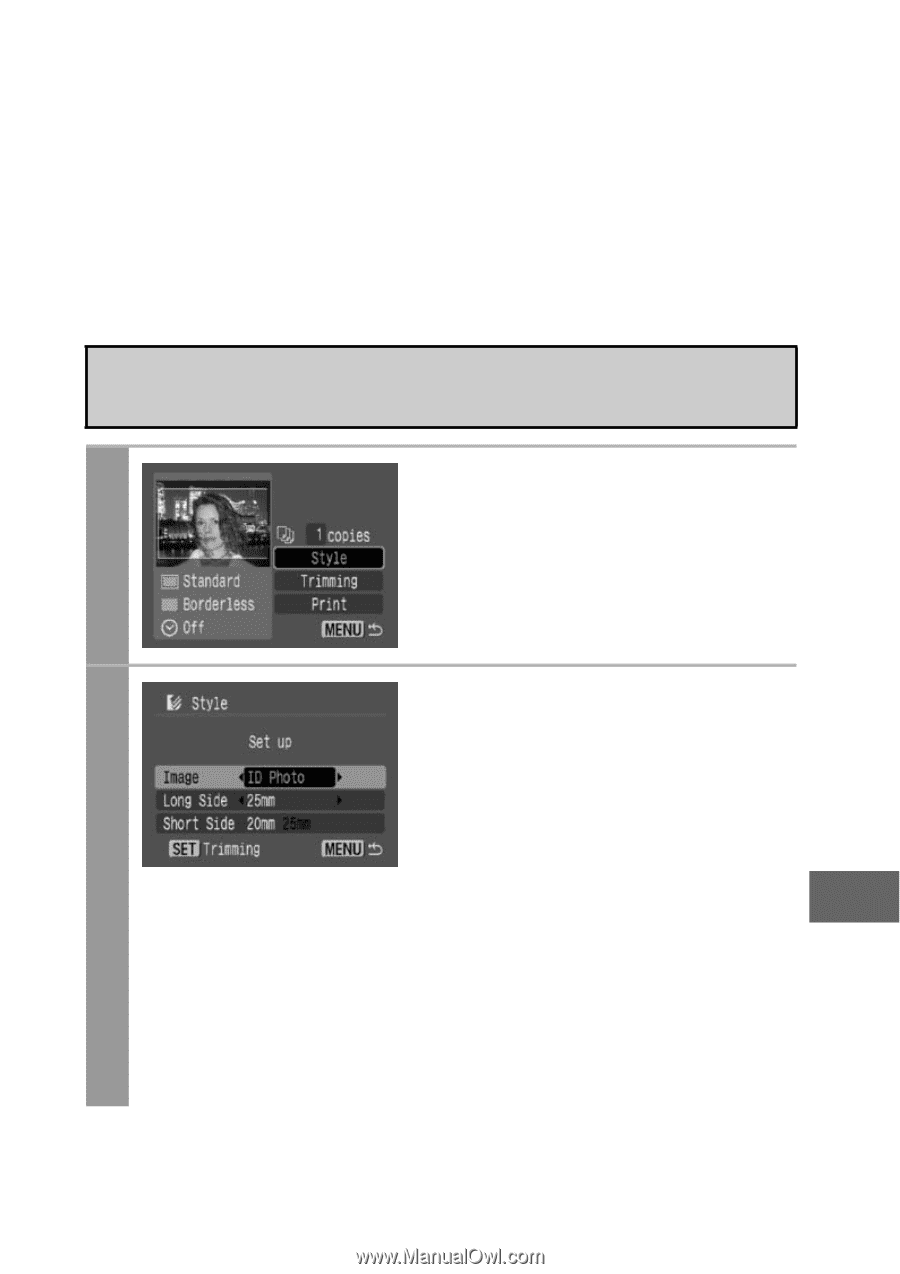
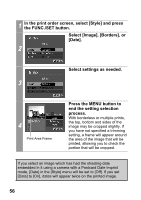
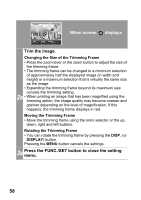
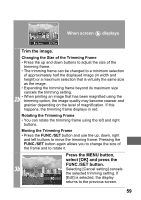
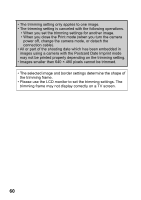
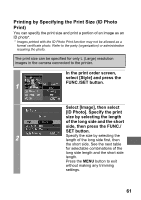
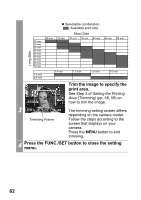
Printing by Specifying the Print Size (ID Photo Print) You can specify the print size and print a portion of an image as an ID photo*. * Images printed with the ID Photo Print function may not be allowed as a formal certificate photo. Refer to the party (organization) or administration requiring the photo. The print size can be specified for only L (Large) resolution images in the camera connected to the printer. In the print order screen, select [Style] and press the FUNC./SET button. 1 Select [Image], then select [ID Photo]. Specify the print size by selecting the length of the long side and the short side, then press the FUNC./ SET button. 2 Specify the size by selecting the length of the long side first, then the short side. See the next table for selectable combinations of the long side length and the short side length. Press the MENU button to exit without making any trimming settings. 61
-
 1
1 -
2
-
3
-
4
-
5
-
6
-
7
-
8
-
9
-
10
-
11
-
12
-
13
-
14
-
15
-
16
-
17
-
18
-
19
-
20
-
21
-
22
-
23
-
24
-
25
-
26
-
27
-
28
-
29
-
30
-
31
-
32
-
33
-
34
-
35
-
36
-
37
-
38
-
39
-
40
-
41
-
42
-
43
-
44
-
45
-
46
-
47
-
48
-
49
-
50
-
51
-
52
-
53
-
54
-
55
-
56
-
57
-
 58
58 -
 59
59 -
 60
60 -
 61
61 -
 62
62 -
 63
63 -
 64
64 -
 65
65 -
 66
66 -
 67
67 -
 68
68 -
69
-
70
-
71
-
72
-
73
-
74
-
75
-
76
-
77
-
78
-
79
-
80
-
81
-
82
 |
 |