Compaq Presario 18XL Maintenance & Service Guide Presario 1800/1800T Serie
Compaq Presario 18XL - Notebook PC Manual
 |
View all Compaq Presario 18XL manuals
Add to My Manuals
Save this manual to your list of manuals |
Compaq Presario 18XL manual content summary:
- Compaq Presario 18XL | Maintenance & Service Guide Presario 1800/1800T Serie - Page 1
Battery & Power Management Parts Catalog Specifications Troubleshooting MSG Index Welcome to the Maintenance & Service Guide (MSG) Welcome to the Maintenance and Service Guide (MSG) for Compaq Presario 1800XL Series Notebook Computers. This online guide is designed to serve the needs of - Compaq Presario 18XL | Maintenance & Service Guide Presario 1800/1800T Serie - Page 2
or color-coded bubble for another chapter. Printing the MSG For portable copies of this MSG, you can print single pages, multiple pages, or the entire guide. In the Acrobat Reader, click File, and then Print... for printing options. 2 PRESARIO NOTEBOOK MAINTENANCE AND SERVICE GUIDE 1800 SERIES - Compaq Presario 18XL | Maintenance & Service Guide Presario 1800/1800T Serie - Page 3
or registered trademarks of their respective companies. Maintenance and Service Guide Compaq Presario 1800 Series Notebook Computer Second Edition (September 2000) Compaq Computer Corporation privacy and legal statement PRESARIO NOTEBOOK MAINTENANCE AND SERVICE GUIDE 1800 SERIES BEFORE YOU BEGIN 1 - Compaq Presario 18XL | Maintenance & Service Guide Presario 1800/1800T Serie - Page 4
Preface The Maintenance and Service Guide is a troubleshooting guide for use as a reference when servicing Compaq Presario 1800 Series Notebook Computers. Compaq Computer Corporation reserves the right to make changes to Compaq Presario 1800 Series Notebooks without notice. Symbols The following - Compaq Presario 18XL | Maintenance & Service Guide Presario 1800/1800T Serie - Page 5
is available to support this product: • Compaq Presario 1800 Series Notebook documentation set • Introducing Windows 98 Guide • Introducing Windows 2000 Guide • Service Training Guides • Compaq Service Advisories and Bulletins PRESARIO NOTEBOOK MAINTENANCE AND SERVICE GUIDE 1800 SERIES BEFORE - Compaq Presario 18XL | Maintenance & Service Guide Presario 1800/1800T Serie - Page 6
XL280, XL380, XL381, and XL390 Product Description This chapter describes the features of each of the Presario 1800XL Series Notebooks. It also provides illustrations of the exterior components unique to these units. PRESARIO NOTEBOOK MAINTENANCE AND SERVICE GUIDE 1800 SERIES PRODUCT DESCRIPTION 1 - Compaq Presario 18XL | Maintenance & Service Guide Presario 1800/1800T Serie - Page 7
Models: XL280, XL380, XL381, and XL390 Models and Features Compaq Presario 1800 Series Portable Computer Models Features XL280* XL380* Display TFT 14.1 in TFT/LVD Diskette Drive which uses 1.44 MB Diskettes. 2 PRODUCT DESCRIPTION PRESARIO NOTEBOOK MAINTENANCE AND SERVICE GUIDE 1800 SERIES - Compaq Presario 18XL | Maintenance & Service Guide Presario 1800/1800T Serie - Page 8
1 Display Release Latch 2 Display 3 Power (On/Off) Button 4 Keyboard 5 TouchPad # Description 6 Integrated Speakers 7 TouchPad Button (Left) 8 Scroll Up/Down Button 9 TouchPad Button (Right) - Model Number PRESARIO NOTEBOOK MAINTENANCE AND SERVICE GUIDE 1800 SERIES PRODUCT DESCRIPTION 3 - Compaq Presario 18XL | Maintenance & Service Guide Presario 1800/1800T Serie - Page 9
Model XL280 # Description 1 AC Adapter Light 2 Caps Lock Light 3 Instant Internet Access 4 Instant E-mail Access 5 My Presario Instant Access 6 Power (outside the U.S.) - Num Lock Light q Scroll Lock Light 4 PRODUCT DESCRIPTION PRESARIO NOTEBOOK MAINTENANCE AND SERVICE GUIDE 1800 SERIES - Compaq Presario 18XL | Maintenance & Service Guide Presario 1800/1800T Serie - Page 10
AC Adapter Light 2 Caps Lock Light 3 Instant Internet Access 4 Instant E-mail Access 5 My Presario Instant Access 6 Power Button # Description 7 Digital Audio Button 8 Entertainment Button 9 Retail Central Button - Num Lock Light q Scroll Lock Light PRESARIO NOTEBOOK MAINTENANCE AND SERVICE - Compaq Presario 18XL | Maintenance & Service Guide Presario 1800/1800T Serie - Page 11
Presario 1800/1800T Series Models: XL280, XL380, XL381, and XL390 Front Bezel Components # Description # Description 1 5 Battery Charging Status Icon q Play/Pause Button 6 DisqPlay Status Icon w Stop Button 6 PRODUCT DESCRIPTION PRESARIO NOTEBOOK MAINTENANCE AND SERVICE GUIDE 1800 SERIES - Compaq Presario 18XL | Maintenance & Service Guide Presario 1800/1800T Serie - Page 12
Note: XL3xx models have silver lids. # Description 1 Security Slot 2 CD or DVD Drive 3 CD/DVD Drive Eject Button # Description 4 CD or DVD Manual Eject Hole 5 Diskette Drive 6 Diskette Drive Eject Button PRESARIO NOTEBOOK MAINTENANCE AND SERVICE GUIDE 1800 SERIES PRODUCT DESCRIPTION 7 - Compaq Presario 18XL | Maintenance & Service Guide Presario 1800/1800T Serie - Page 13
Presario 1800/1800T Series Models: XL280, XL380, XL381, and XL390 Right-Side Components Note: XL3xx models Button 3 PC Card Slot 4 Headphone Jack # Description 5 Microphone Jack 6 Modem Port 7 Ethernet Port 8 PRODUCT DESCRIPTION PRESARIO NOTEBOOK MAINTENANCE AND SERVICE GUIDE 1800 SERIES - Compaq Presario 18XL | Maintenance & Service Guide Presario 1800/1800T Serie - Page 14
Presario 1800/1800T Series Models: XL280, XL380, XL381, and XL390 Underneath the Unit # Description 1 Pop-Up Foot 2 Serial Number # Description 3 Memory Compartment 4 Pop-Up Foot PRESARIO NOTEBOOK MAINTENANCE AND SERVICE GUIDE 1800 SERIES PRODUCT DESCRIPTION 9 - Compaq Presario 18XL | Maintenance & Service Guide Presario 1800/1800T Serie - Page 15
Description 1 Keyboard/Mouse Port 2 AC Adapter Connector 3 Parallel Port 4 QuikDock Connector 5 Fan Vent # Description 6 TV-Out Connector 7 External Monitor Port 8 Serial Ports 9 Universal Serial Bus Port 10 PRODUCT DESCRIPTION PRESARIO NOTEBOOK MAINTENANCE AND SERVICE GUIDE 1800 SERIES - Compaq Presario 18XL | Maintenance & Service Guide Presario 1800/1800T Serie - Page 16
(AC Adapter) Port 4 Keyboard/Mouse Port 5 Keyboard/Mouse Port # Description 6 Parallel Port 7 Game Port 8 Serial Port 9 External Monitor Port - 10/100 TX Ethernet Port # Description q S-Video Port w TV-Out (Composite Video) e Audio-Out PRESARIO NOTEBOOK MAINTENANCE AND SERVICE GUIDE - Compaq Presario 18XL | Maintenance & Service Guide Presario 1800/1800T Serie - Page 17
3.6 AHr W @ 14.8 V W @ 14.8 V W @ 14.8 V AC Power Requirements Operating Voltage Operating Current Operating Frequency Maximum Transient Temperature* Operating Non-operating 100- Presario 1800XL Notebooks operate well within this temperature range. PRESARIO NOTEBOOK MAINTENANCE AND SERVICE GUIDE - Compaq Presario 18XL | Maintenance & Service Guide Presario 1800/1800T Serie - Page 18
IRQ System Function IRQ 10 IRQ 11 Available Intel® Pro/100S Mobile LAN on Motherboard IRQ 11 Texas Instruments PCI-1410 CardBus Controller IRQ 11 IRQ 11 ACPI IRQ Disk Controller Direct Memory Access Controller 2 SPECIFICATIONS PRESARIO NOTEBOOK MAINTENANCE AND SERVICE GUIDE 1800 SERIES - Compaq Presario 18XL | Maintenance & Service Guide Presario 1800/1800T Serie - Page 19
Presario 1800/1800T Series Models: XL280, XL380, XL381, and XL390 System I/O Addresses I/O Address 0000h-000Fh ) RAGE Mobilty AGP (English) Standard Floppy Disk Controller Intel® 82371AB/EB PCI Bus Master IDE Controller PRESARIO NOTEBOOK MAINTENANCE AND SERVICE GUIDE 1800 SERIES SPECIFICATIONS 3 - Compaq Presario 18XL | Maintenance & Service Guide Presario 1800/1800T Serie - Page 20
AudioDrive Lucent 56K V.90 PCI DF Modem ESS SOLO-1 PCI AudioDrive ESS SOLO-1 PCI AudioDrive Motherboard Resources Motherboard Resources Intel® 82443BX Pentium® II Processor to AGP Controller RAGE Mobility AGP (English) 4 SPECIFICATIONS PRESARIO NOTEBOOK MAINTENANCE AND SERVICE GUIDE 1800 SERIES - Compaq Presario 18XL | Maintenance & Service Guide Presario 1800/1800T Serie - Page 21
PCI bridge FFF80000h-FFFFFFFFh Motherboard Resources Memory Expansion System Memory 64 MB 64 MB 64 MB 64 MB 64 MB Expansion Total Board Memory Memory None 64 MB 32 MB 64 MB 128 MB 256 MB 96 MB 128 MB 192 MB 320 MB PRESARIO NOTEBOOK MAINTENANCE AND SERVICE GUIDE 1800 SERIES SPECIFICATIONS - Compaq Presario 18XL | Maintenance & Service Guide Presario 1800/1800T Serie - Page 22
. Number of LED Indicators 0 (Read/Write) Number of Drives Supported 1 Drive Rotation (rpm) 300 Transfer Rate (Kbps) 500 Bytes per Sector 512 Sectors per Track (High/Low) 18/9 Tracks per Side (High/Low) 80 6 SPECIFICATIONS PRESARIO NOTEBOOK MAINTENANCE AND SERVICE GUIDE 1800 SERIES - Compaq Presario 18XL | Maintenance & Service Guide Presario 1800/1800T Serie - Page 23
Presario 1800/1800T Series Models: XL280, XL380, XL381, and XL390 Hard Drive Specification Drive Type Height Width* Depth Weight* 2.5 ms 23.0 ms 66.6 MB/s 4200 rpm ATA-2/3/4/5 1024-2048 KB 66.6 MB/s 5411 ATA-5 2048 KB PRESARIO NOTEBOOK MAINTENANCE AND SERVICE GUIDE 1800 SERIES SPECIFICATIONS 7 - Compaq Presario 18XL | Maintenance & Service Guide Presario 1800/1800T Serie - Page 24
Presario 1800/1800T Series Models: XL280, XL380, XL381, and XL390 Battery Pack Specification Type 3.2 AHr Li-ion 3.6 AHr 24X CD-ROM 128 x 129 x 12.7 mm 180-270 g 4225-5200 rpm 1545-3600 KB/s 90-180 ms 2.7-2.8 s 128 KB 8 SPECIFICATIONS PRESARIO NOTEBOOK MAINTENANCE AND SERVICE GUIDE 1800 SERIES - Compaq Presario 18XL | Maintenance & Service Guide Presario 1800/1800T Serie - Page 25
XL390 Pin Assignments This chapter provides the pin assignments for Presario 1800XL Series Notebook connectors. For additional information about connectors or external ports, Initialize Printer* Select In* Signal Ground PRESARIO NOTEBOOK MAINTENANCE AND SERVICE GUIDE 1800 SERIES PIN ASSIGNMENTS 1 - Compaq Presario 18XL | Maintenance & Service Guide Presario 1800/1800T Serie - Page 26
Presario 1800/1800T Series Models: XL280, XL380, XL381, and XL390 TV-Out (Composite Video) Connector Data + 4 Ground Keyboard/Mouse Connector Pin Signal 1 Data 1 2 Data 2 3 Ground Pin Signal 4 +5 V 5 Clock 1 6 Clock 2 2 PIN ASSIGNMENTS PRESARIO NOTEBOOK MAINTENANCE AND SERVICE GUIDE 1800 SERIES - Compaq Presario 18XL | Maintenance & Service Guide Presario 1800/1800T Serie - Page 27
Presario 1800/1800T Series Models: XL280, XL380, XL381, and XL390 Modem Connector Pin Signal 1 Unused 2 Tip 3 13 Horizontal Sync 6 Ground Analog 14 Vertical Sync 7 Ground Analog 15 DDC2B Clock 8 Ground Analog PRESARIO NOTEBOOK MAINTENANCE AND SERVICE GUIDE 1800 SERIES PIN ASSIGNMENTS 3 - Compaq Presario 18XL | Maintenance & Service Guide Presario 1800/1800T Serie - Page 28
Presario 1800/1800T Series Models: XL280, XL380, XL381, and XL390 Game Port Connector Note: the game port Signal Ground Pin Signal 6 Data Set Ready 7 Ready to Send 8 Clear to Send 9 Ring Indicator 5 Signal Ground 4 PIN ASSIGNMENTS PRESARIO NOTEBOOK MAINTENANCE AND SERVICE GUIDE 1800 SERIES - Compaq Presario 18XL | Maintenance & Service Guide Presario 1800/1800T Serie - Page 29
Keyboard Data 3 Adapter Power 24 Serial Port TXD 45 Mouse Clock 4 Adapter Power 25 Serial Port RTS 46 Mouse Data 5 Adapter Power 26 Monitor DDC 47 Lp Indicator 6 Adapter Power 27 Ground 79 S-Video SCG 80 Ground PRESARIO NOTEBOOK MAINTENANCE AND SERVICE GUIDE 1800 SERIES PIN ASSIGNMENTS 5 - Compaq Presario 18XL | Maintenance & Service Guide Presario 1800/1800T Serie - Page 30
loss occurs while using the AC adapter. To activate Standby/Sleep mode, press Fn+F4 or click Start, click Shut Down, and then select Standby from the options. To resume from Standby/Sleep mode, press any key. PRESARIO NOTEBOOK MAINTENANCE AND SERVICE GUIDE 1800 SERIES BATTERY AND POWER MANAGEMENT - Compaq Presario 18XL | Maintenance & Service Guide Presario 1800/1800T Serie - Page 31
. *The Notebook will not automatically enter Standby or Hibernation mode if using AC power. **Important: The Manual Shutdown procedures are not recommended unless the Standard Shutdown is unsuccessful. 2 BATTERY AND POWER MANAGEMENT PRESARIO NOTEBOOK MAINTENANCE AND SERVICE GUIDE 1800 SERIES - Compaq Presario 18XL | Maintenance & Service Guide Presario 1800/1800T Serie - Page 32
Never 15 minutes 30 minutes Never Portable/ Laptop Never 3 hours 15 minutes Never 15 minutes Never 10 minutes 1 hour Home/ Office Desk Never 20 minutes Never Never 5 minutes 5 minutes 10 minutes 20 minutes PRESARIO NOTEBOOK MAINTENANCE AND SERVICE GUIDE 1800 SERIES BATTERY AND POWER MANAGEMENT 3 - Compaq Presario 18XL | Maintenance & Service Guide Presario 1800/1800T Serie - Page 33
• Reversed: opposite recommended • Recommended: performance on AC, Battery-Optimized on Battery • Disabled: no run-time support, high speed SpeedStep options can be accessed in three technology dialog box. 4 BATTERY AND POWER MANAGEMENT PRESARIO NOTEBOOK MAINTENANCE AND SERVICE GUIDE 1800 SERIES - Compaq Presario 18XL | Maintenance & Service Guide Presario 1800/1800T Serie - Page 34
detect errors, follow the instructions on the screen to Notebook is turned on, turn it off until normal service is restored. The next time the Notebook is turned on, ScanDisk may run to check the hard disk for errors caused by improper shutdown. PRESARIO NOTEBOOK MAINTENANCE AND SERVICE GUIDE - Compaq Presario 18XL | Maintenance & Service Guide Presario 1800/1800T Serie - Page 35
performance. • Keep a battery pack in the Notebook when using it with AC power to supply the battery pack with a constant trickle charge. • Store the battery pack in a cool, dry place when not in use. 6 BATTERY AND POWER MANAGEMENT PRESARIO NOTEBOOK MAINTENANCE AND SERVICE GUIDE 1800 SERIES - Compaq Presario 18XL | Maintenance & Service Guide Presario 1800/1800T Serie - Page 36
the AC adapter and begin using the Notebook. The table below shows typical battery charging times. Li-ion Enhanced Battery Pack Computer On Line Computer Off Line Charge Time 4.75 hours 3.00 hours Disposing of a Used Battery Pack In the interests of safeguarding our environment, Compaq Computer - Compaq Presario 18XL | Maintenance & Service Guide Presario 1800/1800T Serie - Page 37
if no error message occurs. Once the problem is solved, do not perform any remaining recommended solutions. Note: If the problem is intermittent, check the Notebook several times to be sure that the problem is resolved. PRESARIO NOTEBOOK MAINTENANCE AND SERVICE GUIDE 1800 SERIES TROUBLESHOOTING 1 - Compaq Presario 18XL | Maintenance & Service Guide Presario 1800/1800T Serie - Page 38
2. Run Compaq Diagnostics. 3. Turn off the Notebook and its Notebook. 7. Ensure that the battery pack is installed and the Notebook is connected to an external AC power source. When these preliminary steps are completed, run POST. 2 TROUBLESHOOTING PRESARIO NOTEBOOK MAINTENANCE AND SERVICE GUIDE - Compaq Presario 18XL | Maintenance & Service Guide Presario 1800/1800T Serie - Page 39
Reassemble the Notebook (refer to the Removal and Replacement chapter later in this MSG). 10. Turn on the Notebook to verify that the Power-on password has been cleared. If it has not been cleared, repeat this procedure. PRESARIO NOTEBOOK MAINTENANCE AND SERVICE GUIDE 1800 SERIES TROUBLESHOOTING 3 - Compaq Presario 18XL | Maintenance & Service Guide Presario 1800/1800T Serie - Page 40
Notebook, then turn it on again. As soon as the Compaq logo appears, press the ESC key to display the POST messages as they occur. Remember any POST error codes that are displayed. If the Notebook the system board. 4 TROUBLESHOOTING PRESARIO NOTEBOOK MAINTENANCE AND SERVICE GUIDE 1800 SERIES - Compaq Presario 18XL | Maintenance & Service Guide Presario 1800/1800T Serie - Page 41
1. Make sure the keys are not depressed during POST. 2. With the Notebook in Full-Off mode, reconnect the keyboard. 3. Replace the keyboard. 304-Keyboard 3. Replace the diskette drive. 4. Replace the system board. PRESARIO NOTEBOOK MAINTENANCE AND SERVICE GUIDE 1800 SERIES TROUBLESHOOTING 5 - Compaq Presario 18XL | Maintenance & Service Guide Presario 1800/1800T Serie - Page 42
• Prepare Notebook for a Compaq Service Call (RemotePaq) Customers are encouraged to run the Diagnostics utilities to try to solve a problem before calling for support. Checkup ( available when calling for support. 6 TROUBLESHOOTING PRESARIO NOTEBOOK MAINTENANCE AND SERVICE GUIDE 1800 SERIES - Compaq Presario 18XL | Maintenance & Service Guide Presario 1800/1800T Serie - Page 43
6. Select Computer Checkup from the Diagnostics menu. The Test Option menu is displayed. 7. Select View the Device List from the Test Option menu. A list of installed Compaq devices is errors. Continued on the next page. PRESARIO NOTEBOOK MAINTENANCE AND SERVICE GUIDE 1800 SERIES TROUBLESHOOTING 7 - Compaq Presario 18XL | Maintenance & Service Guide Presario 1800/1800T Serie - Page 44
the Compaq Diagnostics Diskette in the diskette drive. 3. Turn on or restart the Notebook. The Notebook boots from instructions to cycle through the screens, return to the list and choose another item, or print the information. 8 TROUBLESHOOTING PRESARIO NOTEBOOK MAINTENANCE AND SERVICE GUIDE - Compaq Presario 18XL | Maintenance & Service Guide Presario 1800/1800T Serie - Page 45
) • 2419 - 2480: Video Test (pg 16) • 3206: Audio Test (pg 16) • 3301 - 6623: DVD or CD Test (pg 17) • 8601 - 8602: TouchPad Test (pg 17) PRESARIO NOTEBOOK MAINTENANCE AND SERVICE GUIDE 1800 SERIES TROUBLESHOOTING 9 - Compaq Presario 18XL | Maintenance & Service Guide Presario 1800/1800T Serie - Page 46
Flash the system ROM and retest. 2. Replace the system board and retest. The following steps apply to error codes 203-xx through 215-xx: 1. Remove the memory module and retest. 2. Install a new memory module and retest. 10 TROUBLESHOOTING PRESARIO NOTEBOOK MAINTENANCE AND SERVICE GUIDE 1800 SERIES - Compaq Presario 18XL | Maintenance & Service Guide Presario 1800/1800T Serie - Page 47
codes 401-xx through 403-xx: 1. Connect the printer. 2. Check power to the printer. 3. Install loopback connector on printer port and retest. 4. Check port and IRQ configuration. 5. Replace the system board and retest. PRESARIO NOTEBOOK MAINTENANCE AND SERVICE GUIDE 1800 SERIES TROUBLESHOOTING - Compaq Presario 18XL | Maintenance & Service Guide Presario 1800/1800T Serie - Page 48
Run the Configuration and Diagnostics utilities. Error Code 1101-xx Serial Test Error Codes Description Serial port test failed Recommended Action 1. Check port configuration. 2. Replace the system board and retest. 12 TROUBLESHOOTING PRESARIO NOTEBOOK MAINTENANCE AND SERVICE GUIDE 1800 SERIES - Compaq Presario 18XL | Maintenance & Service Guide Presario 1800/1800T Serie - Page 49
format test failed Hard drive ECC* test failed Hard drive power mode test failed Network preparation test failed Drive monitoring test failed *ECC = Error Correction Code PRESARIO NOTEBOOK MAINTENANCE AND SERVICE GUIDE 1800 SERIES TROUBLESHOOTING 13 - Compaq Presario 18XL | Maintenance & Service Guide Presario 1800/1800T Serie - Page 50
failed Recommended Action The following steps apply to error codes 501-xx through 516-xx: 1. Disconnect external monitor and test with the Notebook display. 2. Replace the display assembly and retest. test failed 14 TROUBLESHOOTING PRESARIO NOTEBOOK MAINTENANCE AND SERVICE GUIDE 1800 SERIES - Compaq Presario 18XL | Maintenance & Service Guide Presario 1800/1800T Serie - Page 51
x 200 mode color set 0 test failed Recommended Action The following steps apply to error codes 2402-xx through 2418-xx: 1. Run the Configuration and Diagnostics utilities. 2. Replace the ECG/VGC memory test failed PRESARIO NOTEBOOK MAINTENANCE AND SERVICE GUIDE 1800 SERIES TROUBLESHOOTING 15 - Compaq Presario 18XL | Maintenance & Service Guide Presario 1800/1800T Serie - Page 52
retest. Advanced VGA BitBLT test failed Advanced VGA LineDraw test failed Error Code 3206-xx Audio Test Error Codes Description Recommended Action Audio System Internal Error Replace the system board and retest. 16 TROUBLESHOOTING PRESARIO NOTEBOOK MAINTENANCE AND SERVICE GUIDE 1800 SERIES - Compaq Presario 18XL | Maintenance & Service Guide Presario 1800/1800T Serie - Page 53
Code 3301-xx 3305-xx 6600-xx 6605-xx 6608-xx 6623-xx DVD or CD Drive Test Error Codes Description drivers are loaded and properly installed. 4. Replace the CD/DVD drive and retest. 5. Replace the system board and retest. PRESARIO NOTEBOOK MAINTENANCE AND SERVICE GUIDE 1800 SERIES TROUBLESHOOTING - Compaq Presario 18XL | Maintenance & Service Guide Presario 1800/1800T Serie - Page 54
against the problem described to avoid a misdiagnosis. Å WARNING: To avoid a potential shock hazard during troubleshooting procedures, printer drivers have been installed for each application. • Check the printer connection. 18 TROUBLESHOOTING PRESARIO NOTEBOOK MAINTENANCE AND SERVICE GUIDE 1800 - Compaq Presario 18XL | Maintenance & Service Guide Presario 1800/1800T Serie - Page 55
Power Solutions later in this chapter may also be applicable to the following problems. Problem Notebook won't turn on when battery pack is inserted and power cord is unplugged are evenly spaced and not bent or broken. PRESARIO NOTEBOOK MAINTENANCE AND SERVICE GUIDE 1800 SERIES TROUBLESHOOTING 19 - Compaq Presario 18XL | Maintenance & Service Guide Presario 1800/1800T Serie - Page 56
range for operation or storage. • Operating Range: 50°F to 104°F (10°C to 40°C) • Storage Range: -4°F to 86°F (-20°C to 30°C) Recharge the battery pack. 20 TROUBLESHOOTING PRESARIO NOTEBOOK MAINTENANCE AND SERVICE GUIDE 1800 SERIES - Compaq Presario 18XL | Maintenance & Service Guide Presario 1800/1800T Serie - Page 57
Presario 1800/1800T Series Models: XL280, XL380, XL381, and XL390 Battery Pack/Gauge Problem Probable Cause Solution(s) Battery has partially Storage Range: -4°F to 86°F (-20°C to 30°C) Recharge the battery pack. PRESARIO NOTEBOOK MAINTENANCE AND SERVICE GUIDE 1800 SERIES TROUBLESHOOTING 21 - Compaq Presario 18XL | Maintenance & Service Guide Presario 1800/1800T Serie - Page 58
Drive Solutions Some causes and solutions for diskette drive problems are listed in the following table. Problem Diskette drive cannot write to a diskette. Diskette . Run TEST from the Compaq Diagnostics diskette. 22 TROUBLESHOOTING PRESARIO NOTEBOOK MAINTENANCE AND SERVICE GUIDE 1800 SERIES - Compaq Presario 18XL | Maintenance & Service Guide Presario 1800/1800T Serie - Page 59
Solutions This section lists some causes and solutions for common Notebook display and external monitor problems. You can perform a monitor self-test on an move the Notebook. Press any key or touch the TouchPad. PRESARIO NOTEBOOK MAINTENANCE AND SERVICE GUIDE 1800 SERIES TROUBLESHOOTING 23 - Compaq Presario 18XL | Maintenance & Service Guide Presario 1800/1800T Serie - Page 60
set for 1024 x 768 or higher resolution and view is toggled back to the Notebook display, which supports up to 800 x 600. Improper backlight or display cable connections. Press any key on at the front of the Notebook. 24 TROUBLESHOOTING PRESARIO NOTEBOOK MAINTENANCE AND SERVICE GUIDE 1800 SERIES - Compaq Presario 18XL | Maintenance & Service Guide Presario 1800/1800T Serie - Page 61
. Replace the system board. Reseat the display cable to the following until the problem is solved: 1. System board 2. Display assembly Replace the display assembly. Replace that the monitor is working properly. PRESARIO NOTEBOOK MAINTENANCE AND SERVICE GUIDE 1800 SERIES TROUBLESHOOTING 25 - Compaq Presario 18XL | Maintenance & Service Guide Presario 1800/1800T Serie - Page 62
is not turned on. Turn off the Notebook, turn on the external device, then turn on the Notebook to integrate the device with the system. Device is not seated properly. Turn off the Notebook and reinsert the device. 26 TROUBLESHOOTING PRESARIO NOTEBOOK MAINTENANCE AND SERVICE GUIDE 1800 SERIES - Compaq Presario 18XL | Maintenance & Service Guide Presario 1800/1800T Serie - Page 63
external numeric keypad from the Notebook. Memory Solutions Some causes and solutions for memory problems are listed in the following table. Problem Memory count during Power-On not need. applications are running. PRESARIO NOTEBOOK MAINTENANCE AND SERVICE GUIDE 1800 SERIES TROUBLESHOOTING 27 - Compaq Presario 18XL | Maintenance & Service Guide Presario 1800/1800T Serie - Page 64
the slot in the correct orientation. Check and secure telephone connection. Install drivers. See the Specifications chapter to verify the correct COM port. See the Specifications chapter to verify the correct address. 28 TROUBLESHOOTING PRESARIO NOTEBOOK MAINTENANCE AND SERVICE GUIDE 1800 SERIES - Compaq Presario 18XL | Maintenance & Service Guide Presario 1800/1800T Serie - Page 65
connection. Install driver(s). Double-click My Computer to verify the drive letter assigned to the card. Contact a Compaq-authorized Service Provider for a list of PC cards tested successfully in Compaq platforms. PRESARIO NOTEBOOK MAINTENANCE AND SERVICE GUIDE 1800 SERIES TROUBLESHOOTING 29 - Compaq Presario 18XL | Maintenance & Service Guide Presario 1800/1800T Serie - Page 66
. Replace AC Adapter and restart. Turn on the Notebook. Replace the battery pack with a fully charged battery pack, or connect the Notebook to an external power source. Then turn on the Notebook. Replace the system board. 30 TROUBLESHOOTING PRESARIO NOTEBOOK MAINTENANCE AND SERVICE GUIDE 1800 - Compaq Presario 18XL | Maintenance & Service Guide Presario 1800/1800T Serie - Page 67
network. Replace the cable. Refer to the printer documentation to install the correct printer driver. Make sure that the printer signal cable is properly connected to the Notebook. Replace the printer cable and retest. PRESARIO NOTEBOOK MAINTENANCE AND SERVICE GUIDE 1800 SERIES TROUBLESHOOTING 31 - Compaq Presario 18XL | Maintenance & Service Guide Presario 1800/1800T Serie - Page 68
the TouchPad board. Replace system board. Install the appropriate device driver in Windows. Clean the TouchPad with a cloth dampened with alcohol or an ammonia-based glass cleaner. Wipe up liquid with a dry cloth. 32 TROUBLESHOOTING PRESARIO NOTEBOOK MAINTENANCE AND SERVICE GUIDE 1800 SERIES - Compaq Presario 18XL | Maintenance & Service Guide Presario 1800/1800T Serie - Page 69
there are no PC cards in the PC slots. 4. Close the display and all exterior doors of the Notebook. 5. Pack the Notebook with sufficient packing material to protect it. Use the original packing box or similar packaging. PRESARIO NOTEBOOK MAINTENANCE AND SERVICE GUIDE 1800 SERIES TROUBLESHOOTING 33 - Compaq Presario 18XL | Maintenance & Service Guide Presario 1800/1800T Serie - Page 70
generated by common activities associated with servicing computers. Generated Electrostatic Voltage Activity Walking can degrade Notebook components. Be sure to ground yourself before touching the Notebook or its subassemblies. PRESARIO NOTEBOOK MAINTENANCE AND SERVICE GUIDE 1800 SERIES REMOVAL - Compaq Presario 18XL | Maintenance & Service Guide Presario 1800/1800T Serie - Page 71
by the use of excessive force during dissassembly and reassembly. When handling plastic parts, use care. Apply pressure only at the points designated in the instructions. 2 REMOVAL & REPLACEMENT PRESARIO NOTEBOOK MAINTENANCE AND SERVICE GUIDE 1800 SERIES - Compaq Presario 18XL | Maintenance & Service Guide Presario 1800/1800T Serie - Page 72
with constant light pressure. Ä CAUTION: When servicing these Notebooks, make sure that cables are placed in their proper locations during the reassembly process. Improper cable placement can damage the Notebook. PRESARIO NOTEBOOK MAINTENANCE AND SERVICE GUIDE 1800 SERIES REMOVAL & REPLACEMENT 3 - Compaq Presario 18XL | Maintenance & Service Guide Presario 1800/1800T Serie - Page 73
flex cables with extreme care; they can tear easily. Ä CAUTION: When servicing a Notebook, make sure that cables are placed in their proper locations during the reassembly Assembly Cable • Keyboard Ribbon Cable 4 REMOVAL & REPLACEMENT PRESARIO NOTEBOOK MAINTENANCE AND SERVICE GUIDE 1800 SERIES - Compaq Presario 18XL | Maintenance & Service Guide Presario 1800/1800T Serie - Page 74
Drive Ribbon Cable • Speaker Assembly Cable • Keyboard Ribbon Cable To remove or replace the hard drive, see Hard Drive Removal Procedures later in this chapter. PRESARIO NOTEBOOK MAINTENANCE AND SERVICE GUIDE 1800 SERIES REMOVAL & REPLACEMENT 5 - Compaq Presario 18XL | Maintenance & Service Guide Presario 1800/1800T Serie - Page 75
Cable • Keyboard Ribbon Cable To remove or replace the CD or DVD drive, see CD/DVD Drive Removal Procedures later in this chapter. 6 REMOVAL & REPLACEMENT PRESARIO NOTEBOOK MAINTENANCE AND SERVICE GUIDE 1800 SERIES - Compaq Presario 18XL | Maintenance & Service Guide Presario 1800/1800T Serie - Page 76
/DVD Ribbon Cable • Speaker Assembly Cable • Keyboard Ribbon Cable To remove or replace the diskette drive, see Diskette Drive Removal Procedures later in this chapter. PRESARIO NOTEBOOK MAINTENANCE AND SERVICE GUIDE 1800 SERIES REMOVAL & REPLACEMENT 7 - Compaq Presario 18XL | Maintenance & Service Guide Presario 1800/1800T Serie - Page 77
• Diskette Drive Ribbon Cable • Keyboard Ribbon Cable To remove or replace the speaker assembly, see Speaker Assembly Removal Procedures later in this chapter. 8 REMOVAL & REPLACEMENT PRESARIO NOTEBOOK MAINTENANCE AND SERVICE GUIDE 1800 SERIES - Compaq Presario 18XL | Maintenance & Service Guide Presario 1800/1800T Serie - Page 78
• CD/DVD Ribbon Cable • Diskette Drive Ribbon Cable • Speaker Assembly Cable To remove or replace the keyboard, see Keyboard Removal Procedures later in this chapter. PRESARIO NOTEBOOK MAINTENANCE AND SERVICE GUIDE 1800 SERIES REMOVAL & REPLACEMENT 9 - Compaq Presario 18XL | Maintenance & Service Guide Presario 1800/1800T Serie - Page 79
contacts. Place only the battery pack for the Compaq Presario 1800 Series Notebooks in the battery compartment. Do not force the Notebook, place the it together with its screws away from the work area to prevent damage. 10 REMOVAL & REPLACEMENT PRESARIO NOTEBOOK MAINTENANCE AND SERVICE GUIDE - Compaq Presario 18XL | Maintenance & Service Guide Presario 1800/1800T Serie - Page 80
. To prepare the Notebook for disassembly, refer to the previous sections of this chapter. QuikDock To disconnect from the QuikDock, lift the handle on top of the QuikDock to release the Notebook and lift the Notebook straight up. PRESARIO NOTEBOOK MAINTENANCE AND SERVICE GUIDE 1800 SERIES REMOVAL - Compaq Presario 18XL | Maintenance & Service Guide Presario 1800/1800T Serie - Page 81
battery contacts. Place only the battery pack for the Compaq Presario 1800 Series Portable Notebooks into the battery compartment. Do not force the battery field-serviceable parts are located inside the battery pack. 12 REMOVAL & REPLACEMENT PRESARIO NOTEBOOK MAINTENANCE AND SERVICE GUIDE 1800 - Compaq Presario 18XL | Maintenance & Service Guide Presario 1800/1800T Serie - Page 82
: 1. Prepare the Notebook for disassembly (pg 10). 2. Close the display and turn the Notebook upside down. 3. Remove four screws from the bottom of the Notebook, and one from the battery compartment. Continued on the next page. PRESARIO NOTEBOOK MAINTENANCE AND SERVICE GUIDE 1800 SERIES REMOVAL - Compaq Presario 18XL | Maintenance & Service Guide Presario 1800/1800T Serie - Page 83
necessary to apply pressure on the sides of the Palmrest cover to release it from the chassis. Continued on the next page. 14 REMOVAL & REPLACEMENT PRESARIO NOTEBOOK MAINTENANCE AND SERVICE GUIDE 1800 SERIES - Compaq Presario 18XL | Maintenance & Service Guide Presario 1800/1800T Serie - Page 84
Presario 1800/1800T Series Models: XL280, XL380, XL381, and XL390 6. Disconnect the flex cable from the ZIF Connector on the DisqPlay module. To replace the Palmrest cover with TouchPad, reverse these procedures. PRESARIO NOTEBOOK MAINTENANCE AND SERVICE GUIDE 1800 SERIES REMOVAL & REPLACEMENT 15 - Compaq Presario 18XL | Maintenance & Service Guide Presario 1800/1800T Serie - Page 85
these procedures. Note: When replacing the keyboard, the Keyboard Ribbon Cable should fold behind the ZIF Connector and not underneath the keyboard. 16 REMOVAL & REPLACEMENT PRESARIO NOTEBOOK MAINTENANCE AND SERVICE GUIDE 1800 SERIES - Compaq Presario 18XL | Maintenance & Service Guide Presario 1800/1800T Serie - Page 86
the following steps: 1. Prepare the Notebook for disassembly (pg 10). 2. Open the display and squeeze the sides of the display assembly hinge covers while sliding them off the hinges. Continued on the next page. PRESARIO NOTEBOOK MAINTENANCE AND SERVICE GUIDE 1800 SERIES REMOVAL & REPLACEMENT 17 - Compaq Presario 18XL | Maintenance & Service Guide Presario 1800/1800T Serie - Page 87
Presario 1800/1800T Series Models: XL280, XL380, XL381, and XL390 3. Remove the two innermost screws from the display assembly hinges that secure the button board cover to the chassis. Continued on the next page. 18 REMOVAL & REPLACEMENT PRESARIO NOTEBOOK MAINTENANCE AND SERVICE GUIDE 1800 SERIES - Compaq Presario 18XL | Maintenance & Service Guide Presario 1800/1800T Serie - Page 88
and remove the two screws (shown below) located near the back that secure the button board cover to the chassis. Continued on the next page. PRESARIO NOTEBOOK MAINTENANCE AND SERVICE GUIDE 1800 SERIES REMOVAL & REPLACEMENT 19 - Compaq Presario 18XL | Maintenance & Service Guide Presario 1800/1800T Serie - Page 89
Presario 1800/1800T Series Models: XL280, XL380, XL381, and XL390 5. Turn the unit right side up and open the and remove the cover from the chassis 2. To replace the button board cover, reverse these procedures. 20 REMOVAL & REPLACEMENT PRESARIO NOTEBOOK MAINTENANCE AND SERVICE GUIDE 1800 SERIES - Compaq Presario 18XL | Maintenance & Service Guide Presario 1800/1800T Serie - Page 90
procedure. To remove the Internet switch board, complete the following steps: 1. Prepare the Notebook for disassembly (pg 10). 2. Remove the button board cover (pg 17). 3. board 3. Continued on the next page. PRESARIO NOTEBOOK MAINTENANCE AND SERVICE GUIDE 1800 SERIES REMOVAL & REPLACEMENT 21 - Compaq Presario 18XL | Maintenance & Service Guide Presario 1800/1800T Serie - Page 91
switch boards that are not interchangeable. If disassembling more than one Notebook, keep each Internet switch board with the correct Notebook. To replace the Internet switch board, reverse these procedures. 22 REMOVAL & REPLACEMENT PRESARIO NOTEBOOK MAINTENANCE AND SERVICE GUIDE 1800 SERIES - Compaq Presario 18XL | Maintenance & Service Guide Presario 1800/1800T Serie - Page 92
heat sink are missing or damaged, install a new heat sink. Important: Before installing the new heat sink, remove the plastic covering from the thermal pads. PRESARIO NOTEBOOK MAINTENANCE AND SERVICE GUIDE 1800 SERIES REMOVAL & REPLACEMENT 23 - Compaq Presario 18XL | Maintenance & Service Guide Presario 1800/1800T Serie - Page 93
2. Note: The CPU cover prevents lifting the modem straight up from the system board. To replace the modem board, reverse these procedures. 24 REMOVAL & REPLACEMENT PRESARIO NOTEBOOK MAINTENANCE AND SERVICE GUIDE 1800 SERIES - Compaq Presario 18XL | Maintenance & Service Guide Presario 1800/1800T Serie - Page 94
in the written procedure. To remove the hard drive, complete the following steps: 1. Prepare the Notebook for disassembly (pg 10). 2. Remove the Palmrest cover with TouchPad (pg 13). 3. Disconnect on the next page. PRESARIO NOTEBOOK MAINTENANCE AND SERVICE GUIDE 1800 SERIES REMOVAL & REPLACEMENT 25 - Compaq Presario 18XL | Maintenance & Service Guide Presario 1800/1800T Serie - Page 95
Presario 1800/1800T Series Models: XL280, XL380, XL381, and XL390 4. Remove three screws from the hard drive mounting bracket. rough treatment. Handle the hard drive with extreme care. Continued on the next page. 26 REMOVAL & REPLACEMENT PRESARIO NOTEBOOK MAINTENANCE AND SERVICE GUIDE 1800 SERIES - Compaq Presario 18XL | Maintenance & Service Guide Presario 1800/1800T Serie - Page 96
mounting brackets, remove the two screws from each of side of the hard drive. To replace the hard drive and mounting brackets, reverse these procedures. PRESARIO NOTEBOOK MAINTENANCE AND SERVICE GUIDE 1800 SERIES REMOVAL & REPLACEMENT 27 - Compaq Presario 18XL | Maintenance & Service Guide Presario 1800/1800T Serie - Page 97
written procedure. To remove the LCD DisqPlay Module, complete the following steps: 1. Prepare the Notebook for disassembly (pg 10). 2. Remove the Palmrest cover with TouchPad (pg 13). 3. reverse these procedures. 28 REMOVAL & REPLACEMENT PRESARIO NOTEBOOK MAINTENANCE AND SERVICE GUIDE 1800 SERIES - Compaq Presario 18XL | Maintenance & Service Guide Presario 1800/1800T Serie - Page 98
tip of standard screwdriver in center slot, twist screwdriver toward "Free" until it snaps 1, and lift processor from the chassis 2. Continued on the next page. PRESARIO NOTEBOOK MAINTENANCE AND SERVICE GUIDE 1800 SERIES REMOVAL & REPLACEMENT 29 - Compaq Presario 18XL | Maintenance & Service Guide Presario 1800/1800T Serie - Page 99
Presario 1800/1800T Series Models: XL280, XL380, XL381, and XL390 b. With standard screwdriver, turn screw counter-clockwise in place, reassemble the remaining subassemblies by reversing their removal procedures. 30 REMOVAL & REPLACEMENT PRESARIO NOTEBOOK MAINTENANCE AND SERVICE GUIDE 1800 SERIES - Compaq Presario 18XL | Maintenance & Service Guide Presario 1800/1800T Serie - Page 100
23). 5. Turn the unit upside down and remove the two screws that secure the CD/DVD drive to the chassis. Continued on the next page. PRESARIO NOTEBOOK MAINTENANCE AND SERVICE GUIDE 1800 SERIES REMOVAL & REPLACEMENT 31 - Compaq Presario 18XL | Maintenance & Service Guide Presario 1800/1800T Serie - Page 101
Presario 1800/1800T Series Models: XL280, XL380, XL381, and XL390 6. Turn the unit over (right side up) and open the display. 7. Remove the two screws located at the back of the CD/DVD drive. Continued on the next page. 32 REMOVAL & REPLACEMENT PRESARIO NOTEBOOK MAINTENANCE AND SERVICE GUIDE 1800 - Compaq Presario 18XL | Maintenance & Service Guide Presario 1800/1800T Serie - Page 102
Presario 1800/1800T Series Models: XL280, XL380, XL381, and XL390 8. Disconnect the CD/DVD drive cable placed in its proper location during the reassembly process. Improper cable placement can damage the Notebook. PRESARIO NOTEBOOK MAINTENANCE AND SERVICE GUIDE 1800 SERIES REMOVAL & REPLACEMENT 33 - Compaq Presario 18XL | Maintenance & Service Guide Presario 1800/1800T Serie - Page 103
written procedure. To remove the display panel assembly, complete the following steps: 1. Prepare the Notebook for disassembly (pg 10). 2. Remove the button board cover (pg 17). 3. Remove Continued on the next page. 34 REMOVAL & REPLACEMENT PRESARIO NOTEBOOK MAINTENANCE AND SERVICE GUIDE 1800 SERIES - Compaq Presario 18XL | Maintenance & Service Guide Presario 1800/1800T Serie - Page 104
, and XL390 6. Remove the two outermost screws from the display assembly hinges. Ä CAUTION: Support the display while removing the screws to prevent dropping and damaging the display. Continued on the next page. PRESARIO NOTEBOOK MAINTENANCE AND SERVICE GUIDE 1800 SERIES REMOVAL & REPLACEMENT 35 - Compaq Presario 18XL | Maintenance & Service Guide Presario 1800/1800T Serie - Page 105
Presario 1800/1800T Series Models: XL280, XL380, XL381, and XL390 7. Lift the display assembly off the hinges. To replace the display panel assembly, reverse these procedures. 36 REMOVAL & REPLACEMENT PRESARIO NOTEBOOK MAINTENANCE AND SERVICE GUIDE 1800 SERIES - Compaq Presario 18XL | Maintenance & Service Guide Presario 1800/1800T Serie - Page 106
) located on the top of the upper CPU cover and lift the cover off the chassis. To replace the upper CPU cover, reverse these procedures. PRESARIO NOTEBOOK MAINTENANCE AND SERVICE GUIDE 1800 SERIES REMOVAL & REPLACEMENT 37 - Compaq Presario 18XL | Maintenance & Service Guide Presario 1800/1800T Serie - Page 107
assembly from the chassis slot, and disconnect the fan cable from the connector on the system board. Continued on the next page. 38 REMOVAL & REPLACEMENT PRESARIO NOTEBOOK MAINTENANCE AND SERVICE GUIDE 1800 SERIES - Compaq Presario 18XL | Maintenance & Service Guide Presario 1800/1800T Serie - Page 108
Presario 1800/1800T Series Models: XL280, XL380, XL381, and XL390 To remove the facing toward the interior of the Notebook (the fan blades should be seen from the exterior and air should blow into the Notebook). PRESARIO NOTEBOOK MAINTENANCE AND SERVICE GUIDE 1800 SERIES REMOVAL & REPLACEMENT 39 - Compaq Presario 18XL | Maintenance & Service Guide Presario 1800/1800T Serie - Page 109
in the CMOS. To remove the RTC battery, complete the following steps: 1. Prepare the Notebook for disassembly (pg 10). 2. Remove the Palmrest cover with TouchPad (pg 13). 3. Remove Continued on the next page. 40 REMOVAL & REPLACEMENT PRESARIO NOTEBOOK MAINTENANCE AND SERVICE GUIDE 1800 SERIES - Compaq Presario 18XL | Maintenance & Service Guide Presario 1800/1800T Serie - Page 110
Presario 1800/1800T Series Models: XL280, XL380, XL381, and XL390 10. Locate the RTC battery on the battery firmly into the socket, and reassemble the remaining components by reversing their removal procedures. PRESARIO NOTEBOOK MAINTENANCE AND SERVICE GUIDE 1800 SERIES REMOVAL & REPLACEMENT 41 - Compaq Presario 18XL | Maintenance & Service Guide Presario 1800/1800T Serie - Page 111
cover (pg 37). 11. Remove screw from the diskette drive retaining bracket and lift off the bracket. Continued on the next page. 42 REMOVAL & REPLACEMENT PRESARIO NOTEBOOK MAINTENANCE AND SERVICE GUIDE 1800 SERIES - Compaq Presario 18XL | Maintenance & Service Guide Presario 1800/1800T Serie - Page 112
Presario 1800/1800T Series Models: XL280, XL380, XL381, and XL390 12. Disconnect the diskette drive data in its proper location during the reassembly process. Improper cable placement can damage the Notebook. PRESARIO NOTEBOOK MAINTENANCE AND SERVICE GUIDE 1800 SERIES REMOVAL & REPLACEMENT 43 - Compaq Presario 18XL | Maintenance & Service Guide Presario 1800/1800T Serie - Page 113
these procedures. Note: When replacing the voltage converter board, ensure that the pins are aligned with the connector on the system board. 44 REMOVAL & REPLACEMENT PRESARIO NOTEBOOK MAINTENANCE AND SERVICE GUIDE 1800 SERIES - Compaq Presario 18XL | Maintenance & Service Guide Presario 1800/1800T Serie - Page 114
the hard drive (pg 25). 9. Remove the upper CPU cover (pg 37). 10. Remove the voltage converter board (pg 44). Continued on the next page. PRESARIO NOTEBOOK MAINTENANCE AND SERVICE GUIDE 1800 SERIES REMOVAL & REPLACEMENT 45 - Compaq Presario 18XL | Maintenance & Service Guide Presario 1800/1800T Serie - Page 115
Presario 1800/1800T Series Models: XL280, XL380, XL381, and XL390 11. Disconnect the speaker cables placed in its proper location during the reassembly process. Improper cable placement can damage the Notebook. 46 REMOVAL & REPLACEMENT PRESARIO NOTEBOOK MAINTENANCE AND SERVICE GUIDE 1800 SERIES - Compaq Presario 18XL | Maintenance & Service Guide Presario 1800/1800T Serie - Page 116
). 15. Remove the voltage converter board (pg 44). 16. Disconnect the speaker assembly cables from the system board (pg 46). Continued on the next page. PRESARIO NOTEBOOK MAINTENANCE AND SERVICE GUIDE 1800 SERIES REMOVAL & REPLACEMENT 47 - Compaq Presario 18XL | Maintenance & Service Guide Presario 1800/1800T Serie - Page 117
system board. Note: The four remaining standoffs located on the system board may be left in place. Continued on the next page. 48 REMOVAL & REPLACEMENT PRESARIO NOTEBOOK MAINTENANCE AND SERVICE GUIDE 1800 SERIES - Compaq Presario 18XL | Maintenance & Service Guide Presario 1800/1800T Serie - Page 118
Presario 1800/1800T Series Models: XL280, XL380, XL381, and XL390 18. Remove the two screws from the CD/DVD drive mounting rail, and lift the mounting rail from the system board. Continued on the next page. PRESARIO NOTEBOOK MAINTENANCE AND SERVICE GUIDE 1800 SERIES REMOVAL & REPLACEMENT 49 - Compaq Presario 18XL | Maintenance & Service Guide Presario 1800/1800T Serie - Page 119
Presario 1800/1800T Series Models: XL280, XL380, XL381, and XL390 19. Remove four screws (shown below) from the system board. tape. This tape must be removed to free the system board. Continued on the next page. 50 REMOVAL & REPLACEMENT PRESARIO NOTEBOOK MAINTENANCE AND SERVICE GUIDE 1800 SERIES - Compaq Presario 18XL | Maintenance & Service Guide Presario 1800/1800T Serie - Page 120
Presario 1800/1800T Series Models: XL280, XL380, XL381, and XL390 20. Make sure that the PC card replacing the system board, remove all remaining cables. To replace the system board, reverse these procedures. PRESARIO NOTEBOOK MAINTENANCE AND SERVICE GUIDE 1800 SERIES REMOVAL & REPLACEMENT 51 - Compaq Presario 18XL | Maintenance & Service Guide Presario 1800/1800T Serie - Page 121
turn the Notebook upside down. 3. Remove the screw (shown) from the memory module door. 4. With the front of the Notebook facing you, slide the memory module door to the left and lift it off. Continued on the next page. 52 REMOVAL & REPLACEMENT PRESARIO NOTEBOOK MAINTENANCE AND SERVICE GUIDE 1800 - Compaq Presario 18XL | Maintenance & Service Guide Presario 1800/1800T Serie - Page 122
5. Pull the side levers to release the memory 1, and lift the memory module from the system board 2. To replace the memory module, reverse these procedures. PRESARIO NOTEBOOK MAINTENANCE AND SERVICE GUIDE 1800 SERIES REMOVAL & REPLACEMENT 53 - Compaq Presario 18XL | Maintenance & Service Guide Presario 1800/1800T Serie - Page 123
This chapter provides illustrations of the spare parts for Compaq Presario 1800XL Series Notebooks, and identifies the spare part ordering number and availability refer to Part Numbers & Availability later in this chapter. PRESARIO NOTEBOOK MAINTENANCE AND SERVICE GUIDE 1800 SERIES PARTS CATALOG 1 - Compaq Presario 18XL | Maintenance & Service Guide Presario 1800/1800T Serie - Page 124
Boards Presario 1800/1800T Series Models: XL280, XL380, XL381, and XL390 Spare Part Items 1 Heat Sink 2 Modem (56K Data/Fax w/o ) 9 Fan Assembly To order parts, refer to Part Numbers & Availability later in this chapter. 2 PARTS CATALOG PRESARIO NOTEBOOK MAINTENANCE AND SERVICE GUIDE 1800 SERIES - Compaq Presario 18XL | Maintenance & Service Guide Presario 1800/1800T Serie - Page 125
Display Assembly Presario 1800/1800T Series Models: XL280, XL380, XL381, and XL390 Spare Part Item Display Panel: 14.1 or 15.0-inch TFT or TFT/SXGA (with LVDS, MD) To order parts, refer to Part Numbers & Availability later in this chapter. PRESARIO NOTEBOOK MAINTENANCE AND SERVICE GUIDE 1800 - Compaq Presario 18XL | Maintenance & Service Guide Presario 1800/1800T Serie - Page 126
Presario 1800/1800T Series Models: XL280, XL380, XL381, and XL390 Mass-Storage Devices Spare Part Items 1 Hard Drive (6.0 - 32.0 DVD/CD-RW Combo To order parts, refer to Part Numbers & Availability later in this chapter. 4 PARTS CATALOG PRESARIO NOTEBOOK MAINTENANCE AND SERVICE GUIDE 1800 SERIES - Compaq Presario 18XL | Maintenance & Service Guide Presario 1800/1800T Serie - Page 127
Presario 1800/1800T Series Models: XL280, XL380, XL381, and XL390 Miscellaneous Cable Kit Spare Part Items Miscellaneous of the above items. To order parts, refer to Part Numbers & Availability later in this chapter. PRESARIO NOTEBOOK MAINTENANCE AND SERVICE GUIDE 1800 SERIES PARTS CATALOG 5 - Compaq Presario 18XL | Maintenance & Service Guide Presario 1800/1800T Serie - Page 128
*Kit includes one each of the above unless quantity is stated. To order parts, refer to Part Numbers & Availability later in this chapter. 6 PARTS CATALOG PRESARIO NOTEBOOK MAINTENANCE AND SERVICE GUIDE 1800 SERIES - Compaq Presario 18XL | Maintenance & Service Guide Presario 1800/1800T Serie - Page 129
WinME Manual Kit SnapFish Assembly Card Microsoft Word2000 CD Kit Warranty Options Catalog Win2000 Driver CD Kit Owner Registration Card (Win2000) To order documentation or software, refer to Part Numbers & Availability later in this chapter. PRESARIO NOTEBOOK MAINTENANCE AND SERVICE GUIDE - Compaq Presario 18XL | Maintenance & Service Guide Presario 1800/1800T Serie - Page 130
.0 GB hard drive (P/N: 216173-001). To find additional parts available for these models, refer to the Alphabetical Spares Listing later in this chapter. 8 PARTS CATALOG PRESARIO NOTEBOOK MAINTENANCE AND SERVICE GUIDE 1800 SERIES - Compaq Presario 18XL | Maintenance & Service Guide Presario 1800/1800T Serie - Page 131
AC Adapter (60 W Slim 3 Wire) 180675-001 AC Adapter (60 W Slim 2 Wire) 180676-001 AC Power Cord (NA) 293831-001 AC Power Cord (Intl 3 Wire) 170513-002 AC Power Cord (UK 3 Wire) 170513-031 AC 6/6/00 after 6/6/00 PRESARIO NOTEBOOK MAINTENANCE AND SERVICE GUIDE 1800 SERIES PARTS CATALOG 9 - Compaq Presario 18XL | Maintenance & Service Guide Presario 1800/1800T Serie - Page 132
All Emergency Recovery CD Kit Enclosure Base Enclosure Base (1 GHz) 157296-003 171816-001 221480-001 All XL280, 380, 381, and CTO Manuals, See Beyond Setup Guide, Compaq Win2K, Compaq WinME, Microsoft Win2K, and Microsoft WinME 10 PARTS CATALOG PRESARIO NOTEBOOK MAINTENANCE AND SERVICE GUIDE - Compaq Presario 18XL | Maintenance & Service Guide Presario 1800/1800T Serie - Page 133
180309-001 147234-001 138189-001 138160-001 138190-001 138161-001 400445-001 166299-003 141572-005 138181-001 216792-001 201347-001 175319-001 175322-001 175323-001 199193- 9/25/00 after 9/25/00 after 9/3/00 after 9/3/00 PRESARIO NOTEBOOK MAINTENANCE AND SERVICE GUIDE 1800 SERIES PARTS CATALOG 11 - Compaq Presario 18XL | Maintenance & Service Guide Presario 1800/1800T Serie - Page 134
-001 All 170835-004 All US platforms 191298-003 CTO after 9/3/00 To see illustrations of each part and a list of items contained in each miscellaneous parts kit, refer to Illustrated Parts earlier in this chapter. 12 PARTS CATALOG PRESARIO NOTEBOOK MAINTENANCE AND SERVICE GUIDE 1800 SERIES
-
 1
1 -
 2
2 -
 3
3 -
 4
4 -
 5
5 -
 6
6 -
 7
7 -
8
-
9
-
10
-
11
-
12
-
13
-
14
-
15
-
16
-
17
-
18
-
19
-
20
-
21
-
22
-
23
-
24
-
25
-
26
-
27
-
28
-
29
-
30
-
31
-
32
-
33
-
34
-
35
-
36
-
37
-
38
-
39
-
40
-
41
-
42
-
43
-
44
-
45
-
46
-
47
-
48
-
49
-
50
-
51
-
52
-
53
-
54
-
55
-
56
-
57
-
58
-
59
-
60
-
61
-
62
-
63
-
64
-
65
-
66
-
67
-
68
-
69
-
70
-
71
-
72
-
73
-
74
-
75
-
76
-
77
-
78
-
79
-
80
-
81
-
82
-
83
-
84
-
85
-
86
-
87
-
88
-
89
-
90
-
91
-
92
-
93
-
94
-
95
-
96
-
97
-
98
-
99
-
100
-
101
-
102
-
103
-
104
-
105
-
106
-
107
-
108
-
109
-
110
-
111
-
112
-
113
-
114
-
115
-
116
-
117
-
118
-
119
-
120
-
121
-
122
-
123
-
124
-
125
-
126
-
127
-
128
-
129
-
130
-
131
-
132
-
133
-
134
 |
 |
Product
Description
Presario 1800/1800T Series
Models: XL280, XL380, XL381,
and XL390
P
RESARIO
N
OTEBOOK
M
AINTENANCE
AND
S
ERVICE
G
UIDE
1800 S
ERIES
1
Before You
Begin
Specifications
Pin
Assignments
Battery & Power
Management
Troubleshooting
Removal &
Replacement
Parts
Catalog
MSG Index
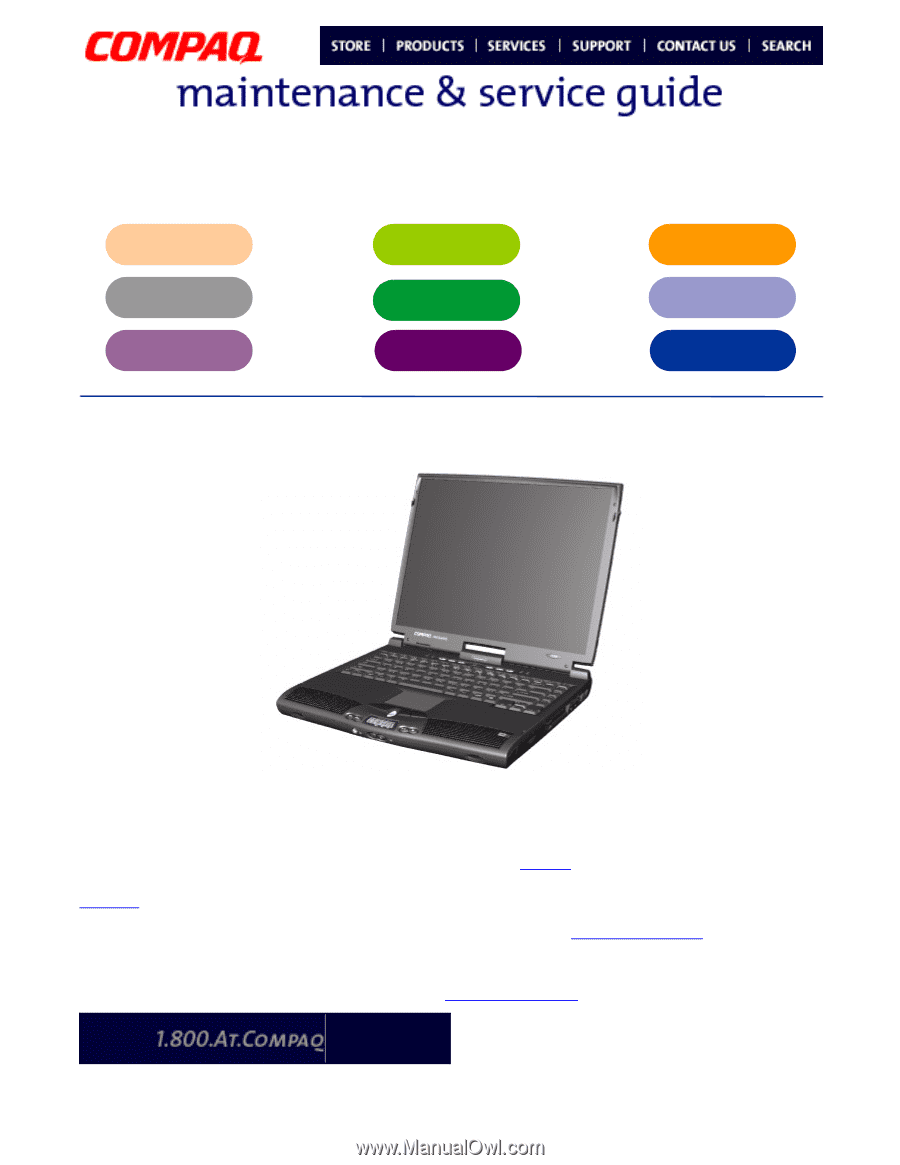
Welcome to the Maintenance & Service Guide (MSG)
Welcome to the
Maintenance and Service Guide
(MSG) for Compaq Presario 1800XL Series
Notebook Computers. This online guide is designed to serve the needs of technicians whose
job is to repair Compaq products.
For copyright and trademark information, refer to the
Notice
section of this MSG. To locate
your unit°s serial number, to see symbol conventions, or to view technician°s notes, see the
Preface
. This MSG is updated online as needed.
For comments or questions about the contents of this MSG,
contact Compaq
.
To report a technical problem, contact your Regional Support Center or IM Help Center.
For help on navigating in this guide, refer to
Using this Guide
.