Compaq Presario 18XL Maintenance & Service Guide Presario 1800/1800T Serie - Page 92
Heat Sink (Heatspreader
 |
View all Compaq Presario 18XL manuals
Add to My Manuals
Save this manual to your list of manuals |
Page 92 highlights
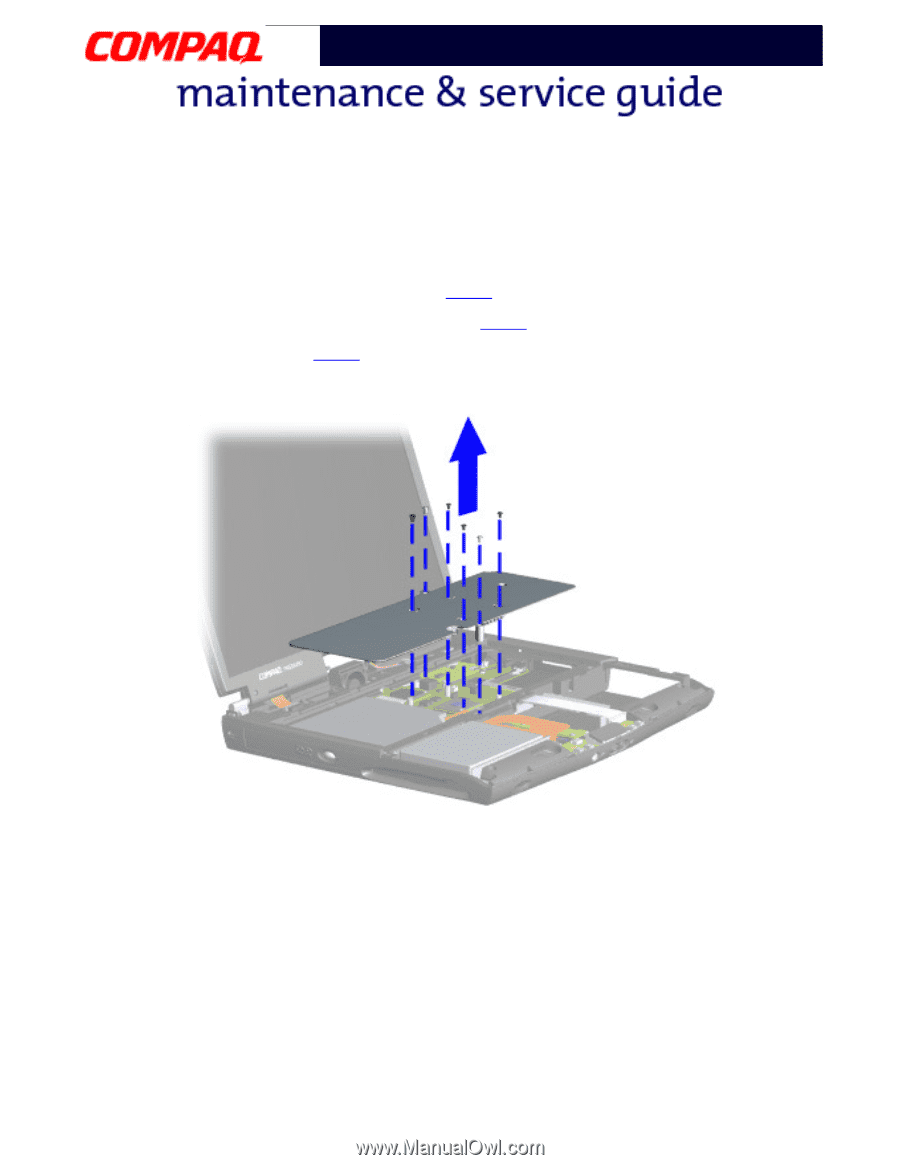
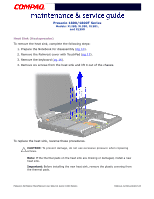
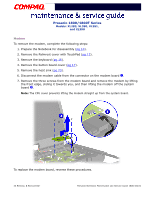
Presario 1800/1800T Series Models: XL280, XL380, XL381, and XL390 Heat Sink (Heatspreader) To remove the heat sink, complete the following steps: 1. Prepare the Notebook for disassembly (pg 10). 2. Remove the Palmrest cover with TouchPad (pg 13). 3. Remove the keyboard (pg 16). 4. Remove six screws from the heat sink and lift it out of the chassis. To replace the heat sink, reverse these procedures. Ä CAUTION: To prevent damage, do not use excessive pressure when replacing screws. Note: If the thermal pads on the heat sink are missing or damaged, install a new heat sink. Important: Before installing the new heat sink, remove the plastic covering from the thermal pads. PRESARIO NOTEBOOK MAINTENANCE AND SERVICE GUIDE 1800 SERIES REMOVAL & REPLACEMENT 23
-
 1
1 -
2
-
3
-
4
-
5
-
6
-
7
-
8
-
9
-
10
-
11
-
12
-
13
-
14
-
15
-
16
-
17
-
18
-
19
-
20
-
21
-
22
-
23
-
24
-
25
-
26
-
27
-
28
-
29
-
30
-
31
-
32
-
33
-
34
-
35
-
36
-
37
-
38
-
39
-
40
-
41
-
42
-
43
-
44
-
45
-
46
-
47
-
48
-
49
-
50
-
51
-
52
-
53
-
54
-
55
-
56
-
57
-
58
-
59
-
60
-
61
-
62
-
63
-
64
-
65
-
66
-
67
-
68
-
69
-
70
-
71
-
72
-
73
-
74
-
75
-
76
-
77
-
78
-
79
-
80
-
81
-
82
-
83
-
84
-
85
-
86
-
 87
87 -
 88
88 -
 89
89 -
 90
90 -
 91
91 -
 92
92 -
 93
93 -
 94
94 -
 95
95 -
 96
96 -
 97
97 -
98
-
99
-
100
-
101
-
102
-
103
-
104
-
105
-
106
-
107
-
108
-
109
-
110
-
111
-
112
-
113
-
114
-
115
-
116
-
117
-
118
-
119
-
120
-
121
-
122
-
123
-
124
-
125
-
126
-
127
-
128
-
129
-
130
-
131
-
132
-
133
-
134
 |
 |