Compaq Presario 18XL Maintenance & Service Guide Presario 1800/1800T Serie - Page 85
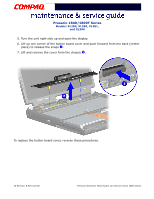
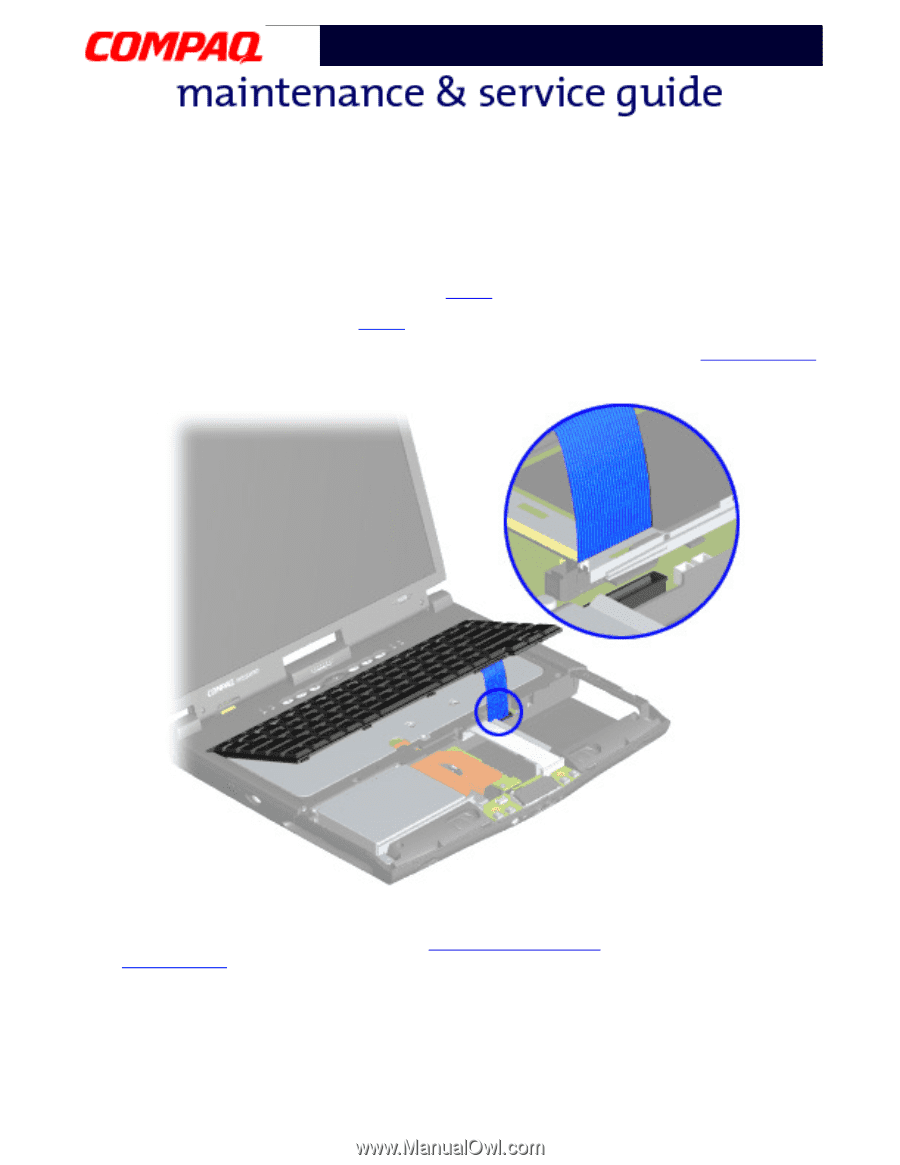
Keyboard, on the system board, and remove the keyboard.
 |
View all Compaq Presario 18XL manuals
Add to My Manuals
Save this manual to your list of manuals |
Page 85 highlights
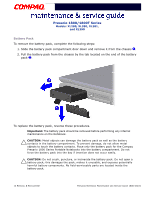
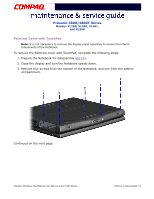
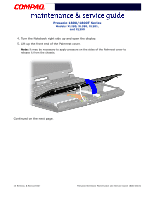
Presario 1800/1800T Series Models: XL280, XL380, XL381, and XL390 Keyboard To remove the keyboard, complete the following steps: 1. Prepare the Notebook for disassembly (pg 10). 2. Remove the Palmrest cover (pg 13). 3. Gently lift the front of the keyboard, disconnect the flex cable from the ZIF Connector on the system board, and remove the keyboard. To replace the keyboard, reverse these procedures. Note: When replacing the keyboard, the Keyboard Ribbon Cable should fold behind the ZIF Connector and not underneath the keyboard. 16 REMOVAL & REPLACEMENT PRESARIO NOTEBOOK MAINTENANCE AND SERVICE GUIDE 1800 SERIES
-
 1
1 -
2
-
3
-
4
-
5
-
6
-
7
-
8
-
9
-
10
-
11
-
12
-
13
-
14
-
15
-
16
-
17
-
18
-
19
-
20
-
21
-
22
-
23
-
24
-
25
-
26
-
27
-
28
-
29
-
30
-
31
-
32
-
33
-
34
-
35
-
36
-
37
-
38
-
39
-
40
-
41
-
42
-
43
-
44
-
45
-
46
-
47
-
48
-
49
-
50
-
51
-
52
-
53
-
54
-
55
-
56
-
57
-
58
-
59
-
60
-
61
-
62
-
63
-
64
-
65
-
66
-
67
-
68
-
69
-
70
-
71
-
72
-
73
-
74
-
75
-
76
-
77
-
78
-
79
-
 80
80 -
 81
81 -
 82
82 -
 83
83 -
 84
84 -
 85
85 -
 86
86 -
 87
87 -
 88
88 -
 89
89 -
 90
90 -
91
-
92
-
93
-
94
-
95
-
96
-
97
-
98
-
99
-
100
-
101
-
102
-
103
-
104
-
105
-
106
-
107
-
108
-
109
-
110
-
111
-
112
-
113
-
114
-
115
-
116
-
117
-
118
-
119
-
120
-
121
-
122
-
123
-
124
-
125
-
126
-
127
-
128
-
129
-
130
-
131
-
132
-
133
-
134
 |
 |
16 R
EMOVAL
& R
EPLACEMENT
P
RESARIO
N
OTEBOOK
M
AINTENANCE
AND
S
ERVICE
G
UIDE
1800 S
ERIES
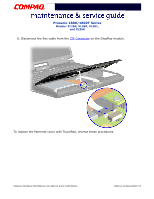
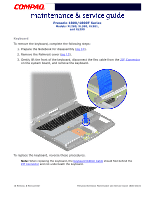
Presario 1800/1800T Series
Models: XL280, XL380, XL381,
and XL390
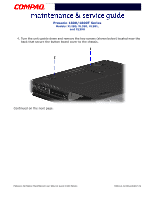
Keyboard
To remove the keyboard, complete the following steps:
1.
Prepare the Notebook for disassembly (
pg 10
).
2.
Remove the Palmrest cover (
pg 13
).
3.
Gently lift the front of the keyboard, disconnect the flex cable from the
ZIF Connector
on the system board, and remove the keyboard.
To replace the keyboard, reverse these procedures.
Note:
When replacing the keyboard, the
Keyboard Ribbon Cable
should fold behind the
ZIF Connector
and not underneath the keyboard.