D-Link DCS-900 Product Manual - Page 27
ASSIGNING AND OPENING VIRTUAL SERVER PORTS, Open Virtual Server Ports To Enable Remote Image Viewing
 |
UPC - 790069262012
View all D-Link DCS-900 manuals
Add to My Manuals
Save this manual to your list of manuals |
Page 27 highlights
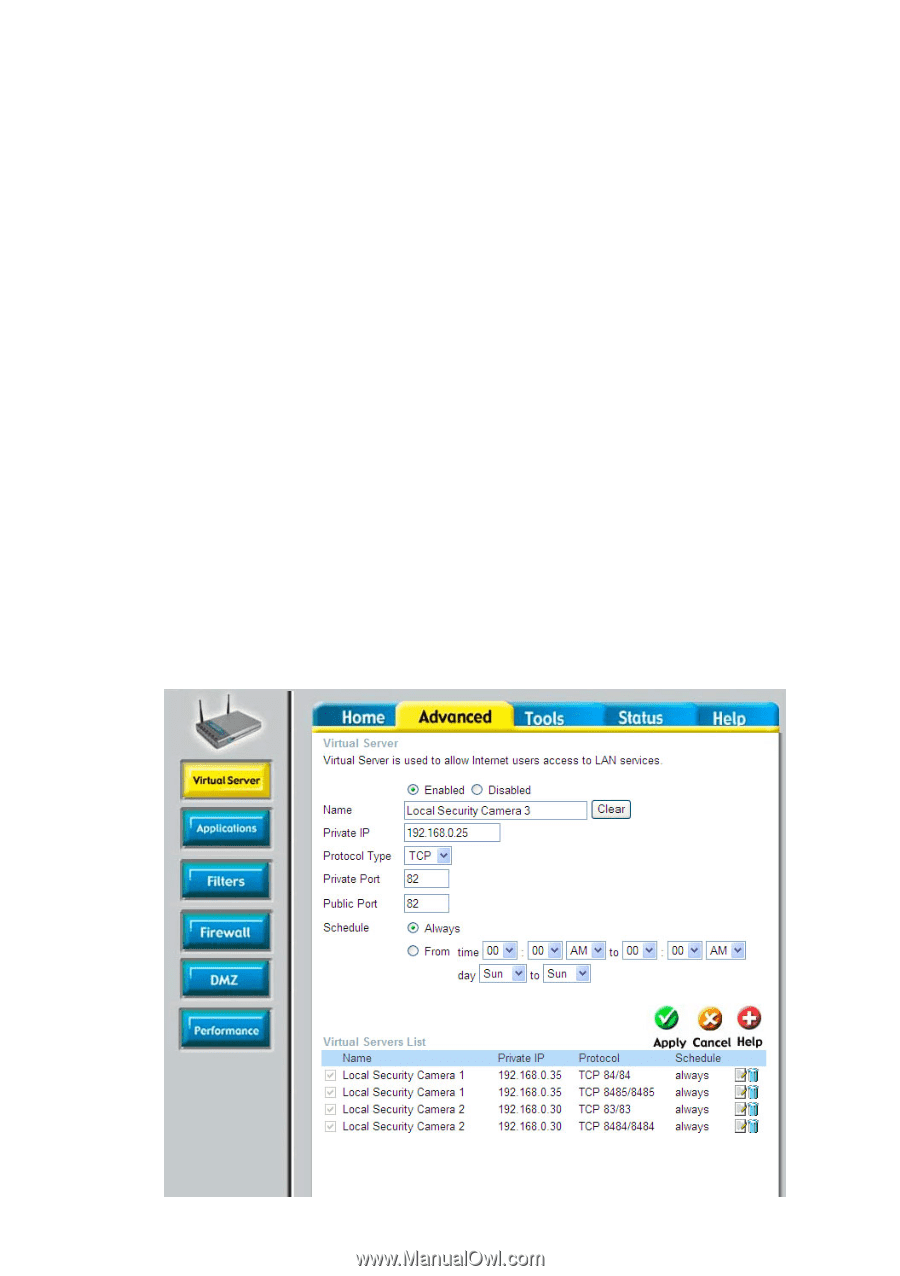
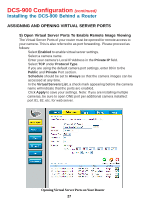
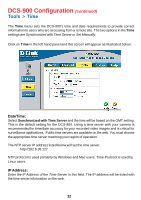
DCS-900 Configuration (continued) Installing the DCS-900 Behind a Router ASSIGNING AND OPENING VIRTUAL SERVER PORTS 5) Open Virtual Server Ports To Enable Remote Image Viewing The Virtual Server Ports of your router must be opened for remote access to your camera. This is also referred to as port forwarding. Please proceed as follows: • Select Enabled to enable virtual server settings. • Select a camera name. • Enter your camera's Local IP Address in the Private IP field. • Select TCP under Protocol Type. • If you are using the default camera port settings, enter 80 in to the Public and Private Port section. • Schedule should be set to Always so that the camera images can be accessed at any time. • In the Virtual Servers List, a check mark appearing before the camera name will indicate that the ports are enabled. • Click Apply to save your settings. Note: If you are installing multiple cameras, be sure to open ONE port per additional camera installed: port 81, 82, etc. for web server. Opening Virtual Server Ports on Your Router 27
-
 1
1 -
2
-
3
-
4
-
5
-
6
-
7
-
8
-
9
-
10
-
11
-
12
-
13
-
14
-
15
-
16
-
17
-
18
-
19
-
20
-
21
-
 22
22 -
 23
23 -
 24
24 -
 25
25 -
 26
26 -
 27
27 -
 28
28 -
 29
29 -
 30
30 -
 31
31 -
 32
32 -
33
-
34
-
35
-
36
-
37
-
38
-
39
-
40
-
41
-
42
-
43
-
44
-
45
-
46
-
47
-
48
-
49
-
50
-
51
-
52
-
53
-
54
-
55
-
56
-
57
-
58
-
59
-
60
-
61
-
62
-
63
-
64
-
65
-
66
-
67
-
68
-
69
-
70
-
71
-
72
-
73
-
74
-
75
-
76
-
77
-
78
-
79
-
80
-
81
-
82
-
83
-
84
-
85
-
86
-
87
-
88
-
89
-
90
-
91
-
92
-
93
 |
 |