Dell Dimension 5150 Owner's Manual - Page 83
Drives, IDE Drive Addressing - upgrade
 |
View all Dell Dimension 5150 manuals
Add to My Manuals
Save this manual to your list of manuals |
Page 83 highlights
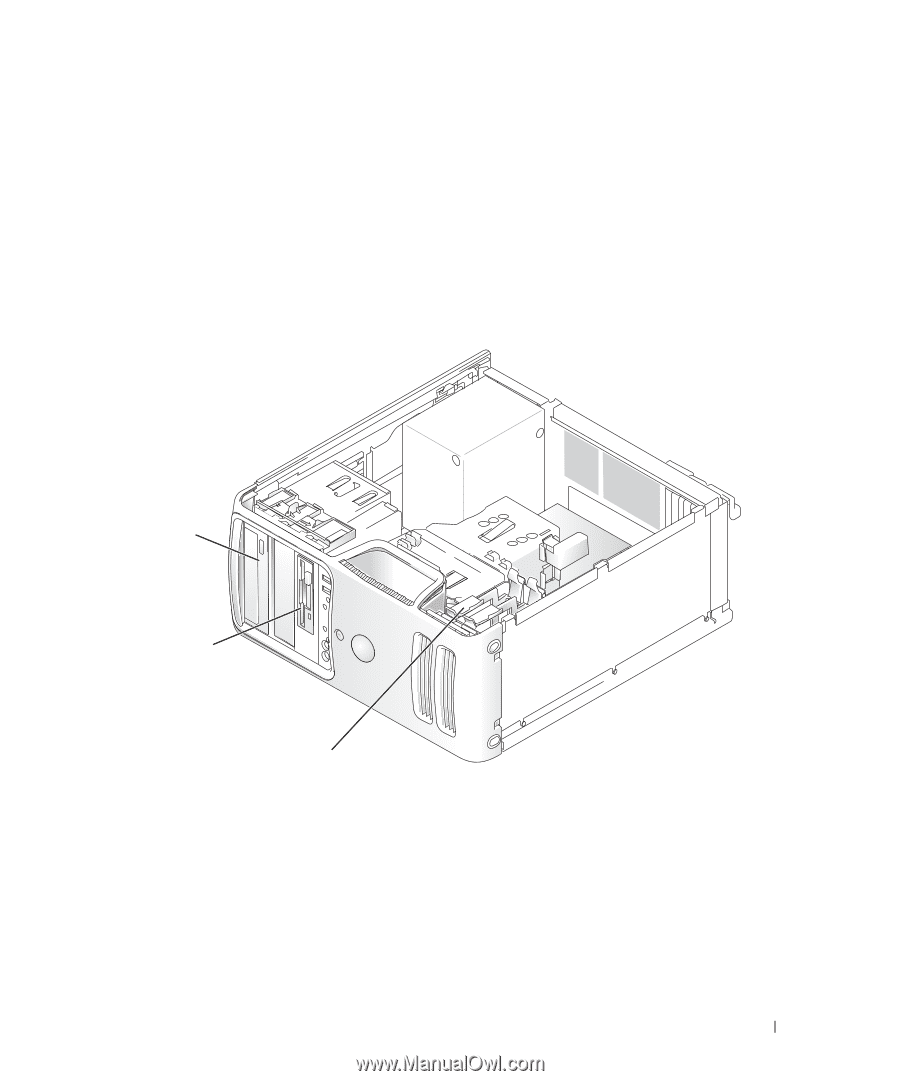
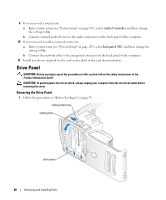
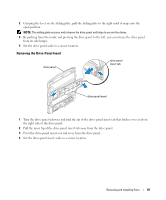
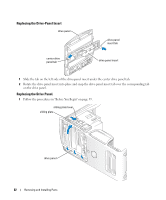
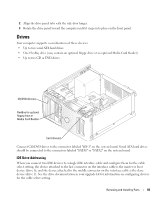
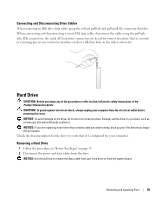
2 Align the drive panel tabs with the side-door hinges. 3 Rotate the drive panel toward the computer until it snaps into place on the front panel. Drives Your computer supports a combination of these devices: • Up to two serial ATA hard drives • One FlexBay drive (may contain an optional floppy drive or an optional Media Card Reader) • Up to two CD or DVD drives CD/DVD drive(s) FlexBay for optional floppy drive or Media Card Reader hard drive(s) Connect CD/DVD drives to the connector labeled "IDE1" on the system board. Serial ATA hard drives should be connected to the connectors labeled "SATA0" or "SATA2" on the system board. IDE Drive Addressing When you connect two IDE devices to a single IDE interface cable and configure them for the cable select setting, the device attached to the last connector on the interface cable is the master or boot device (drive 0), and the device attached to the middle connector on the interface cable is the slave device (drive 1). See the drive documentation in your upgrade kit for information on configuring devices for the cable select setting. Removing and Installing Parts 83
-
 1
1 -
2
-
3
-
4
-
5
-
6
-
7
-
8
-
9
-
10
-
11
-
12
-
13
-
14
-
15
-
16
-
17
-
18
-
19
-
20
-
21
-
22
-
23
-
24
-
25
-
26
-
27
-
28
-
29
-
30
-
31
-
32
-
33
-
34
-
35
-
36
-
37
-
38
-
39
-
40
-
41
-
42
-
43
-
44
-
45
-
46
-
47
-
48
-
49
-
50
-
51
-
52
-
53
-
54
-
55
-
56
-
57
-
58
-
59
-
60
-
61
-
62
-
63
-
64
-
65
-
66
-
67
-
68
-
69
-
70
-
71
-
72
-
73
-
74
-
75
-
76
-
77
-
 78
78 -
 79
79 -
 80
80 -
 81
81 -
 82
82 -
 83
83 -
 84
84 -
 85
85 -
 86
86 -
 87
87 -
 88
88 -
89
-
90
-
91
-
92
-
93
-
94
-
95
-
96
-
97
-
98
-
99
-
100
-
101
-
102
-
103
-
104
-
105
-
106
-
107
-
108
-
109
-
110
-
111
-
112
-
113
-
114
-
115
-
116
-
117
-
118
-
119
-
120
-
121
-
122
-
123
-
124
-
125
-
126
-
127
-
128
-
129
-
130
-
131
-
132
-
133
-
134
-
135
-
136
-
137
-
138
-
139
-
140
-
141
-
142
 |
 |