Dell XPS 730 H2C Service Manual - Page 18
hard drive
 |
View all Dell XPS 730 H2C manuals
Add to My Manuals
Save this manual to your list of manuals |
Page 18 highlights
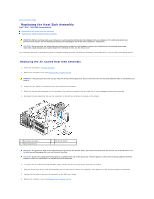
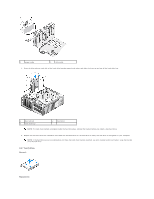
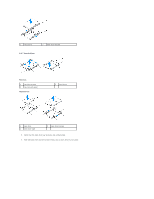
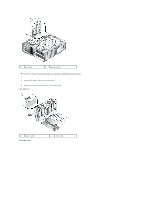
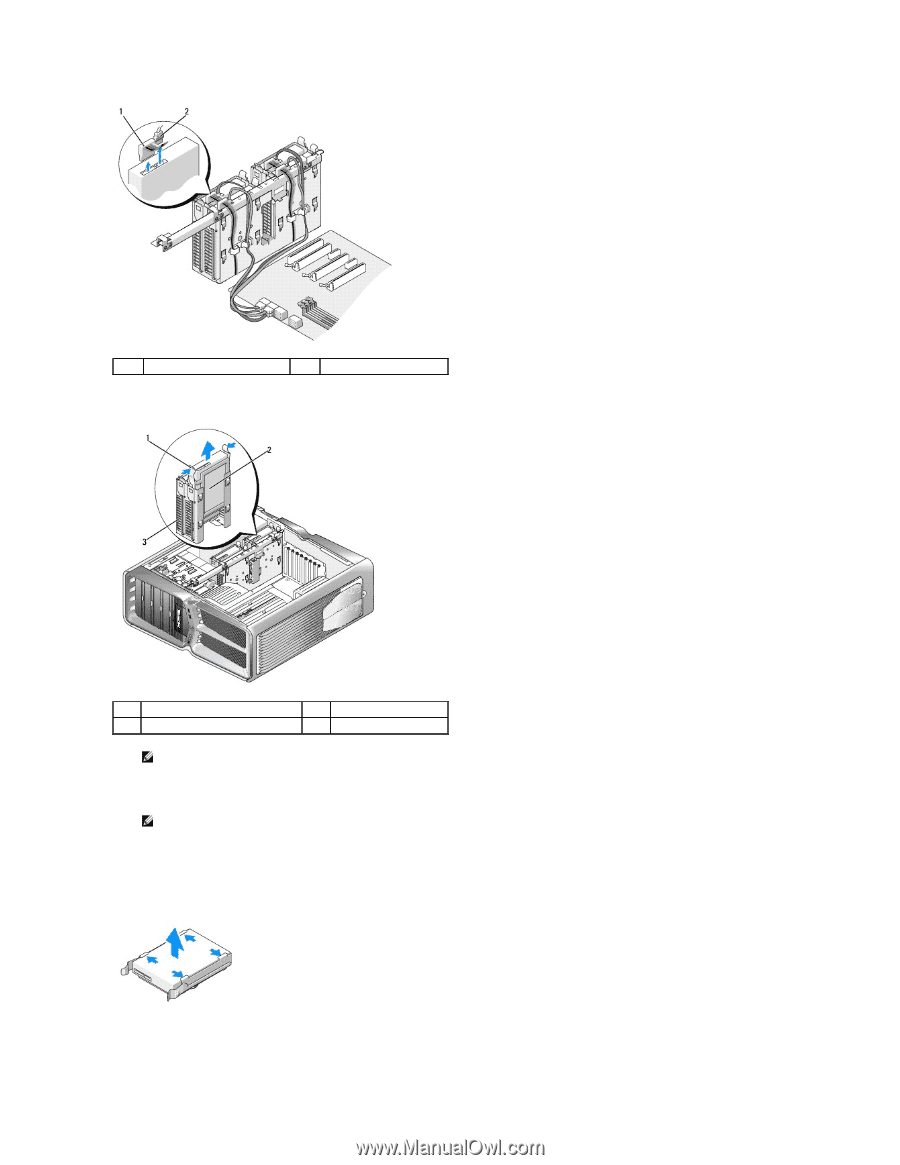
1 power cable 2 data cable 4. Press the blue tabs on each side of the hard drive bracket toward each other and slide the drive up and out of the hard drive bay. 1 blue tabs (2) 3 hard drive bay 2 hard drive NOTE: If a hard drive bracket is installed inside the hard drive bay, remove the bracket before you install a new hard drive. 5. Prepare the new hard drive for installation and check the documentation for the hard drive to verify that the drive is configured for your computer. NOTE: If the hard drive you are installing does not have the hard drive bracket attached, use your original hard drive bracket; snap the bracket onto the new drive. 3.5" hard drive: Removal: Replacement:
-
 1
1 -
2
-
3
-
4
-
5
-
6
-
7
-
8
-
9
-
10
-
11
-
12
-
 13
13 -
 14
14 -
 15
15 -
 16
16 -
 17
17 -
 18
18 -
 19
19 -
 20
20 -
 21
21 -
 22
22 -
 23
23 -
24
-
25
-
26
-
27
-
28
-
29
-
30
-
31
-
32
-
33
-
34
-
35
-
36
-
37
-
38
-
39
-
40
-
41
-
42
-
43
-
44
-
45
-
46
-
47
-
48
-
49
-
50
-
51
-
52
 |
 |
4.
Press the blue tabs on each side of the hard drive bracket toward each other and slide the drive up and out of the hard drive bay.
5.
Prepare the new hard drive for installation and check the documentation for the hard drive to verify that the drive is configured for your computer.
3.5" hard drive:
Removal:
Replacement:
1
power cable
2
data cable
1
blue tabs (2)
2
hard drive
3
hard drive bay
NOTE:
If a hard drive bracket is installed inside the hard drive bay, remove the bracket before you install a new hard drive.
NOTE:
If the hard drive you are installing does not have the hard drive bracket attached, use your original hard drive bracket; snap the bracket
onto the new drive.