Epson CX5800F Basics
Epson CX5800F - Stylus Color Inkjet Manual
 |
UPC - 010343856264
View all Epson CX5800F manuals
Add to My Manuals
Save this manual to your list of manuals |
Epson CX5800F manual content summary:
- Epson CX5800F | Basics - Page 1
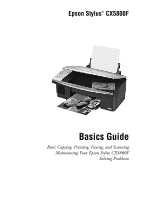
Epson Stylus® CX5800F Basics Guide Basic Copying, Printing, Faxing, and Scanning Maintaining Your Epson Stylus CX5800F Solving Problems - Epson CX5800F | Basics - Page 2
using digital cameras, scanners, and ink jet printers. Trademarks Epson and Epson Stylus are registered trademarks and Exceed Your Vision is a trademark of Seiko Epson Corporation. Epson Connection, Epson Store, and SoundAdvice are service marks of Epson America, Inc. USB DIRECT-PRINT™ and the USB - Epson CX5800F | Basics - Page 3
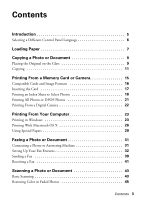
23 Printing in Windows 23 Printing With Macintosh OS X 26 Using Special Papers 29 Faxing a Photo or Document 31 Connecting a Phone or Answering Machine 31 Setting Up Your Fax Features 32 Sending a Fax 39 Receiving a Fax 41 Scanning a Photo or Document 43 Basic Scanning 43 Restoring Color - Epson CX5800F | Basics - Page 4
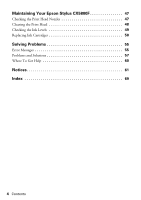
Maintaining Your Epson Stylus CX5800F 47 Checking the Print Head Nozzles 47 Cleaning the Print Head 48 Checking the Ink Levels 49 Replacing Ink Cartridges 50 Solving Problems 55 Error Messages 55 Problems and Solutions 57 Where To Get Help 60 Notices 61 Index 69 4 Contents - Epson CX5800F | Basics - Page 5
tells you how to do most of these things without ever turning on your computer! Of course your Epson Stylus CX5800F can do lots more when you connect it to your Windows® or Macintosh® computer. For additional instructions, see the on-screen User's Guide by selecting the icon for it on your desktop - Epson CX5800F | Basics - Page 6
Control Panel Language If you prefer to view messages on the Epson Stylus CX5800F display in a language other than English, follow these steps: 1. Press the P On button to turn on the Epson Stylus CX5800F, or press the y Cancel/Back button until you see a screen like this: 12:00 PM Y 2. Press - Epson CX5800F | Basics - Page 7
here to load paper in your Epson Stylus CX5800F all-in-one. 1. Open the paper support and output tray, then slide out the extensions. 2. Flip the feeder guard forward. Then slide the left edge guide to the left. 3. Insert the paper, printable side up, against the right edge guide. Always load it - Epson CX5800F | Basics - Page 8
use one of Epson's special ink jet papers designed for your printer. For example, your photos will look great printed on Epson Premium Glossy Photo Paper. See page 29 for details. 4. Slide the left edge guide against the left edge of the paper (but not too tightly). Then flip the feeder guard back - Epson CX5800F | Basics - Page 9
Copying a Photo or Document Follow the instructions in this section to: ■ Position your photo or document correctly on the glass (see below) ■ Make copies document cover beyond where it stops and do not place heavy objects on top of the Epson Stylus CX5800F all-in-one. Copying a Photo or Document 9 - Epson CX5800F | Basics - Page 10
open it and pull it straight up. If you need to press the document flat while you copy or scan it, do not press too hard and be careful not to move it. Caution: Do not use excessive When you are done, replace the document cover by inserting the tabs back into the slots. 10 Copying a Photo or Document - Epson CX5800F | Basics - Page 11
which type is selected. 8. Press the paper size button to select Letter. 9. To make a color copy, press the x Start Color button. To make a black and white copy, press the x Start B&W button. Printing appears on the display and the Epson Stylus CX5800F starts copying. If you need to stop - Epson CX5800F | Basics - Page 12
(printed without a white border), press the Copy button again to select Fit to Page mode. (If you select 100%, photos are printed color copy, press the x Start Color button. To make a black and white copy, press the x Start B&W button. Printing appears on the display and the Epson Stylus CX5800F - Epson CX5800F | Basics - Page 13
is printed faster. 1. Load plain, letter-size paper. 2. Press the Copy button. You see this display: 3. Press the paper type button to select Plain Paper. Copies:1 100% 4. Press the paper size button to select Letter. 5. Hold down the y Cancel/Back button, then press the x Start Color button - Epson CX5800F | Basics - Page 14
14 Copying a Photo or Document - Epson CX5800F | Basics - Page 15
Card or Camera The Epson Stylus CX5800F all-in-one lets you print color photos directly from your digital camera's memory card; just insert it into a memory card slot on the Epson Stylus CX5800F and you're ready to print. If your digital camera supports DPOF™ (Digital Print Order Format), you can - Epson CX5800F | Basics - Page 16
* Adapter required The Epson Stylus CX5800F supports image files that meet one partition) taken with a DCF version 1.0 or 2.0 compliant digital camera Supports Exif version 2.21 80 × 80 pixels to 9200 × 9200 pixels Up to 999 * DCF is the "Design rule for Camera File system" standard 16 Printing - Epson CX5800F | Basics - Page 17
Make sure the Epson Stylus CX5800F is turned on. Note: When you print directly from a memory card, it is best if the Epson Stylus CX5800F is not connected to card into the correct slot. See page 16 for details. Insert just one card at a time Left slot Right slot Memory card access light The - Epson CX5800F | Basics - Page 18
. Then you mark the photos on the index sheet that you want to print, scan the sheet, and let the Epson Stylus CX5800F automatically print the selected photos. Printing the Index Sheet 1. Make sure your Epson Stylus CX5800F is not connected to your computer (or your computer is turned off ). 2. Load - Epson CX5800F | Basics - Page 19
button. The Epson Stylus CX5800F starts printing the index sheet(s). This may take a few minutes. For multiple index sheets, the pages containing the most recent images are printed first. If you want to cancel printing more sheets, press the y Cancel/Back button. Now follow the instructions below to - Epson CX5800F | Basics - Page 20
at a time. (See page 7 for details.) You can load more paper later as necessary to print all your selected photos. 5. The display should now look like this, indicating that the Epson Stylus CX5800F is ready to scan the index sheet: 2.Img:92 Scn Idx If this setting is not displayed, press the Memory - Epson CX5800F | Basics - Page 21
Plain Paper, the photos print with a white border. If you select Photo Paper, the photos print borderless, to the edge of the paper. 5. Select Letter, 4"x 6", or 5"x 7" for the paper size. 6. Press the OK button to start printing. Note: If you need to stop printing, press the y Cancel/Back button - Epson CX5800F | Basics - Page 22
your camera to the USB connector on the front of your Epson Stylus CX5800F. 7. Turn on your camera and select the photos you want to print. Then adjust any necessary settings and print your photos as explained in your camera manual. 8. When you're finished, disconnect your camera and cable from the - Epson CX5800F | Basics - Page 23
a photo or document stored on your Windows or Macintosh computer. Note: For detailed instructions on printing, see the on-screen User's Guide. Before you start, make sure you've installed your printer software and connected the Epson Stylus CX5800F all-in-one to your computer as described on the - Epson CX5800F | Basics - Page 24
4. Make sure EPSON Stylus CX5800F Series is selected, then click the Preferences or Properties button. (If you see a Setup, Printer, or Options button, click it. Then click Preferences or Properties on the next screen.) 5. On the Main tab, select the basic print settings: Select the type of document - Epson CX5800F | Basics - Page 25
color management method (To choose No Color Adjustment, click ICM first) Select Paper & Quality Options as necessary Select Print Print to start printing. This window appears and shows the progress of your print job. Cancel printing Pause or resume printing Check remaining ink levels Printing - Epson CX5800F | Basics - Page 26
Feeder - Borderless) option in the Paper Size list for your paper size (US Letter, 8 x 10, 5 x 7, or 4 x 6). 4. Click OK to close the Page Setup window. 5. Open the File menu and select Print. You see a window like this one: Select Stylus CX5800F Select Print Settings 26 Printing From Your Computer - Epson CX5800F | Basics - Page 27
your print job to print at a later time. ■ Paper Handling: Select page printing options, such as Reverse print order or Page Order. ■ ColorSync or Color Management: Select ColorSync®or adjust the color controls, change the gamma setting, or turn off color adjustments in the printer software. ■ Cover - Epson CX5800F | Basics - Page 28
click the Print Center icon instead, then double-click Stylus CX5800F in the Printer List window. You see a screen like this: Pause printing Resume printing Cancel printing Select the print job 11. When you're finished, close the printer window or Print Center. 28 Printing From Your Computer - Epson CX5800F | Basics - Page 29
printer software: For this paper Plain paper or Epson Premium Bright White Paper Epson Matte Paper Heavyweight Epson Double-Sided Matte Paper Epson Photo Quality Ink Jet Paper Epson Ultra Premium Glossy Photo Paper Epson Premium Glossy Photo Paper Epson Premium Semigloss Photo Paper Epson Glossy - Epson CX5800F | Basics - Page 30
30 Printing From Your Computer - Epson CX5800F | Basics - Page 31
■ "Receiving a Fax" on page 41 For more information on faxing and selecting fax settings, see the User's Guide. Connecting a Phone or Answering Machine If you're connecting the Epson Stylus CX5800F to a phone line, and connecting a telephone or answering machine to the same phone line so you can - Epson CX5800F | Basics - Page 32
You also need to set up your Epson Stylus CX5800F to receive faxes manually. See page 41 for details. Setting Up Your Fax Features Before sending or receiving faxes, you may want to create a fax header, select your fax - Epson CX5800F | Basics - Page 33
You return to the 2.Date/Time display. 16. If you want to print your fax number in the fax header, press the u or d Back button until you return to the first screen. Selecting the Paper Size Before you receive a fax, be sure to load plain paper and set the Paper Size setting to the size of paper - Epson CX5800F | Basics - Page 34
or when the Epson Stylus CX5800F prints a report for outgoing faxes. Select Off to turn off report printing, On Error to print reports only when an error occurs, or On Send to print reports for every fax you send. Indicates whether you can send faxes in black and white or color (by pressing the - Epson CX5800F | Basics - Page 35
. Indicates the number of rings that must occur before the Epson Stylus CX5800F automatically receives a fax. To change the fax settings listed Scan & Print S 1.Resolution 5. Press the u or d button, or press the 3, 4, 5, or 6 key on the numeric keypad, to display one of these options: ■ 3.Paper - Epson CX5800F | Basics - Page 36
or press the 2, 3, 4, or 5 key on the numeric keypad, to display one of these options: ■ 2.DRD ■ 3.ECM: On/Off ■ 4.V.34: On/ When you're finished, press the y Cancel/Back button to return to the first screen. Setting add names to identify the recipients and print the speed dial list. 1. Press the - Epson CX5800F | Basics - Page 37
speed dial entry number: 11. If you want to add another speed dial entry, repeat steps 6 through 10. When you're finished, press the y Cancel/Back button to return to the 3.Speed Dial Setup menu. Editing or Deleting a Speed Dial Entry 1. To edit a speed dial entry, press the OK button. Then - Epson CX5800F | Basics - Page 38
to delete this entry, or press the u or d button to select a different entry and press the OK button to delete it. Printing Your Speed Dial List 1. Press the y Cancel/Back button to return to the first fax screen. 2. Press the Setup button. You see this display: 3. Press the u or d button, or - Epson CX5800F | Basics - Page 39
pag Note: If the fax number is busy or there is some other connection problem, you see an error message and the Epson Stylus CX5800F returns to the first fax mode screen. The Epson Stylus CX5800F redials the number after one minute. Wait for the redial, or check your connection and settings and try - Epson CX5800F | Basics - Page 40
If you're sending a color fax, or a large document that fills up the memory area, the Epson Stylus CX5800F scans and faxes one page at a time. It problem, you see an error message and the Epson Stylus CX5800F returns to the first fax mode screen. The Epson Stylus CX5800F redials the number after one - Epson CX5800F | Basics - Page 41
CX5800F scans and faxes one page at a time. It then asks if you want to send another page. The fax connection stays open until you are finished. Receiving a Fax The Epson Stylus CX5800F automatically receives and prints faxes in Auto Answer mode. However, you may want to receive faxes manually - Epson CX5800F | Basics - Page 42
Start Color button to receive the fax. The message Receiving appears on the display. After the Epson Stylus CX5800F receives all the pages, it begins printing the fax. When it's finished, you see the message Complete. Note: If you run out of paper during printing, you see the error message Paper out - Epson CX5800F | Basics - Page 43
You can use your Epson Stylus CX5800F all-in-one to scan a photo or document and save it on your computer or other device. You can even automatically restore faded color photographs as you scan. See page 45 for details. The EPSON Scan software provides three scanning modes for progressive levels - Epson CX5800F | Basics - Page 44
Import or Acquire, and select EPSON Stylus CX5700F/CX5800F. You see the EPSON Scan standby window: 4. If the Mode setting in the upper right corner is set to Full Auto Mode, click the Scan button. Note: If you want to automatically restore a color photo as you scan, click the Customize button. See - Epson CX5800F | Basics - Page 45
in Faded Photos You can automatically transform an old, faded, or badly exposed color photo into one with true-to-life color and sharpness as you scan. Look for the Color Restoration option in EPSON Scan's Full Auto, Home, and Professional Mode screens: Full Auto Mode Click the Customize button - Epson CX5800F | Basics - Page 46
46 Scanning a Photo or Document - Epson CX5800F | Basics - Page 47
Your Epson Stylus CX5800F If you notice a decline in print quality, follow the instructions in this chapter for: ■ "Checking the Print Head Nozzles" (below) ■ "Cleaning the Print Head" on page 48 ■ "Checking the Ink Levels" on page 49 ■ "Replacing Ink Cartridges" on page 50 Checking the Print Head - Epson CX5800F | Basics - Page 48
as described on the next page. Note: You can also check the print head nozzles using software when the Epson Stylus CX5800F is connected to your computer. See the User's Guide for instructions. Cleaning the Print Head If your printouts are unexpectedly light or faint, or you notice light or dark - Epson CX5800F | Basics - Page 49
Cancel/Back button to return to the first screen. If you need to replace an ink cartridge, see page 50. Note: You can also check the ink levels using software when the Epson Stylus CX5800F is connected to your computer. See the User's Guide for instructions. Maintaining Your Epson Stylus CX5800F - Epson CX5800F | Basics - Page 50
result in printer damage. Yields vary considerably based on images printed, print settings, paper type, frequency of use, and temperature. The printer ships with full cartridges and part of the ink from the first cartridges is used for priming the printer. 50 Maintaining Your Epson Stylus CX5800F - Epson CX5800F | Basics - Page 51
Do not open the scanner when the document cover is open. Do not move the print head by hand; this may damage the Epson Stylus CX5800F. Always select 5.Replace Cartridge from the display to move it. 6. Open the cartridge cover, then squeeze the tab at the back of the cartridge and lift it straight - Epson CX5800F | Basics - Page 52
the ink cartridge. 8. Place the new ink cartridge into the cartridge holder and push it down until it clicks into place. 9. Replace any other cartridges that need to be replaced. 10. Close the ink cartridge cover and press it until it clicks into place. 52 Maintaining Your Epson Stylus CX5800F - Epson CX5800F | Basics - Page 53
Color OK Charging takes about one minute. When it's finished, 5.Replace Cartridge appears on the display. Caution: Never turn off the Epson Stylus CX5800F while Charging appears on the display or you'll waste ink. Note: If you see an ink cartridge error message on the display, the ink cartridge - Epson CX5800F | Basics - Page 54
54 Maintaining Your Epson Stylus CX5800F - Epson CX5800F | Basics - Page 55
If you have a problem with your Epson Stylus CX5800F all-in-one, check the display on the control panel to diagnose the cause. You can also check "Problems and Solutions" on page 57 for basic troubleshooting suggestions, or double-click the User's Guide icon on your computer desktop for more - Epson CX5800F | Basics - Page 56
Ink cartridge error -> Cartridge replacement is necessary. Press the OK button to begin. An ink cartridge that is not supported by the Epson Stylus CX5800F is installed. See page 50 for replacement instructions than one mark one used to print Start Color button to a fax machine that prints only - Epson CX5800F | Basics - Page 57
required. See your documentation for details. Printer error -> or Scanner error -> See your documentation and call service if necessary. Cause and solution The paper thickness lever is set to the m L position. If you are printing on paper sheets, press x Start Color or x Start B&W to continue. If - Epson CX5800F | Basics - Page 58
stuck inside the Epson Stylus CX5800F, press the P On button to turn it off. Open the scanner and remove any paper inside, including any torn pieces. Do not pull it backward however; this can damage the sheet feeder. Close the scanner, then turn the Epson Stylus CX5800F back on. 58 Solving Problems - Epson CX5800F | Basics - Page 59
to align the print head. See your User's Guide for instructions. ■ The ink cartridges may be old or low on ink. See page 50 for instructions on replacing an ink cartridge. ■ If a dotted line appears in the image, clean the document table glass with a soft, dry, lint-free cloth (paper towels are not - Epson CX5800F | Basics - Page 60
in the following table. Service World Wide Web Automated Telephone Services Access From the Internet, you can reach Epson Support at http://support.epson.com. At this site, you can download drivers and other files, look at product documentation, access troubleshooting information, and receive - Epson CX5800F | Basics - Page 61
if it is tilted or at an angle. ■ Make sure the back of the Epson Stylus CX5800F is at least 3.9 inches (10 cm) away from the wall. ■ Do not open the scanner section while the Epson Stylus CX5800F is copying, printing, or scanning. ■ Do not spill liquid on the Epson Stylus CX5800F. Notices 61 - Epson CX5800F | Basics - Page 62
inside the Epson Stylus CX5800F or touch any cartridges during printing. ■ Install a new ink cartridge immediately after removing an empty one. Leaving cartridges uninstalled can dehydrate the print head and may prevent the Epson Stylus CX5800F from printing. ■ If you remove an ink cartridge for - Epson CX5800F | Basics - Page 63
CPU Boards and Power Supplies used with Class B Personal Computers: We: Located at: Epson America, Inc. MS 3-13 3840 Kilroy Airport Way Long Beach, CA 90806 Telephone: Name: Epson Type of Product: Multifunction printer Model: C271A ENERGY STAR Compliance As an ENERGY STAR® Partner, Epson has - Epson CX5800F | Basics - Page 64
Users This equipment complies with Part 68 of the FCC rules. On the back connected to one line should 00 are the REN without a decimal point (e.g., service. This product is not intended to be repaired. If you experience trouble with this equipment, please contact: Name: Address: Telephone: Epson - Epson CX5800F | Basics - Page 65
program this information into your fax machine, follow the instructions in "Creating Header Information" on page 32. According and that this is a major nationwide problem. If your home has specially wired off and on, the user is encouraged to try to correct the interference by one or more of the - Epson CX5800F | Basics - Page 66
limits established by the FCC for this equipment. It is the responsibility of the user to obtain and use a shielded equipment interface cable with this device. If this equipment has more than one interface connector, do not leave cables connected to unused interfaces. Changes or modifications not - Epson CX5800F | Basics - Page 67
any color change or fading of prints or reimbursement of materials or services required for reprinting. This warranty does not cover damage to the Epson product caused by parts or supplies not manufactured, distributed or certified by Epson. This warranty does not cover ribbons, ink cartridges or - Epson CX5800F | Basics - Page 68
shipping, damage caused by disasters such as fire, flood, and lightning, improper electrical current, software problems, interaction with nonEpson products, or service other than by an Epson Authorized Servicer. If a claimed defect cannot be identified or reproduced, you will be held responsible for - Epson CX5800F | Basics - Page 69
, 12 printing, Macintosh, 26 to 27 printing, Windows, 24 C Camera, printing from, 22 Cleaning document table glass, 59 print head, 48 to 49 Color Management, turning off, 25, 27 Color, restoring while scanning, 45 ColorSync, 27 Copying documents, 11 photos, 12 placing originals, 9 to 10 problems, 57 - Epson CX5800F | Basics - Page 70
, 22 Print head checking nozzles, 47 to 48 cleaning, 48 to 49 Printing from camera, 22 from computer, 23 to 29 from memory card, 15 to 21 Problems, solving copying, 57 error messages, 55 to 57 faxing, 58 help, 60 paper feeding, 58 print quality, 59 S Safety instructions, 61 to 62 Scanning basic, 43 - Epson CX5800F | Basics - Page 71
T Technical support, 60 Telephone connecting, 31 safety instructions, 62 Time setting, 32 to 33 Troubleshooting, 55 to 60 U USB DIRECT-PRINT camera, printing from, 22 W Warranty, 67 to 68 Windows, printing with, 23 to 25 Index 71 - Epson CX5800F | Basics - Page 72
CPD-20213R1 Printed in XXXXXX XX.XX-XX XXX
-
 1
1 -
 2
2 -
 3
3 -
 4
4 -
 5
5 -
 6
6 -
 7
7 -
8
-
9
-
10
-
11
-
12
-
13
-
14
-
15
-
16
-
17
-
18
-
19
-
20
-
21
-
22
-
23
-
24
-
25
-
26
-
27
-
28
-
29
-
30
-
31
-
32
-
33
-
34
-
35
-
36
-
37
-
38
-
39
-
40
-
41
-
42
-
43
-
44
-
45
-
46
-
47
-
48
-
49
-
50
-
51
-
52
-
53
-
54
-
55
-
56
-
57
-
58
-
59
-
60
-
61
-
62
-
63
-
64
-
65
-
66
-
67
-
68
-
69
-
70
-
71
-
72
 |
 |
Epson Stylus
CX5800F
Basics Guide
Basic Copying, Printing, Faxing, and Scanning
Maintaining Your Epson Stylus CX5800F
Solving Problems
®