Epson LQ-2500 User Manual - Page 16
Paper feeding, On line/Off line, Print quality/font selection, SelecType.
 |
View all Epson LQ-2500 manuals
Add to My Manuals
Save this manual to your list of manuals |
Page 16 highlights
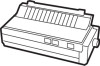
From this panel, you can control almost all printer functions. On the LQ-2500 there aren't any DIP switches to set or reset as on most printers, because Se&Type controls these settings. The four buttons on the panel have multiple names to control different functions. Generally however, they control four areas of printer operation: On line/Off line Paper feeding Print quality/font selection SelecType. On line/off line The ON LINE button switches the printer between the on line and off line states. In the on line state the display reads [ON LINE], which means: The printer can receive and print data, and the green ON LINE, POWER, and READY lights are on. You can enter the SelecType mode, using the two ENTER SelecType buttons. You can use the DRAFT and LQ buttons to select between the two types of print quality: draft and Letter Quality (if you select Letter Quality you can also select among the LQ-2500's five fonts-see Print quality/font selection.) In the off line state, the display panel reads [OFF LINE], which means: l The printer cannot receive any data, and the green ON LINE and READY lights are off. l You can use the LINE FEED button to advance the paper. Pressing the button once advances the paper one line: holding the button down advances the paper continuously When the power is on, always use this button to advance the paper. Setting Up the Printer 1-7
-
 1
1 -
2
-
3
-
4
-
5
-
6
-
7
-
8
-
9
-
10
-
 11
11 -
 12
12 -
 13
13 -
 14
14 -
 15
15 -
 16
16 -
 17
17 -
 18
18 -
 19
19 -
 20
20 -
 21
21 -
22
-
23
-
24
-
25
-
26
-
27
-
28
-
29
-
30
-
31
-
32
-
33
-
34
-
35
-
36
-
37
-
38
-
39
-
40
-
41
-
42
-
43
-
44
-
45
-
46
-
47
-
48
-
49
-
50
-
51
-
52
-
53
-
54
-
55
-
56
-
57
-
58
-
59
-
60
-
61
-
62
-
63
-
64
-
65
-
66
-
67
-
68
-
69
-
70
-
71
-
72
-
73
-
74
-
75
-
76
-
77
-
78
-
79
-
80
-
81
-
82
-
83
-
84
-
85
-
86
-
87
-
88
-
89
-
90
-
91
-
92
-
93
-
94
-
95
-
96
-
97
-
98
-
99
-
100
-
101
-
102
-
103
-
104
-
105
-
106
-
107
-
108
-
109
-
110
-
111
-
112
-
113
-
114
-
115
-
116
-
117
-
118
-
119
-
120
-
121
-
122
-
123
-
124
-
125
-
126
-
127
-
128
-
129
-
130
-
131
-
132
-
133
-
134
-
135
-
136
-
137
-
138
-
139
-
140
-
141
-
142
-
143
-
144
-
145
-
146
-
147
-
148
-
149
-
150
-
151
-
152
-
153
-
154
-
155
-
156
-
157
-
158
-
159
-
160
-
161
-
162
-
163
-
164
-
165
-
166
-
167
-
168
-
169
-
170
-
171
-
172
-
173
-
174
-
175
-
176
-
177
-
178
-
179
-
180
-
181
-
182
-
183
-
184
 |
 |
