Epson LQ-2500 User Manual - Page 50
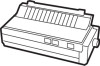
The paper guide has notches at either side that fit over two pins, it is installed horizontally
 |
View all Epson LQ-2500 manuals
Add to My Manuals
Save this manual to your list of manuals |
Page 50 highlights
10. If the paper is straight and has no wrinkles, lock the right sprocket unit in place. 11. Turn the paper feed knob slowly to feed the paper under the metal plate in front of the tractor. (The diagram on the metal plate shows how the paper should go through.) Make sure the paper does not wrinkle after it reaches the platen. 12. Turn the knob until the paper is past the paper bail. Then push back the paper bail lever (the lever on the right side). The paper bail lever must be back at all times when you are printing with continuous-feed paper. Installing the paper guide lnstall the paper guide to prevent the outgoing paper from being pulled back into the printer- This is the same part that supports the paper when you print on single sheets, but with continuous-feed paper, it is installed horizontally The paper guide has notches at either side that fit over two pins located at the sides of the tractor. 1. Hold the paper guide vertically above the printer, with the curved end down, as shown in Figure 3-5. 2. Lower the notches onto the pins as shown below, then tilt the paper guide back until it lies horizontally over the paper. figure 3-5. Installing the paper guide Choosing and Loading Paper 3-5
-
 1
1 -
2
-
3
-
4
-
5
-
6
-
7
-
8
-
9
-
10
-
11
-
12
-
13
-
14
-
15
-
16
-
17
-
18
-
19
-
20
-
21
-
22
-
23
-
24
-
25
-
26
-
27
-
28
-
29
-
30
-
31
-
32
-
33
-
34
-
35
-
36
-
37
-
38
-
39
-
40
-
41
-
42
-
43
-
44
-
 45
45 -
 46
46 -
 47
47 -
 48
48 -
 49
49 -
 50
50 -
 51
51 -
 52
52 -
 53
53 -
 54
54 -
 55
55 -
56
-
57
-
58
-
59
-
60
-
61
-
62
-
63
-
64
-
65
-
66
-
67
-
68
-
69
-
70
-
71
-
72
-
73
-
74
-
75
-
76
-
77
-
78
-
79
-
80
-
81
-
82
-
83
-
84
-
85
-
86
-
87
-
88
-
89
-
90
-
91
-
92
-
93
-
94
-
95
-
96
-
97
-
98
-
99
-
100
-
101
-
102
-
103
-
104
-
105
-
106
-
107
-
108
-
109
-
110
-
111
-
112
-
113
-
114
-
115
-
116
-
117
-
118
-
119
-
120
-
121
-
122
-
123
-
124
-
125
-
126
-
127
-
128
-
129
-
130
-
131
-
132
-
133
-
134
-
135
-
136
-
137
-
138
-
139
-
140
-
141
-
142
-
143
-
144
-
145
-
146
-
147
-
148
-
149
-
150
-
151
-
152
-
153
-
154
-
155
-
156
-
157
-
158
-
159
-
160
-
161
-
162
-
163
-
164
-
165
-
166
-
167
-
168
-
169
-
170
-
171
-
172
-
173
-
174
-
175
-
176
-
177
-
178
-
179
-
180
-
181
-
182
-
183
-
184
 |
 |
