Epson WorkForce GT-1500 User Manual - Page 109
Scanning Directly to an E-mail, Image Type, Document Source, Resolution, Preview
 |
View all Epson WorkForce GT-1500 manuals
Add to My Manuals
Save this manual to your list of manuals |
Page 109 highlights
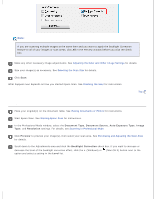
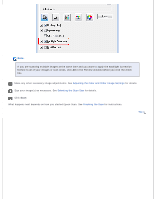
Home > Scanning Special Projects Scanning Directly to an E-mail You can scan and automatically attach scanned image file(s) to an e-mail message with the scanner. E-mail button on the Place your document on the document table or in the ADF. See Placing Documents or Photos or Loading Documents in the Automatic Document Feeder for instructions. Press the E-mail button on the scanner. Note: Epson Scan starts in the last mode you used. The following steps are for Office Mode. For instructions on using other modes, see Scanning in Home Mode or Scanning in Professional Mode. In the Office Mode window, select the Image Type, Document Source, Size, and Resolution settings. For details, see Scanning in Office Mode. Click Preview to preview your image(s), then select your scan area. For details, see Previewing and Adjusting the Scan Area. Make any other necessary image adjustments. See Adjusting the Color and Other Image Settings for details. Click Scan. The File Save Settings window appears. For details, see Selecting File Save Settings. Click OK. Epson Scan scans your document or photo and displays the Send File Via E-mail window.
-
 1
1 -
2
-
3
-
4
-
5
-
6
-
7
-
8
-
9
-
10
-
11
-
12
-
13
-
14
-
15
-
16
-
17
-
18
-
19
-
20
-
21
-
22
-
23
-
24
-
25
-
26
-
27
-
28
-
29
-
30
-
31
-
32
-
33
-
34
-
35
-
36
-
37
-
38
-
39
-
40
-
41
-
42
-
43
-
44
-
45
-
46
-
47
-
48
-
49
-
50
-
51
-
52
-
53
-
54
-
55
-
56
-
57
-
58
-
59
-
60
-
61
-
62
-
63
-
64
-
65
-
66
-
67
-
68
-
69
-
70
-
71
-
72
-
73
-
74
-
75
-
76
-
77
-
78
-
79
-
80
-
81
-
82
-
83
-
84
-
85
-
86
-
87
-
88
-
89
-
90
-
91
-
92
-
93
-
94
-
95
-
96
-
97
-
98
-
99
-
100
-
101
-
102
-
103
-
 104
104 -
 105
105 -
 106
106 -
 107
107 -
 108
108 -
 109
109 -
 110
110 -
 111
111 -
 112
112 -
 113
113 -
 114
114 -
115
-
116
-
117
-
118
-
119
-
120
-
121
-
122
-
123
-
124
-
125
-
126
-
127
-
128
-
129
-
130
-
131
-
132
-
133
-
134
-
135
-
136
-
137
-
138
-
139
-
140
-
141
-
142
-
143
-
144
-
145
-
146
-
147
-
148
-
149
 |
 |
