Epson WorkForce GT-1500 User Manual - Page 68
Black&White, Auto Detect
 |
View all Epson WorkForce GT-1500 manuals
Add to My Manuals
Save this manual to your list of manuals |
Page 68 highlights
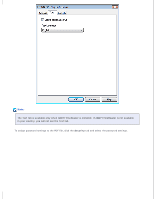
Select Color, Grayscale, or Black&White as the Image Type setting to select the colors in the original. Select one of these settings as the Document Source setting. Auto Detect: This setting automatically determines whether to load your document from the ADF or scan it from the document table. Document Table: Select this setting when you want to scan using the document table. ADF: Select this setting when you want to scan using the ADF. Click the arrow to open the Size list and select the size of your original(s). If you need to select a size that is not in the Size list, you can create a custom size. Click the arrow in the Size list and select Customize. You see the Source Size window. Type a name for your custom size, enter the size, click Save, then click OK. Your new size appears in the Size list. Click the arrow next to the Resolution list and select the number of dots per inch at which you want to scan. See the table below for guidelines. What you will do with the scanned image Send via e-mail, upload to web, view only on the screen Fax Print Suggested scan resolution 96 to 150 dpi 200 dpi 300 dpi Use the settings in the Image Adjustments area of the window to modify the image quality if necessary. See the table below for guidelines. Setting Description
-
 1
1 -
2
-
3
-
4
-
5
-
6
-
7
-
8
-
9
-
10
-
11
-
12
-
13
-
14
-
15
-
16
-
17
-
18
-
19
-
20
-
21
-
22
-
23
-
24
-
25
-
26
-
27
-
28
-
29
-
30
-
31
-
32
-
33
-
34
-
35
-
36
-
37
-
38
-
39
-
40
-
41
-
42
-
43
-
44
-
45
-
46
-
47
-
48
-
49
-
50
-
51
-
52
-
53
-
54
-
55
-
56
-
57
-
58
-
59
-
60
-
61
-
62
-
 63
63 -
 64
64 -
 65
65 -
 66
66 -
 67
67 -
 68
68 -
 69
69 -
 70
70 -
 71
71 -
 72
72 -
 73
73 -
74
-
75
-
76
-
77
-
78
-
79
-
80
-
81
-
82
-
83
-
84
-
85
-
86
-
87
-
88
-
89
-
90
-
91
-
92
-
93
-
94
-
95
-
96
-
97
-
98
-
99
-
100
-
101
-
102
-
103
-
104
-
105
-
106
-
107
-
108
-
109
-
110
-
111
-
112
-
113
-
114
-
115
-
116
-
117
-
118
-
119
-
120
-
121
-
122
-
123
-
124
-
125
-
126
-
127
-
128
-
129
-
130
-
131
-
132
-
133
-
134
-
135
-
136
-
137
-
138
-
139
-
140
-
141
-
142
-
143
-
144
-
145
-
146
-
147
-
148
-
149
 |
 |
