Epson WorkForce GT-1500 User Manual - Page 47
Previewing and Adjusting the Scan Area, Office Mode, Professional Mode, Resolution, Preview, Thumbnail
 |
View all Epson WorkForce GT-1500 manuals
Add to My Manuals
Save this manual to your list of manuals |
Page 47 highlights
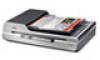
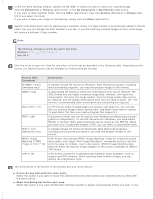
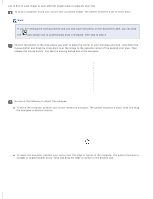
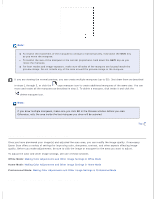
Selecting the Resolution in Office Mode or Professional Mode You can select the resolution you want at any time. Office Mode Professional Mode Click the arrow next to the Resolution list and select the number of dpi (dots per inch) at which you want to scan. Top Previewing and Adjusting the Scan Area Once you have selected your basic settings and resolution, you can preview your image and select or adjust the image area of the image(s) in a separate Preview window on your screen. There are two types of preview. Normal preview displays your previewed image(s) in their entirety. You must select the scan area and make any image quality adjustments manually. Thumbnail preview displays your previewed image(s) as thumbnail(s). Epson Scan automatically locates the edges of your scan area, applies automatic exposure settings to the image(s), and rotates the image(s) if necessary. Note: If you are using Office Mode or scanning from the ADF, the thumbnail preview is not available. You must use the normal preview. Click Preview. If you want to change the preview type, click the Thumbnail check box under the Preview button, if it is available.
-
 1
1 -
2
-
3
-
4
-
5
-
6
-
7
-
8
-
9
-
10
-
11
-
12
-
13
-
14
-
15
-
16
-
17
-
18
-
19
-
20
-
21
-
22
-
23
-
24
-
25
-
26
-
27
-
28
-
29
-
30
-
31
-
32
-
33
-
34
-
35
-
36
-
37
-
38
-
39
-
40
-
41
-
 42
42 -
 43
43 -
 44
44 -
 45
45 -
 46
46 -
 47
47 -
 48
48 -
 49
49 -
 50
50 -
 51
51 -
 52
52 -
53
-
54
-
55
-
56
-
57
-
58
-
59
-
60
-
61
-
62
-
63
-
64
-
65
-
66
-
67
-
68
-
69
-
70
-
71
-
72
-
73
-
74
-
75
-
76
-
77
-
78
-
79
-
80
-
81
-
82
-
83
-
84
-
85
-
86
-
87
-
88
-
89
-
90
-
91
-
92
-
93
-
94
-
95
-
96
-
97
-
98
-
99
-
100
-
101
-
102
-
103
-
104
-
105
-
106
-
107
-
108
-
109
-
110
-
111
-
112
-
113
-
114
-
115
-
116
-
117
-
118
-
119
-
120
-
121
-
122
-
123
-
124
-
125
-
126
-
127
-
128
-
129
-
130
-
131
-
132
-
133
-
134
-
135
-
136
-
137
-
138
-
139
-
140
-
141
-
142
-
143
-
144
-
145
-
146
-
147
-
148
-
149
 |
 |
