Garmin Forerunner 201 Owner's Manual - Page 31
To change the elevation
 |
UPC - 753759043278
View all Garmin Forerunner 201 manuals
Add to My Manuals
Save this manual to your list of manuals |
Page 31 highlights
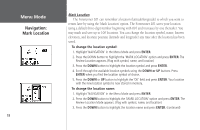
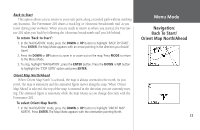
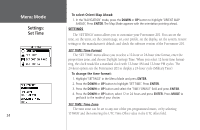
4. Scroll through the letters holders using the DOWN or UP buttons. (UP button moves the cursor right to left, and the DOWN button moves the cursor left to right). When you reach the position place you want to change, stop, and press ENTER. Using the DOWN or UP button, scroll through the letter, number or symbol choices, highlight the one you want and press ENTER. The position place is now changed. You can change the name of the location up to 6 characters. Continue until all positions are changed. 5. Press the DOWN or UP button to highlight the 'OK' field and press ENTER. The Location Mode appears again with the corrected name. 6. Press the DOWN or UP button to highlight the 'OK' field and press ENTER. Your location with the new location name is now stored in memory. To change the elevation: 1. Highlight 'NAVIGATION' in the Menu Mode and press ENTER. 2. Press the DOWN button to highlight the 'MARK LOCATION' option and press ENTER. The 'Review Location Mode appears. (Flag with symbol, name, and location) 3. Press the DOWN button to highlight the 'ELEV(ATION):' field and press ENTER. 4. Scroll through the elevation position places using the DOWN or UP buttons (UP button moves the cursor right to left, and the DOWN button moves the cursor left to right). When you reach the position you want to change, stop, and press ENTER. Using the DOWN or UP button, scroll through the choices to highlight the one you want. Press ENTER. The position place is now changed. Continue until all positions are changed. 5. Press the DOWN or UP button to highlight the 'OK' field and press ENTER. The Location Mode appears again with the corrected elevation. 6. Press the DOWN or UP button to highlight the 'OK' field and press ENTER. Your location with the new elevation is now stored in memory. Menu Mode Navigation: Mark Location 19
-
 1
1 -
2
-
3
-
4
-
5
-
6
-
7
-
8
-
9
-
10
-
11
-
12
-
13
-
14
-
15
-
16
-
17
-
18
-
19
-
20
-
21
-
22
-
23
-
24
-
25
-
 26
26 -
 27
27 -
 28
28 -
 29
29 -
 30
30 -
 31
31 -
 32
32 -
 33
33 -
 34
34 -
 35
35 -
 36
36 -
37
-
38
-
39
-
40
-
41
-
42
-
43
-
44
-
45
-
46
-
47
-
48
 |
 |