Gateway MT6452 8511882 - Gateway Notebook User Guide for Windows Vista - Page 36
Faxing a scanned document or from programs, Canceling a fax, Receiving and viewing a fax
 |
View all Gateway MT6452 manuals
Add to My Manuals
Save this manual to your list of manuals |
Page 36 highlights
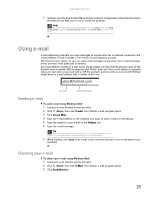
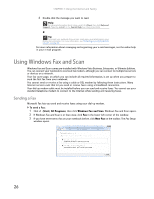
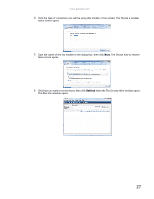
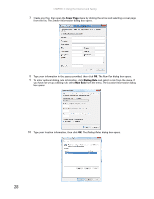
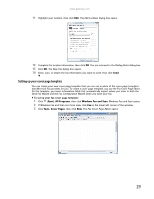
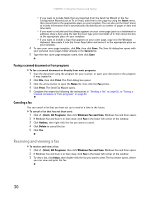
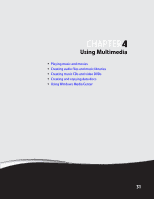
CHAPTER 3: Using the Internet and Faxing • If you want to include fields that are imported from the Send Fax Wizard or the Fax Configuration Wizard (such as To or From), add them to the page by using the Insert menu, then move them to the appropriate place on your template. You can also use the Insert menu to include information that is automatically calculated (such as number of pages or date and time sent). • If you want to include text that always appears on your cover page (such as a letterhead or address), draw a box using the text box tool, type your text inside of it, then move the box to the appropriate place on your template. • If you want to include a logo that appears on your cover page, copy it to the Windows clipboard, then paste it into the Cover Page Editor and move it to the appropriate place on your template. 4 To save your cover page template, click File, then click Save. The Save As dialog box opens with your personal cover pages folder already in the Save in list. 5 Type the new cover page template name, then click Save. Faxing a scanned document or from programs To fax a scanned document or directly from most programs: 1 Scan the document using the program for your scanner, or open your document in the program it was created in. 2 Click File, then click Print. The Print dialog box opens. 3 Click the arrow button to open the Name list, then click the Fax printer. 4 Click Print. The Send Fax Wizard opens. 5 Complete the wizard by following the instructions in "Sending a Fax" on page 26, or "Faxing a scanned document or from programs" on page 30. Canceling a fax You can cancel a fax that you have set up to send at a time in the future. To cancel a fax that has not been sent: 1 Click (Start), All Programs, then click Windows Fax and Scan. Windows Fax and Scan opens. 2 If Windows Fax and Scan is in Scan view, click Fax in the lower left corner of the window. 3 Click Outbox, then right-click the fax you want to cancel. 4 Click Delete to cancel the fax. 5 Click Yes. Receiving and viewing a fax To receive and view a fax: 1 Click (Start), All Programs, then click Windows Fax and Scan. Windows Fax and Scan opens. 2 If Windows Fax and Scan is in Scan view, click Fax in the lower left corner of the window. 3 To view a fax, click Inbox, then double-click the fax you want to view. The fax viewer opens, where you can view and print the fax. 30
-
 1
1 -
2
-
3
-
4
-
5
-
6
-
7
-
8
-
9
-
10
-
11
-
12
-
13
-
14
-
15
-
16
-
17
-
18
-
19
-
20
-
21
-
22
-
23
-
24
-
25
-
26
-
27
-
28
-
29
-
30
-
 31
31 -
 32
32 -
 33
33 -
 34
34 -
 35
35 -
 36
36 -
 37
37 -
 38
38 -
 39
39 -
 40
40 -
 41
41 -
42
-
43
-
44
-
45
-
46
-
47
-
48
-
49
-
50
-
51
-
52
-
53
-
54
-
55
-
56
-
57
-
58
-
59
-
60
-
61
-
62
-
63
-
64
-
65
-
66
-
67
-
68
-
69
-
70
-
71
-
72
-
73
-
74
-
75
-
76
-
77
-
78
-
79
-
80
-
81
-
82
-
83
-
84
-
85
-
86
-
87
-
88
-
89
-
90
-
91
-
92
-
93
-
94
-
95
-
96
-
97
-
98
-
99
-
100
 |
 |