Gateway MT6452 8511882 - Gateway Notebook User Guide for Windows Vista - Page 90
Checking the hard drive for errors, Defragmenting the hard drive, Start, Computer, Properties, Tools
 |
View all Gateway MT6452 manuals
Add to My Manuals
Save this manual to your list of manuals |
Page 90 highlights
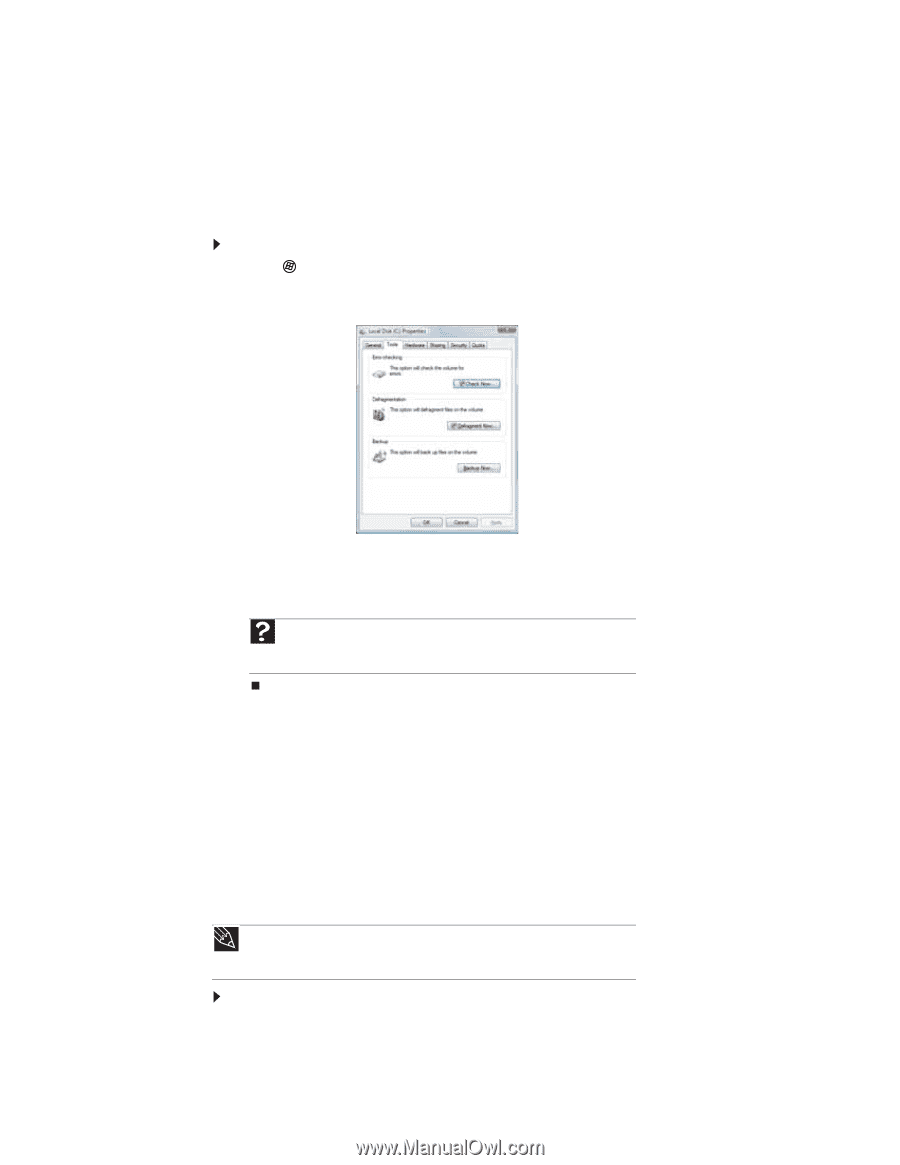
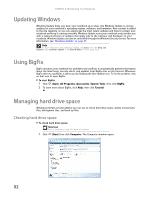
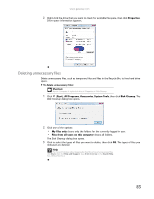
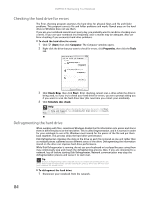
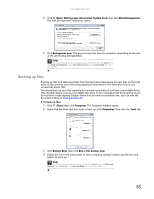
CHAPTER 8: Maintaining Your Notebook Checking the hard drive for errors The Error-checking program examines the hard drive for physical flaws and file and folder problems. This program corrects file and folder problems and marks flawed areas on the hard drive so Windows does not use them. If you use your notebook several hours every day, you probably want to run Error-checking once a week. If you use your notebook less frequently, once a month may be adequate. Also use Error-checking if you encounter hard drive problems. To check the hard drive for errors: 1 Click (Start) then click Computer. The Computer window opens. 2 Right-click the drive that you want to check for errors, click Properties, then click the Tools tab. 3 Click Check Now, then click Start. Error checking cannot scan a drive while the drive is being used, so if you try to check your hard drive for errors, you see a prompt asking you if you want to scan the hard drive later (the next time you restart your notebook). 4 Click Schedule disc check. Help For more information about checking the hard drive for errors, click Start, then click Help and Support. Type checking for disk errors in the Search Help box, then press ENTER. Defragmenting the hard drive When working with files, sometimes Windows divides the file information into pieces and stores them in different places on the hard drive. This is called fragmentation, and it is normal. In order for your notebook to use a file, Windows must search for the pieces of the file and put them back together. This process slows the hard drive performance. Disk Defragmenter organizes the data on the drive so each file is stored as one unit rather than as multiple pieces scattered across different areas of the drive. Defragmenting the information stored on the drive can improve hard drive performance. While Disk Defragmenter is running, do not use your keyboard or touchpad because using them may continuously stop and restart the defragmenting process. Also, if you are connected to a network, log off before starting Disk Defragmenter. Network communication may stop the defragmentation process and cause it to start over. Tip Because defragmenting a drive may take hours to complete (depending on the size of the drive being defragmented), consider starting the process when you will not need your notebook for several hours. To defragment the hard drive: 1 Disconnect your notebook from the network. 84
-
 1
1 -
2
-
3
-
4
-
5
-
6
-
7
-
8
-
9
-
10
-
11
-
12
-
13
-
14
-
15
-
16
-
17
-
18
-
19
-
20
-
21
-
22
-
23
-
24
-
25
-
26
-
27
-
28
-
29
-
30
-
31
-
32
-
33
-
34
-
35
-
36
-
37
-
38
-
39
-
40
-
41
-
42
-
43
-
44
-
45
-
46
-
47
-
48
-
49
-
50
-
51
-
52
-
53
-
54
-
55
-
56
-
57
-
58
-
59
-
60
-
61
-
62
-
63
-
64
-
65
-
66
-
67
-
68
-
69
-
70
-
71
-
72
-
73
-
74
-
75
-
76
-
77
-
78
-
79
-
80
-
81
-
82
-
83
-
84
-
 85
85 -
 86
86 -
 87
87 -
 88
88 -
 89
89 -
 90
90 -
 91
91 -
 92
92 -
 93
93 -
 94
94 -
 95
95 -
96
-
97
-
98
-
99
-
100
 |
 |