Gateway NV-79 Gateway Notebook User's Guide - English - Page 60
Wireless security, Testing your network, Adding a printer to your network, Sharing resources - windows 7 drivers
 |
View all Gateway NV-79 manuals
Add to My Manuals
Save this manual to your list of manuals |
Page 60 highlights
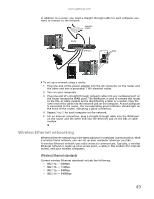
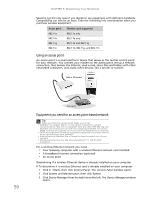
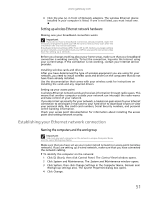
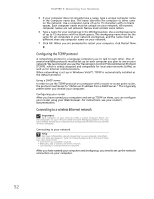
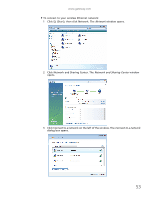
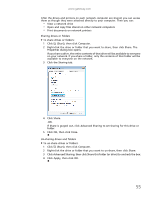
CHAPTER 5: Networking Your Notebook 4 Click a network, then click Connect. If you can see the network name, but you cannot connect to it, your network is using security. Right-click on the network, then click Properties. Modify the security settings to match the settings you set on your access point. Wireless security For information on wireless security, refer to the documentation that came with your access point. Help For more information about wireless network security methods, click Start, then click Help and Support. Type wireless network security methods in the Search Help box, then press ENTER. Testing your network Now that your home network is set up, log onto one of your computers and access a favorite Internet Web site. If you are unable to connect to the Internet: • Click (Start), Control Panel, Network and Internet, then click Network and Sharing Center. Select Diagnose and Repair on the left of the window. Take any actions suggested. • If you are using a wired Ethernet network, check all physical cable connections. • Make sure that your router or access point is plugged in and compare the status lights on the front of the router or access point with the patterns described in the router or access point documentation. • Temporarily turn off any firewall software on your desktop computer. • Turn off all of the devices, then power them back on. • Refer to your router's or access point's troubleshooting information. • Contact your Internet service provider. Adding a printer to your network Instead of plugging a printer into each of your computers, you can add a printer to your network. To add a printer to the network, do one of the following: • Connect your printer to a networked computer, then share the printer. For information about sharing printers, see "Sharing drives and printers" on page 54. • Connect your printer to your router or access point if the router or access point includes a USB or parallel port. For more information, see the instructions that came with your router or access point. • Use a printer that has built-in networking. • Use a print server. Sharing resources With a network, you can share your Internet connection, drives, and printers. Sharing drives and printers With a network, you can share drives (for example hard drives and DVD drives) and printers among the computers connected to the network. Important To share a printer among the network computers, each computer must have the shared printer's drivers installed. Follow the instructions included with your printer to install the printer drivers on each computer. 54
-
 1
1 -
2
-
3
-
4
-
5
-
6
-
7
-
8
-
9
-
10
-
11
-
12
-
13
-
14
-
15
-
16
-
17
-
18
-
19
-
20
-
21
-
22
-
23
-
24
-
25
-
26
-
27
-
28
-
29
-
30
-
31
-
32
-
33
-
34
-
35
-
36
-
37
-
38
-
39
-
40
-
41
-
42
-
43
-
44
-
45
-
46
-
47
-
48
-
49
-
50
-
51
-
52
-
53
-
54
-
 55
55 -
 56
56 -
 57
57 -
 58
58 -
 59
59 -
 60
60 -
 61
61 -
 62
62 -
 63
63 -
 64
64 -
 65
65 -
66
-
67
-
68
-
69
-
70
-
71
-
72
-
73
-
74
-
75
-
76
-
77
-
78
-
79
-
80
-
81
-
82
-
83
-
84
-
85
-
86
-
87
-
88
-
89
-
90
-
91
-
92
-
93
-
94
-
95
-
96
-
97
-
98
-
99
-
100
-
101
-
102
-
103
-
104
-
105
-
106
-
107
-
108
 |
 |