HP Designjet 510 HP Designjet 510 Printer series - Quick Reference Guide - Page 7
Installing a new roll on the printer - stand
 |
View all HP Designjet 510 manuals
Add to My Manuals
Save this manual to your list of manuals |
Page 7 highlights
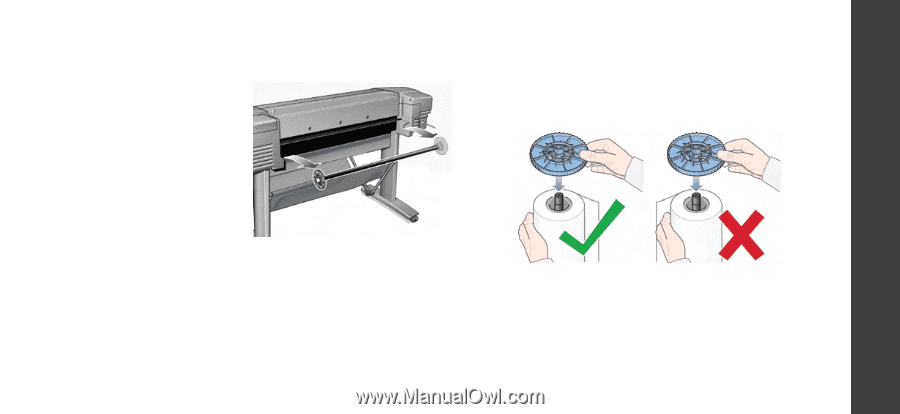
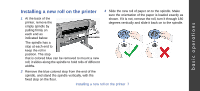
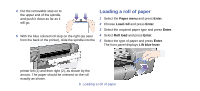
basic operations Installing a new roll on the printer 1 At the back of the printer, remove the empty spindle by pulling firmly on each end as indicated below. Removable The spindle has a Fixed stop at each end to keep the roll in position. The stop that is colored blue can be removed to mount a new roll; it slides along the spindle to hold rolls of different widths. 3 Slide the new roll of paper on to the spindle. Make sure the orientation of the paper is loaded exactly as shown. If it is not, remove the roll, turn it through 180 degrees vertically and slide it back on to the spindle. 2 Remove the blue colored stop from the end of the spindle, and stand the spindle vertically, with the fixed stop on the floor. Installing a new roll on the printer 7
-
 1
1 -
 2
2 -
 3
3 -
 4
4 -
 5
5 -
 6
6 -
 7
7 -
 8
8 -
 9
9 -
 10
10 -
 11
11 -
 12
12 -
13
-
14
-
15
-
16
-
17
-
18
-
19
-
20
-
21
-
22
-
23
-
24
-
25
-
26
-
27
-
28
-
29
-
30
-
31
-
32
-
33
 |
 |