HP Designjet 70 HP Designjet 70 Printer Series - Quick Reference Guide - Page 33
The problem is a paper jam - printing problems
 |
View all HP Designjet 70 manuals
Add to My Manuals
Save this manual to your list of manuals |
Page 33 highlights
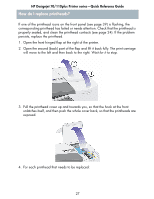
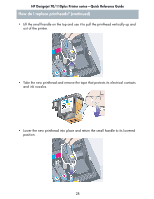
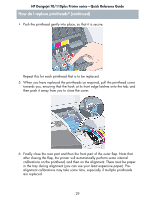
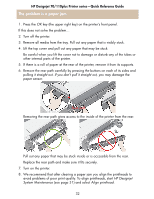
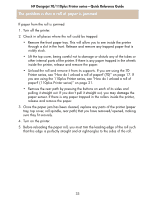
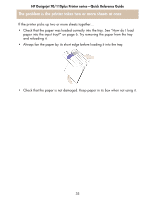
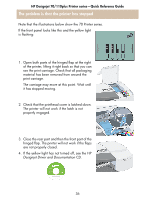
HP Designjet 70/110plus Printer series-Quick Reference Guide The problem is a paper jam 1. Press the OK key (the upper right key) on the printer's front panel. If this does not solve the problem... 2. Turn off the printer. 3. Remove all media from the tray. Pull out any paper that is visibly stuck. 4. Lift the top cover and pull out any paper that may be stuck. Be careful when you lift the cover not to damage or disturb any of the tubes or other internal parts of the printer. 5. If there is a roll of paper at the rear of the printer, remove it from its supports. 6. Remove the rear path carefully by pressing the buttons on each of its sides and pulling it straight out. If you don't pull it straight out, you may damage the paper sensor. Rear path Removing the rear path gives access to the inside of the printer from the rear. Pull out any paper that may be stuck inside or is accessible from the rear. Replace the rear path and make sure it fits securely. 7. Turn on the printer. 8. We recommend that after clearing a paper jam you align the printheads to avoid problems of poor print quality. To align printheads, start HP Designjet System Maintenance (see page 31) and select Align printhead. 32
-
 1
1 -
2
-
3
-
4
-
5
-
6
-
7
-
8
-
9
-
10
-
11
-
12
-
13
-
14
-
15
-
16
-
17
-
18
-
19
-
20
-
21
-
22
-
23
-
24
-
25
-
26
-
27
-
 28
28 -
 29
29 -
 30
30 -
 31
31 -
 32
32 -
 33
33 -
 34
34 -
 35
35 -
 36
36 -
 37
37 -
 38
38 -
39
-
40
-
41
-
42
-
43
-
44
-
45
-
46
-
47
-
48
-
49
-
50
-
51
-
52
-
53
-
54
-
55
-
56
-
57
 |
 |