HP EliteBook 8770w RAID User Guide - Page 29
Windows 7 contain additional capabilities that allow you to create a single RAID 5 volume. Refer - case
 |
View all HP EliteBook 8770w manuals
Add to My Manuals
Save this manual to your list of manuals |
Page 29 highlights
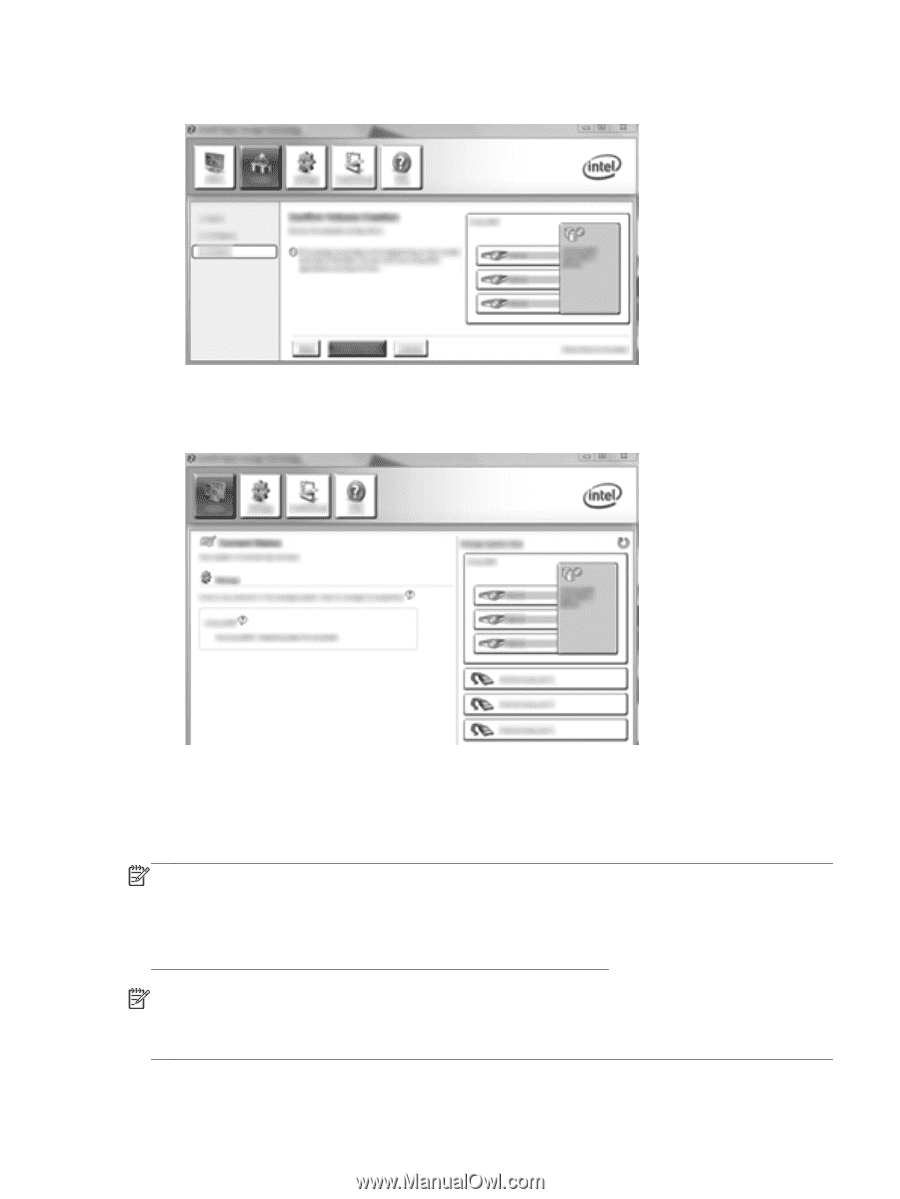
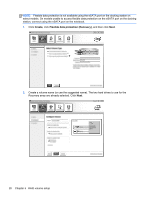
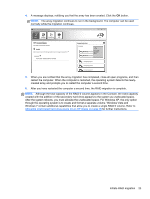
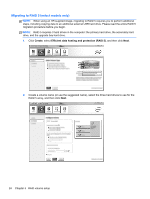
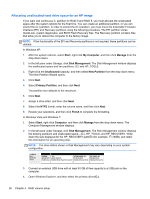
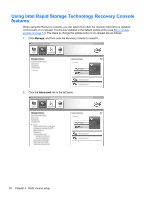
3. Click Create Volume to begin the migration process. 4. Once Create Volume is selected, you are informed that the array has been created. Click the OK button. The array migration continues to run in the background. The computer can be used normally while the migration continues. 5. When you are notified that the array migration has completed, close all open programs, and then restart the computer. When the computer is restarted, the operating system detects the newlycreated array and prompts you to restart the computer a second time. 6. After you have restarted the computer a second time, the RAID migration is complete. NOTE: Although the total capacity of the RAID 5 volume appears in the Console, the extra capacity created with the addition of the three hard drives appears to the system as unallocated space. After the system reboots, you must allocate the unallocated space. For Windows XP, the only option through the operating system is to create and format a separate volume. Windows Vista and Windows 7 contain additional capabilities that allow you to create a single RAID 5 volume. Refer to Allocating unallocated hard drive space for an HP image on page 26 for further instructions. NOTE: Due to the complexity of the RAID 5 volume, it will take longer for the computer to enter HIbernation than it does for other operations. After entering Hibernation, ensure that all computer activity has ceased and that all the lights are turned off before storing the computer in an enclosed space such as a computer carrying case. Initiate RAID migration 25
-
 1
1 -
2
-
3
-
4
-
5
-
6
-
7
-
8
-
9
-
10
-
11
-
12
-
13
-
14
-
15
-
16
-
17
-
18
-
19
-
20
-
21
-
22
-
23
-
 24
24 -
 25
25 -
 26
26 -
 27
27 -
 28
28 -
 29
29 -
 30
30 -
 31
31 -
 32
32 -
 33
33 -
 34
34 -
35
-
36
-
37
-
38
-
39
-
40
-
41
 |
 |