HP Pavilion m7-1000 HP Pavilion dv7 Entertainment PC - Maintenance and Service - Page 71
CAUTION, the optical drive bay when removing the top cover.
 |
View all HP Pavilion m7-1000 manuals
Add to My Manuals
Save this manual to your list of manuals |
Page 71 highlights
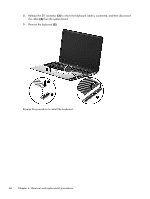
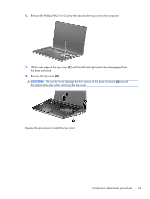
6. Remove the Phillips PM2.5×4.0 screw that secures the top cover to the computer. 7. Lift the rear edge of the top cover (1) until the left and right sides have disengaged from the base enclosure. 8. Remove the top cover (2). CAUTION: Be careful not to damage the thin section of the base enclosure (3) around the optical drive bay when removing the top cover. Reverse this procedure to install the top cover. Component replacement procedures 63
-
 1
1 -
2
-
3
-
4
-
5
-
6
-
7
-
8
-
9
-
10
-
11
-
12
-
13
-
14
-
15
-
16
-
17
-
18
-
19
-
20
-
21
-
22
-
23
-
24
-
25
-
26
-
27
-
28
-
29
-
30
-
31
-
32
-
33
-
34
-
35
-
36
-
37
-
38
-
39
-
40
-
41
-
42
-
43
-
44
-
45
-
46
-
47
-
48
-
49
-
50
-
51
-
52
-
53
-
54
-
55
-
56
-
57
-
58
-
59
-
60
-
61
-
62
-
63
-
64
-
65
-
 66
66 -
 67
67 -
 68
68 -
 69
69 -
 70
70 -
 71
71 -
 72
72 -
 73
73 -
 74
74 -
 75
75 -
 76
76 -
77
-
78
-
79
-
80
-
81
-
82
-
83
-
84
-
85
-
86
-
87
-
88
-
89
-
90
-
91
-
92
-
93
-
94
-
95
-
96
-
97
-
98
-
99
-
100
-
101
-
102
-
103
-
104
-
105
-
106
-
107
-
108
-
109
-
110
-
111
-
112
-
113
-
114
-
115
-
116
-
117
-
118
-
119
-
120
-
121
-
122
-
123
-
124
 |
 |
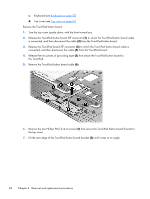
6.
Remove the Phillips PM2.5×4.0 screw that secures the top cover to the computer.
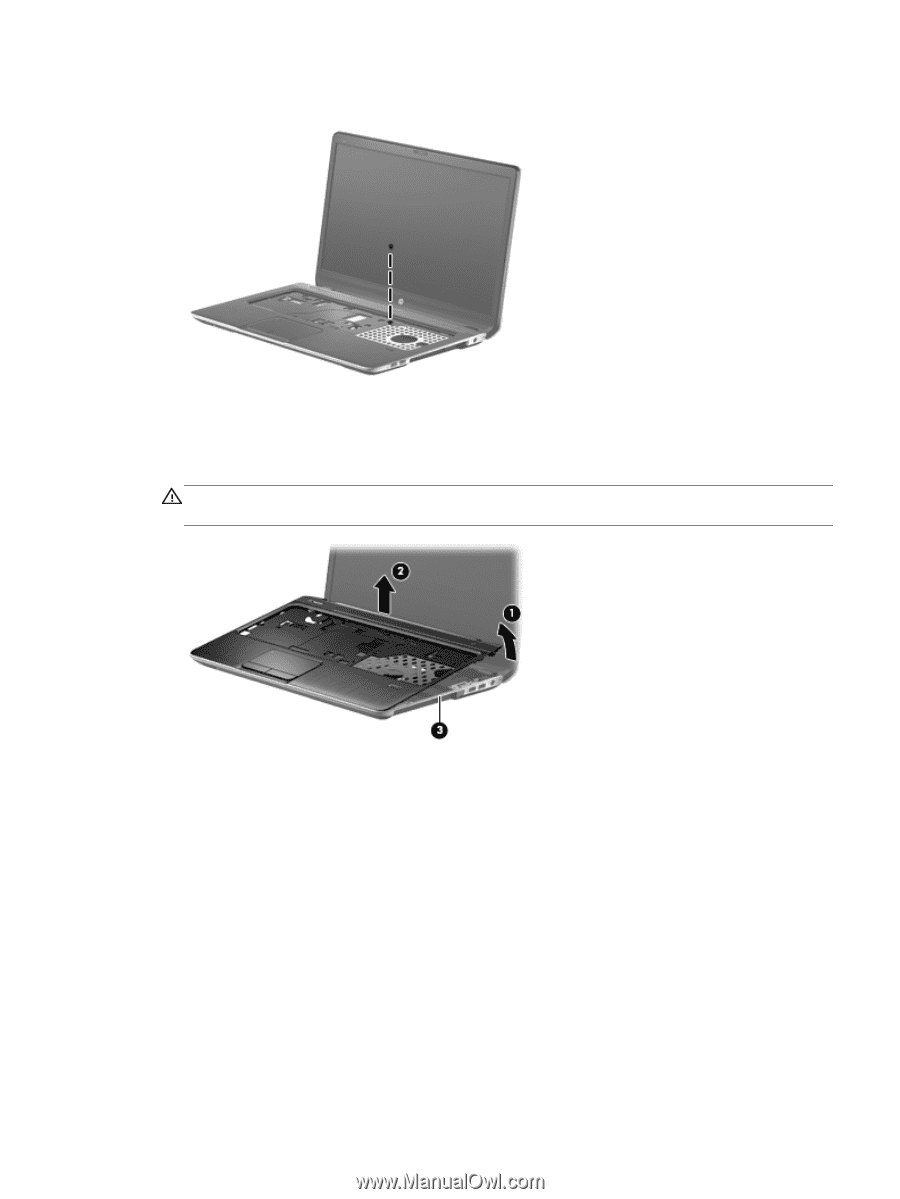
7.
Lift the rear edge of the top cover
(1)
until the left and right sides have disengaged from
the base enclosure.
8.
Remove the top cover
(2)
.
CAUTION:
Be careful not to damage the thin section of the base enclosure
(3)
around
the optical drive bay when removing the top cover.
Reverse this procedure to install the top cover.
Component replacement procedures
63