HP Photosmart C6100 Basics Guide - Page 63
Avoid paper jams, To load 10 x 15 cm 4 x 6 inch photo paper in the photo tray
 |
View all HP Photosmart C6100 manuals
Add to My Manuals
Save this manual to your list of manuals |
Page 63 highlights
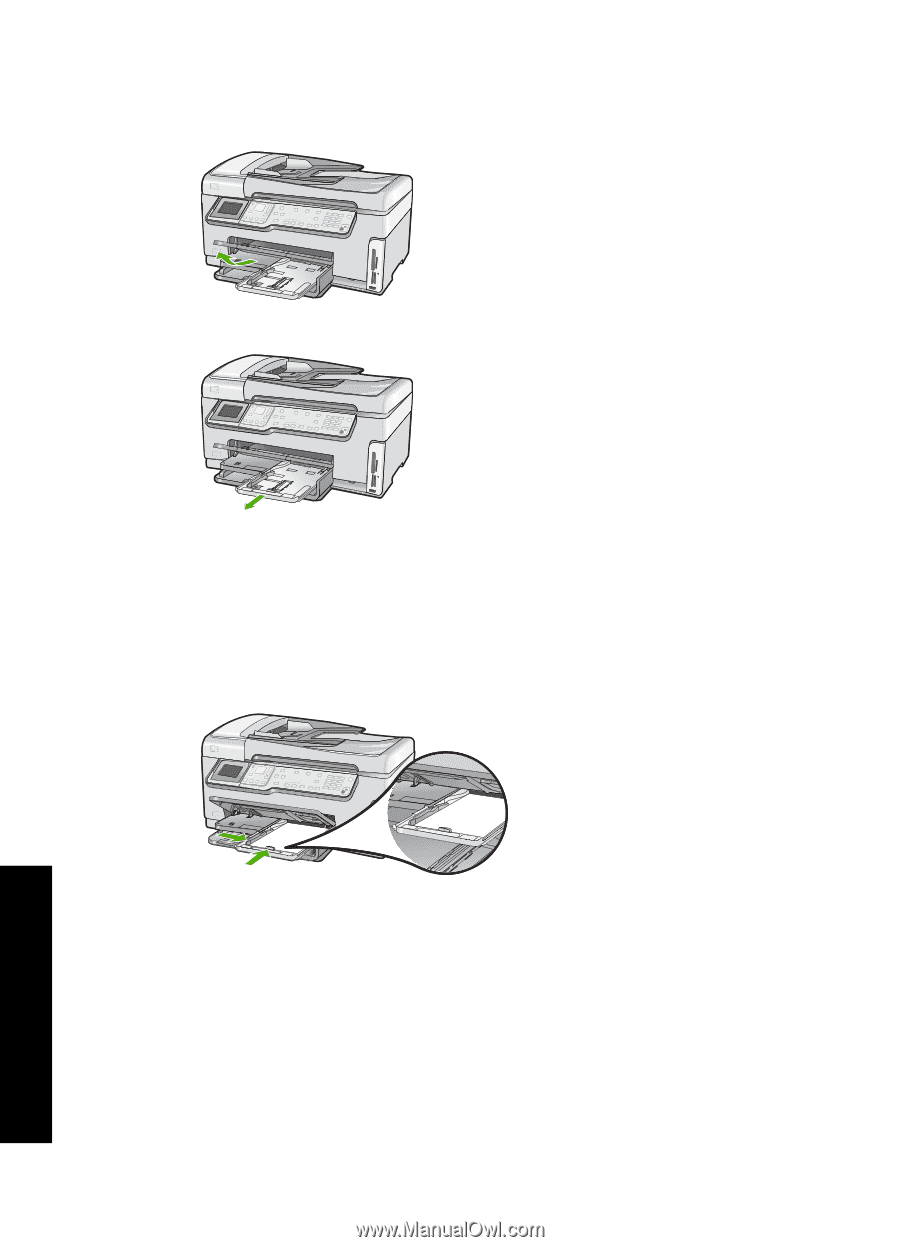
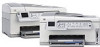
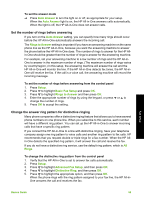
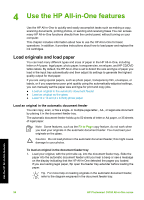
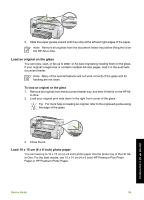
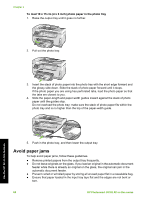
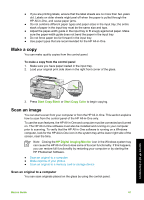
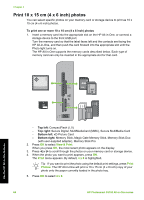
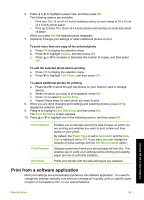
Chapter 4 To load 10 x 15 cm (4 x 6 inch) photo paper in the photo tray 1. Raise the output tray until it goes no further. 2. Pull out the photo tray. 3. Insert the stack of photo paper into the photo tray with the short edge forward and the glossy side down. Slide the stack of photo paper forward until it stops. If the photo paper you are using has perforated tabs, load the photo paper so that the tabs are closest to you. 4. Slide the paper-length and paper-width guides inward against the stack of photo paper until the guides stop. Do not overload the photo tray; make sure the stack of photo paper fits within the photo tray and is no higher than the top of the paper-width guide. Use the HP All-in-One features 5. Push in the photo tray, and then lower the output tray. Avoid paper jams To help avoid paper jams, follow these guidelines. ● Remove printed papers from the output tray frequently. ● Do not leave originals on the glass. If you load an original in the automatic document feeder while there is already an original on the glass, the original can jam in the automatic document feeder. ● Prevent curled or wrinkled paper by storing all unused paper flat in a resealable bag. ● Ensure that paper loaded in the input tray lays flat and the edges are not bent or torn. 60 HP Photosmart C6100 All-in-One series
-
 1
1 -
2
-
3
-
4
-
5
-
6
-
7
-
8
-
9
-
10
-
11
-
12
-
13
-
14
-
15
-
16
-
17
-
18
-
19
-
20
-
21
-
22
-
23
-
24
-
25
-
26
-
27
-
28
-
29
-
30
-
31
-
32
-
33
-
34
-
35
-
36
-
37
-
38
-
39
-
40
-
41
-
42
-
43
-
44
-
45
-
46
-
47
-
48
-
49
-
50
-
51
-
52
-
53
-
54
-
55
-
56
-
57
-
 58
58 -
 59
59 -
 60
60 -
 61
61 -
 62
62 -
 63
63 -
 64
64 -
 65
65 -
 66
66 -
 67
67 -
 68
68 -
69
-
70
-
71
-
72
-
73
-
74
-
75
-
76
-
77
-
78
-
79
-
80
-
81
-
82
-
83
-
84
-
85
-
86
-
87
-
88
-
89
-
90
-
91
-
92
-
93
-
94
-
95
-
96
-
97
-
98
-
99
-
100
-
101
-
102
-
103
-
104
-
105
-
106
-
107
-
108
-
109
-
110
-
111
-
112
-
113
-
114
-
115
-
116
-
117
-
118
 |
 |