HP Photosmart C6100 Basics Guide - Page 68
Print from a software application, Copies, Edit Photo, Select to Print, Done Selecting, Print Summary
 |
View all HP Photosmart C6100 manuals
Add to My Manuals
Save this manual to your list of manuals |
Page 68 highlights
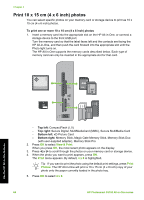
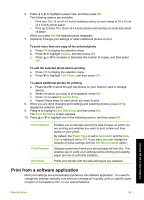
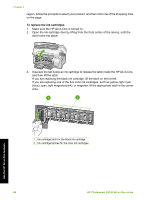
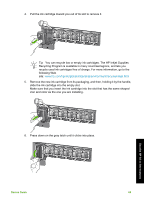
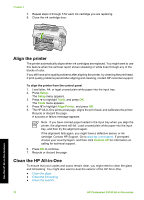
6. Press or to highlight a paper size, and then press OK. The following options are available: - Print one 10 x 15 cm (4 x 6 inch) borderless photo on each sheet of 10 x 15 cm (4 x 6 inch) photo paper - Print up to three 10 x 15 cm (4 x 6 inch) photos with borders on a full-size sheet of paper When you press OK, the selected photo reappears. 7. (Optional) Change print settings or select additional photos to print. To print more than one copy of the selected photo a. Press OK to display the selection menu. b. Press to highlight Copies, and then press OK. c. Press or to increase or decrease the number of copies, and then press OK. To edit the selected photo before printing a. Press OK to display the selection menu. b. Press to highlight Edit Photo, and then press OK. To select additional photos for printing a. Press or to scroll through the photos on your memory card or storage device. b. When the photo you want to print appears, press OK. c. Press OK to select Select to Print. d. Repeat these steps for each photo you want to print. 8. When you are done changing print settings and selecting photos, press OK to display the selection menu. 9. Press to highlight Done Selecting, and then press OK. The Print Summary screen appears. 10. Press or to highlight one of the following options, and then press OK. Print Options Print Preview Print Now Enables you to manually specify the type of paper on which you are printing and whether you want to print a date and time stamp on your photo. By default, the Paper Type is set to Automatic and the Date Stamp setting is set to Off. If you want, you can change the defaults of these settings with the Set New Defaults option. Displays a preview of what your printed page will look like. This enables you to verify your settings before printing and wasting paper and ink on potential mistakes. Prints your photos with the size and layout you selected. Print from a software application Most print settings are automatically handled by the software application. You need to change the settings manually only when you change print quality, print on specific types of paper or transparency film, or use special features. Use the HP All-in-One features Basics Guide 65
-
 1
1 -
2
-
3
-
4
-
5
-
6
-
7
-
8
-
9
-
10
-
11
-
12
-
13
-
14
-
15
-
16
-
17
-
18
-
19
-
20
-
21
-
22
-
23
-
24
-
25
-
26
-
27
-
28
-
29
-
30
-
31
-
32
-
33
-
34
-
35
-
36
-
37
-
38
-
39
-
40
-
41
-
42
-
43
-
44
-
45
-
46
-
47
-
48
-
49
-
50
-
51
-
52
-
53
-
54
-
55
-
56
-
57
-
58
-
59
-
60
-
61
-
62
-
 63
63 -
 64
64 -
 65
65 -
 66
66 -
 67
67 -
 68
68 -
 69
69 -
 70
70 -
 71
71 -
 72
72 -
 73
73 -
74
-
75
-
76
-
77
-
78
-
79
-
80
-
81
-
82
-
83
-
84
-
85
-
86
-
87
-
88
-
89
-
90
-
91
-
92
-
93
-
94
-
95
-
96
-
97
-
98
-
99
-
100
-
101
-
102
-
103
-
104
-
105
-
106
-
107
-
108
-
109
-
110
-
111
-
112
-
113
-
114
-
115
-
116
-
117
-
118
 |
 |