HP RP3 Maintenance & Service Guide HP RP3 Retail System Model 3100 - Page 31
on the rear of the chassis., and rotate the latch open
 |
View all HP RP3 manuals
Add to My Manuals
Save this manual to your list of manuals |
Page 31 highlights
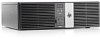
3. Push outward on the tab located on the back of the expansion card retention latch inside the chassis (1) and rotate the latch open (2). 4. Before installing the expansion card, remove the expansion slot cover by sliding it out of the slot on the rear of the chassis. 24 Chapter 4 Removal and Replacement Procedures
-
 1
1 -
2
-
3
-
4
-
5
-
6
-
7
-
8
-
9
-
10
-
11
-
12
-
13
-
14
-
15
-
16
-
17
-
18
-
19
-
20
-
21
-
22
-
23
-
24
-
25
-
 26
26 -
 27
27 -
 28
28 -
 29
29 -
 30
30 -
 31
31 -
 32
32 -
 33
33 -
 34
34 -
 35
35 -
 36
36 -
37
-
38
-
39
-
40
-
41
-
42
-
43
-
44
-
45
-
46
-
47
-
48
-
49
-
50
-
51
-
52
-
53
-
54
-
55
-
56
-
57
-
58
-
59
-
60
-
61
-
62
-
63
-
64
-
65
-
66
-
67
-
68
-
69
-
70
-
71
-
72
-
73
-
74
-
75
-
76
-
77
-
78
-
79
-
80
-
81
-
82
-
83
-
84
-
85
-
86
-
87
-
88
-
89
-
90
-
91
-
92
-
93
-
94
-
95
-
96
-
97
-
98
-
99
-
100
-
101
-
102
-
103
-
104
-
105
-
106
-
107
-
108
-
109
-
110
-
111
-
112
-
113
-
114
-
115
-
116
-
117
-
118
-
119
-
120
-
121
-
122
-
123
-
124
-
125
-
126
-
127
-
128
-
129
-
130
-
131
-
132
-
133
-
134
-
135
-
136
-
137
-
138
-
139
-
140
 |
 |

3.
Push outward on the tab located on the back of the expansion card retention latch inside the
chassis
(1)
and rotate the latch open
(2)
.
4.
Before installing the expansion card, remove the expansion slot cover by sliding it out of the slot
on the rear of the chassis.
24
Chapter 4
Removal and Replacement Procedures