HP RP3 Maintenance & Service Guide HP RP3 Retail System Model 3100 - Page 45
Front Fan/Baffle
 |
View all HP RP3 manuals
Add to My Manuals
Save this manual to your list of manuals |
Page 45 highlights
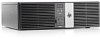
Front Fan/Baffle Description Front fan assembly Spare part number 682431-001 1. Prepare the computer for disassembly (Preparation for Disassembly on page 15). 2. Remove the access panel (Access Panel on page 16). 3. Remove the front bezel Front Bezel on page 17. 4. Disconnect the fan control cable from the system board connector labeled CHFAN. 5. Press the tabs that secure the fan assembly to the front of the chassis. 6. Rotate the assembly toward the rear of the unit, and then lift it out of the chassis. 38 Chapter 4 Removal and Replacement Procedures
-
 1
1 -
2
-
3
-
4
-
5
-
6
-
7
-
8
-
9
-
10
-
11
-
12
-
13
-
14
-
15
-
16
-
17
-
18
-
19
-
20
-
21
-
22
-
23
-
24
-
25
-
26
-
27
-
28
-
29
-
30
-
31
-
32
-
33
-
34
-
35
-
36
-
37
-
38
-
39
-
 40
40 -
 41
41 -
 42
42 -
 43
43 -
 44
44 -
 45
45 -
 46
46 -
 47
47 -
 48
48 -
 49
49 -
 50
50 -
51
-
52
-
53
-
54
-
55
-
56
-
57
-
58
-
59
-
60
-
61
-
62
-
63
-
64
-
65
-
66
-
67
-
68
-
69
-
70
-
71
-
72
-
73
-
74
-
75
-
76
-
77
-
78
-
79
-
80
-
81
-
82
-
83
-
84
-
85
-
86
-
87
-
88
-
89
-
90
-
91
-
92
-
93
-
94
-
95
-
96
-
97
-
98
-
99
-
100
-
101
-
102
-
103
-
104
-
105
-
106
-
107
-
108
-
109
-
110
-
111
-
112
-
113
-
114
-
115
-
116
-
117
-
118
-
119
-
120
-
121
-
122
-
123
-
124
-
125
-
126
-
127
-
128
-
129
-
130
-
131
-
132
-
133
-
134
-
135
-
136
-
137
-
138
-
139
-
140
 |
 |

Front Fan/Baffle
Description
Spare part number
Front fan assembly
682431-001
1.
Prepare the computer for disassembly (
Preparation for Disassembly
on page
15
).
2.
Remove the access panel (
Access Panel
on page
16
).
3.
Remove the front bezel
Front Bezel
on page
17
.
4.
Disconnect the fan control cable from the system board connector labeled CHFAN.
5.
Press the tabs that secure the fan assembly to the front of the chassis.
6.
Rotate the assembly toward the rear of the unit, and then lift it out of the chassis.
38
Chapter 4
Removal and Replacement Procedures