HP q1335a User Manual - Page 150
Appendix F
 |
View all HP q1335a manuals
Add to My Manuals
Save this manual to your list of manuals |
Page 150 highlights
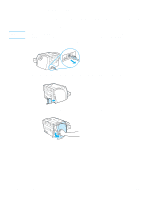
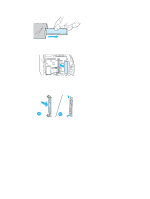
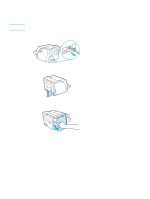
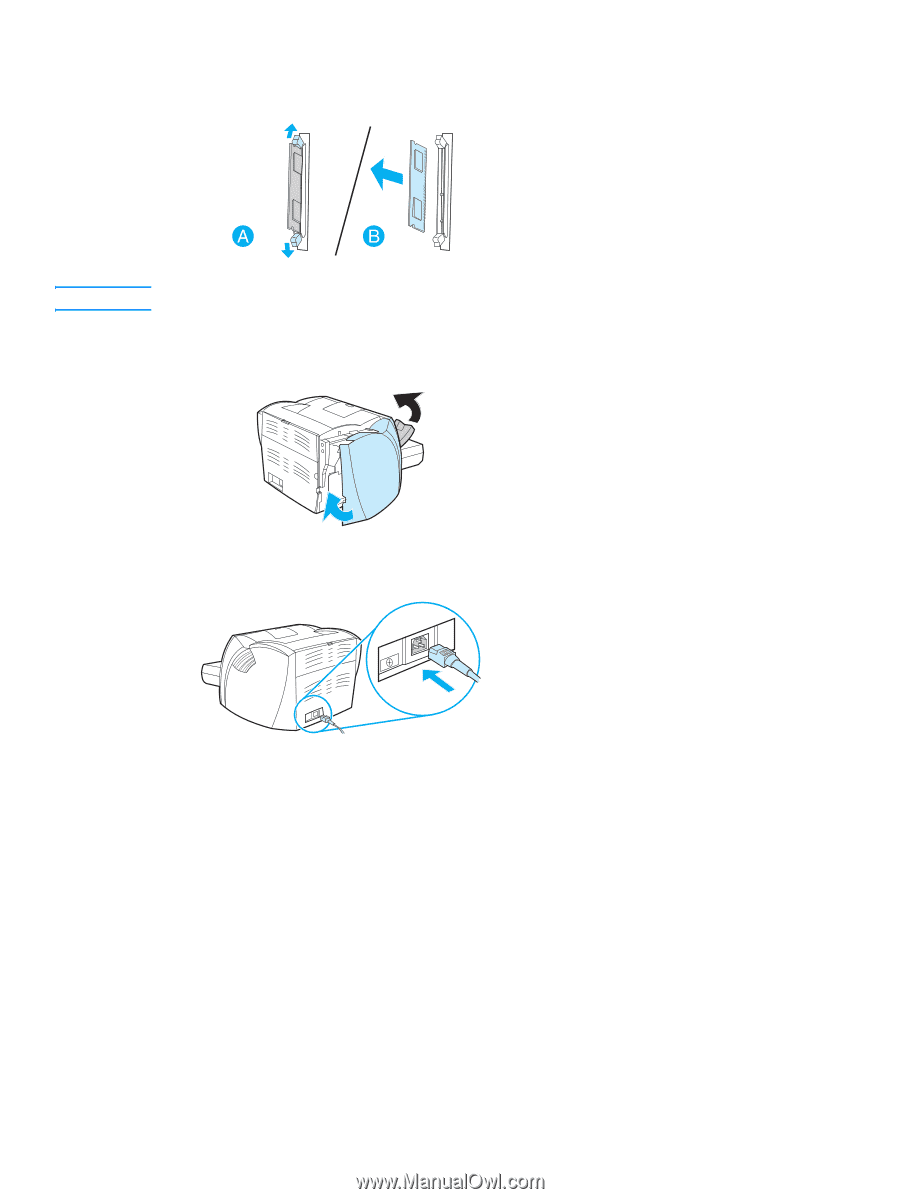
4 To unlock the cam latches, press them outward (A). Grasp the DIMM chip on the edge, gently pull straight out, and remove the chip from the printer (B). Note Store the DIMM chip in an antistatic bag. 5 Close the left side panel and the print cartridge door. Reinstall the parallel adaptor or the print server. 6 Plug the printer back in, and turn on the power switch. 142 Appendix F Memory ENWW
-
 1
1 -
2
-
3
-
4
-
5
-
6
-
7
-
8
-
9
-
10
-
11
-
12
-
13
-
14
-
15
-
16
-
17
-
18
-
19
-
20
-
21
-
22
-
23
-
24
-
25
-
26
-
27
-
28
-
29
-
30
-
31
-
32
-
33
-
34
-
35
-
36
-
37
-
38
-
39
-
40
-
41
-
42
-
43
-
44
-
45
-
46
-
47
-
48
-
49
-
50
-
51
-
52
-
53
-
54
-
55
-
56
-
57
-
58
-
59
-
60
-
61
-
62
-
63
-
64
-
65
-
66
-
67
-
68
-
69
-
70
-
71
-
72
-
73
-
74
-
75
-
76
-
77
-
78
-
79
-
80
-
81
-
82
-
83
-
84
-
85
-
86
-
87
-
88
-
89
-
90
-
91
-
92
-
93
-
94
-
95
-
96
-
97
-
98
-
99
-
100
-
101
-
102
-
103
-
104
-
105
-
106
-
107
-
108
-
109
-
110
-
111
-
112
-
113
-
114
-
115
-
116
-
117
-
118
-
119
-
120
-
121
-
122
-
123
-
124
-
125
-
126
-
127
-
128
-
129
-
130
-
131
-
132
-
133
-
134
-
135
-
136
-
137
-
138
-
139
-
140
-
141
-
142
-
143
-
144
-
 145
145 -
 146
146 -
 147
147 -
 148
148 -
 149
149 -
 150
150 -
 151
151 -
 152
152 -
 153
153 -
 154
154 -
 155
155 -
156
-
157
-
158
-
159
-
160
-
161
-
162
 |
 |
142
Appendix F
Memory
ENWW
4
To unlock the cam latches, press them outward (A). Grasp the DIMM chip on the edge, gently
pull straight out, and remove the chip from the printer (B).
Note
Store the DIMM chip in an antistatic bag.
5
Close the left side panel and the print cartridge door. Reinstall the parallel adaptor or the print
server.
6
Plug the printer back in, and turn on the power switch.