HP q1335a User Manual - Page 94
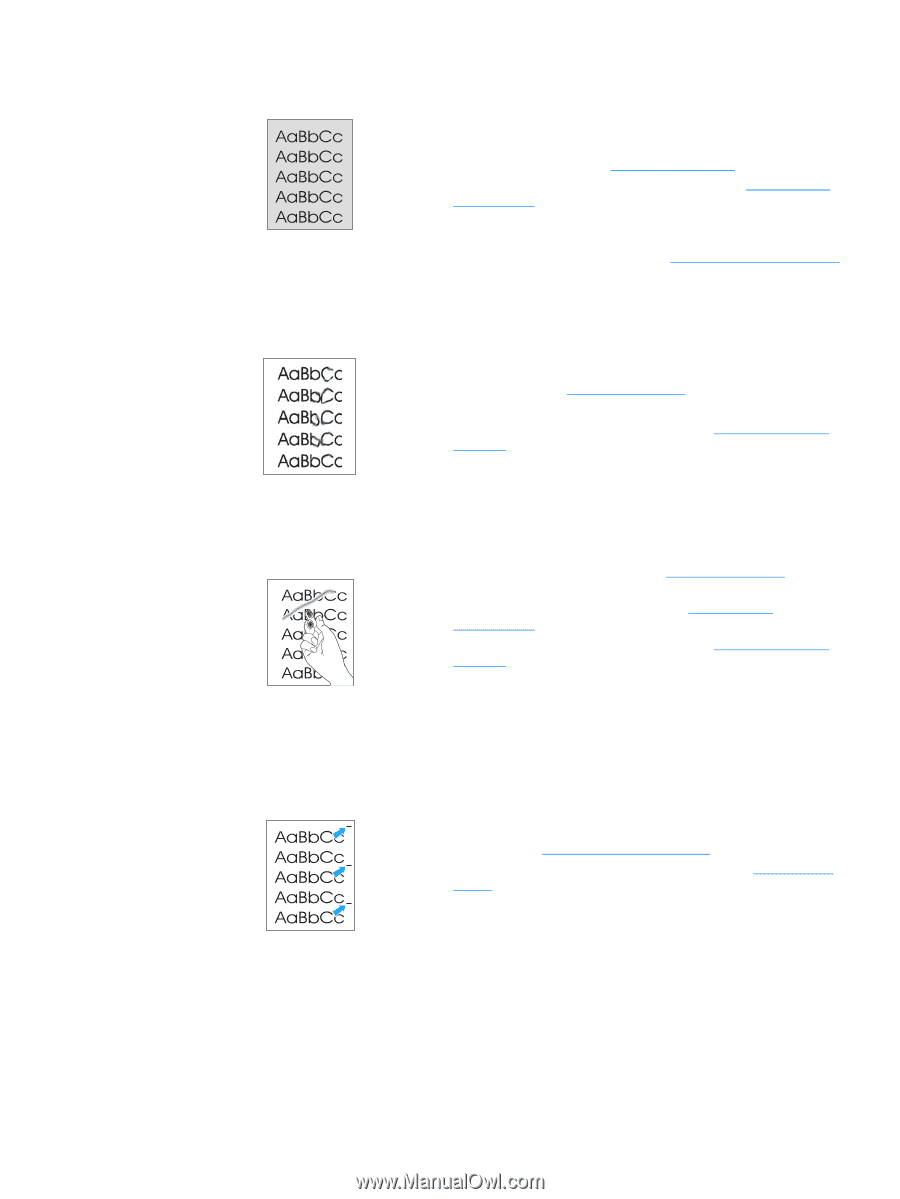
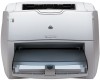
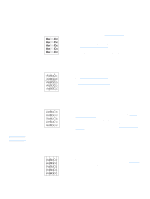
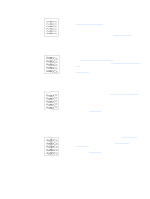
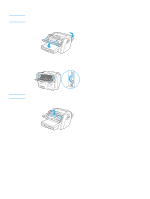
Gray background, Toner smear, Loose toner, Vertical repetitive defects
 |
View all HP q1335a manuals
Add to My Manuals
Save this manual to your list of manuals |
Page 94 highlights
Gray background Toner smear ● Make sure that the priority input tray is in place. ● Decrease the print density setting through HP Toolbox or the embedded web server. This decreases the amount of background shading. See Using the hp toolbox. ● Change the media to a lighter basis weight. See Printer media specifications for more information. ● Check the printer's environment. Very dry (low humidity) conditions can increase the amount of background shading. ● Install a new HP print cartridge. See Changing the print cartridge for instructions. Loose toner ● If toner smears appear on the leading edge of the media, the media guides might be dirty. Wipe the media guides with a dry, lint-free cloth. See Cleaning the printer for more information. ● Check the media type and quality. ● Try installing a new HP print cartridge. See Changing the print cartridge for instructions. ● The fuser temperature might be too low. In your printer driver, make sure the appropriate media type is selected. ● Clean the inside of the printer. See Cleaning the printer for instructions. ● Check the media type and quality. See Printer media specifications for more information. ● Try installing a new HP print cartridge. See Changing the print cartridge for instructions. ● In your printer driver, make sure the appropriate media type is selected. ● Plug the printer directly into an AC outlet instead of into a power strip. Vertical repetitive defects ● The print cartridge might be damaged. If a repetitive mark occurs at the same spot on the page, install a new HP print cartridge. See Changing the print cartridge for instructions. ● The internal parts might have toner on them. See Cleaning the printer for more information. If the defects occur on the back of the page, the problem will probably correct itself after a few more printed pages. ● In your printer driver, make sure the appropriate media type is selected. 86 Chapter 6 ENWW
-
 1
1 -
2
-
3
-
4
-
5
-
6
-
7
-
8
-
9
-
10
-
11
-
12
-
13
-
14
-
15
-
16
-
17
-
18
-
19
-
20
-
21
-
22
-
23
-
24
-
25
-
26
-
27
-
28
-
29
-
30
-
31
-
32
-
33
-
34
-
35
-
36
-
37
-
38
-
39
-
40
-
41
-
42
-
43
-
44
-
45
-
46
-
47
-
48
-
49
-
50
-
51
-
52
-
53
-
54
-
55
-
56
-
57
-
58
-
59
-
60
-
61
-
62
-
63
-
64
-
65
-
66
-
67
-
68
-
69
-
70
-
71
-
72
-
73
-
74
-
75
-
76
-
77
-
78
-
79
-
80
-
81
-
82
-
83
-
84
-
85
-
86
-
87
-
88
-
 89
89 -
 90
90 -
 91
91 -
 92
92 -
 93
93 -
 94
94 -
 95
95 -
 96
96 -
 97
97 -
 98
98 -
 99
99 -
100
-
101
-
102
-
103
-
104
-
105
-
106
-
107
-
108
-
109
-
110
-
111
-
112
-
113
-
114
-
115
-
116
-
117
-
118
-
119
-
120
-
121
-
122
-
123
-
124
-
125
-
126
-
127
-
128
-
129
-
130
-
131
-
132
-
133
-
134
-
135
-
136
-
137
-
138
-
139
-
140
-
141
-
142
-
143
-
144
-
145
-
146
-
147
-
148
-
149
-
150
-
151
-
152
-
153
-
154
-
155
-
156
-
157
-
158
-
159
-
160
-
161
-
162
 |
 |