HP q1335a User Manual - Page 64
Cleaning the printer media path, Access the HP toolbox. See
 |
View all HP q1335a manuals
Add to My Manuals
Save this manual to your list of manuals |
Page 64 highlights
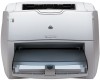
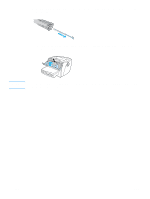
3 Replace the print cartridge, and close the print cartridge door. 4 Plug the power cord back into the printer. Cleaning the printer media path If you are experiencing toner specks or dots on the printouts, clean the printer media path. This process uses a transparency to remove dust and toner from the media path. Do not use bond or rough paper. Note Note For best results use a sheet of transparency. If you do not have any transparencies, you can use copier grade media (18 to 24 lb. or 70 to 90 g/m2) with a smooth surface. 1 Make sure that the printer is idle and the Ready light is on. 2 Load the media in the input tray. 3 Print a cleaning page using one of the following methods: • Access the HP toolbox. See Using the hp toolbox for instructions. Click the Troubleshooting tab, and click Print Quality Tools. Select the cleaning page. Or • On the printer control panel, press and hold the Go button until all three lights come on (about 10 seconds). When all three lights come on, release the Go button. The cleaning process takes approximately 2 minutes. The cleaning page will stop periodically during the cleaning process. Do not turn the printer off until the cleaning process has finished. You might need to repeat the cleaning process several times to thoroughly clean the printer. 56 Chapter 4 ENWW
-
 1
1 -
2
-
3
-
4
-
5
-
6
-
7
-
8
-
9
-
10
-
11
-
12
-
13
-
14
-
15
-
16
-
17
-
18
-
19
-
20
-
21
-
22
-
23
-
24
-
25
-
26
-
27
-
28
-
29
-
30
-
31
-
32
-
33
-
34
-
35
-
36
-
37
-
38
-
39
-
40
-
41
-
42
-
43
-
44
-
45
-
46
-
47
-
48
-
49
-
50
-
51
-
52
-
53
-
54
-
55
-
56
-
57
-
58
-
 59
59 -
 60
60 -
 61
61 -
 62
62 -
 63
63 -
 64
64 -
 65
65 -
 66
66 -
 67
67 -
 68
68 -
 69
69 -
70
-
71
-
72
-
73
-
74
-
75
-
76
-
77
-
78
-
79
-
80
-
81
-
82
-
83
-
84
-
85
-
86
-
87
-
88
-
89
-
90
-
91
-
92
-
93
-
94
-
95
-
96
-
97
-
98
-
99
-
100
-
101
-
102
-
103
-
104
-
105
-
106
-
107
-
108
-
109
-
110
-
111
-
112
-
113
-
114
-
115
-
116
-
117
-
118
-
119
-
120
-
121
-
122
-
123
-
124
-
125
-
126
-
127
-
128
-
129
-
130
-
131
-
132
-
133
-
134
-
135
-
136
-
137
-
138
-
139
-
140
-
141
-
142
-
143
-
144
-
145
-
146
-
147
-
148
-
149
-
150
-
151
-
152
-
153
-
154
-
155
-
156
-
157
-
158
-
159
-
160
-
161
-
162
 |
 |