HP q1335a User Manual - Page 99
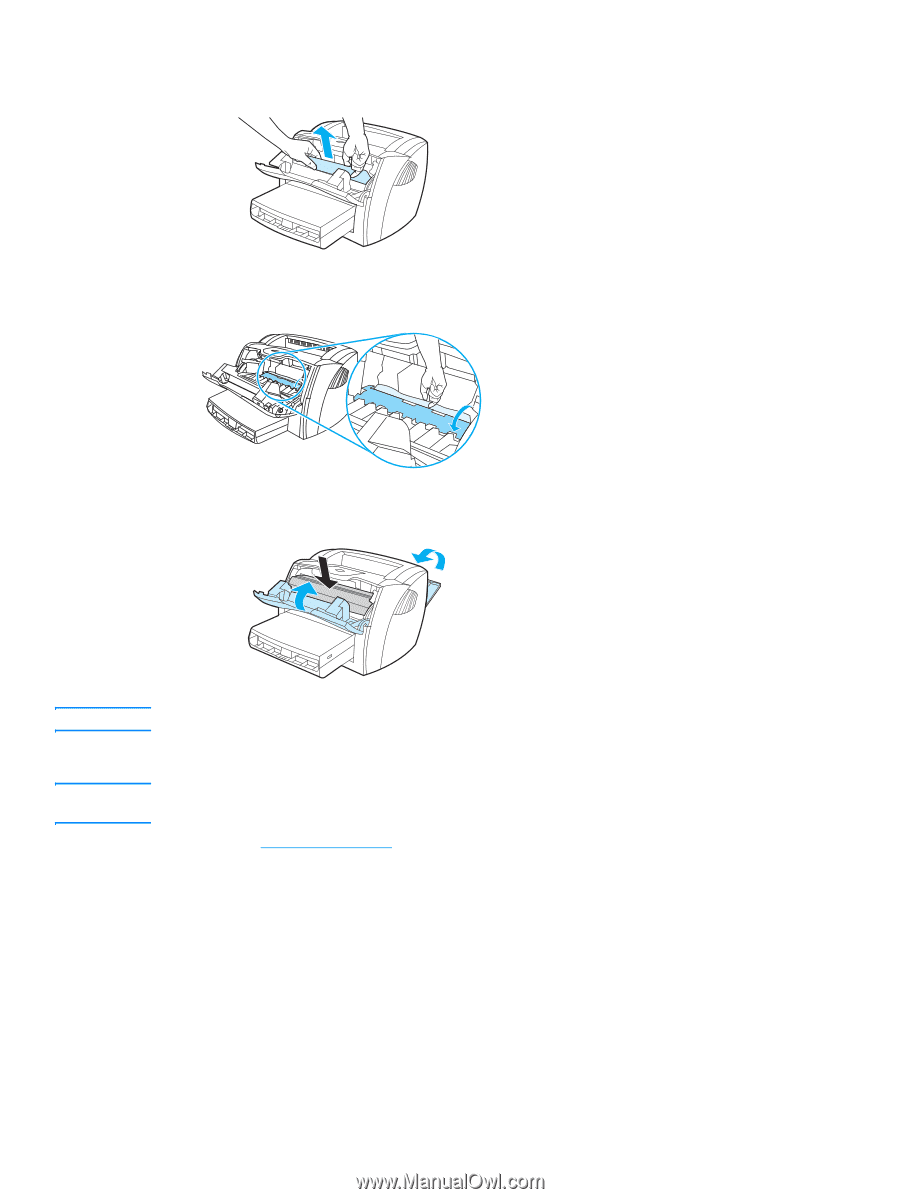
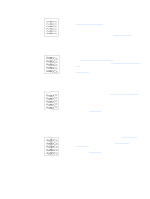
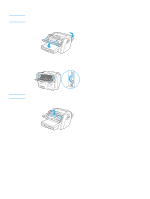
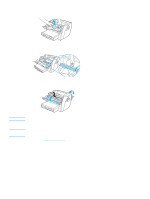
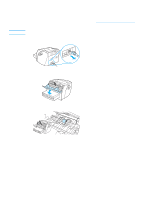
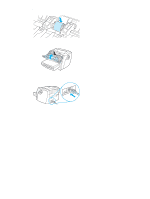
The pressure release levers automatically close when you close the straight-through output door.
 |
View all HP q1335a manuals
Add to My Manuals
Save this manual to your list of manuals |
Page 99 highlights
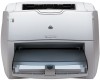
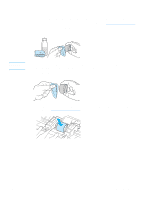
4 With both hands, grasp the side of the media that is most visible (this includes the middle), and carefully pull it free from the printer. 5 If no media is visible, grasp the tab on the right-hand side of the upper media guide and pull it forward. Carefully pull the media up and out of the printer. 6 When you have removed the jammed media, replace the print cartridge, and close the print cartridge door and the straight-through output door. Note Note The pressure release levers automatically close when you close the straight-through output door. After clearing a media jam, you might need to turn the printer off and turn it back on. When you add new media, remove all of the media from the input tray and straighten the stack of new media. Return to Finding the solution. ENWW Clearing jams 91
-
 1
1 -
2
-
3
-
4
-
5
-
6
-
7
-
8
-
9
-
10
-
11
-
12
-
13
-
14
-
15
-
16
-
17
-
18
-
19
-
20
-
21
-
22
-
23
-
24
-
25
-
26
-
27
-
28
-
29
-
30
-
31
-
32
-
33
-
34
-
35
-
36
-
37
-
38
-
39
-
40
-
41
-
42
-
43
-
44
-
45
-
46
-
47
-
48
-
49
-
50
-
51
-
52
-
53
-
54
-
55
-
56
-
57
-
58
-
59
-
60
-
61
-
62
-
63
-
64
-
65
-
66
-
67
-
68
-
69
-
70
-
71
-
72
-
73
-
74
-
75
-
76
-
77
-
78
-
79
-
80
-
81
-
82
-
83
-
84
-
85
-
86
-
87
-
88
-
89
-
90
-
91
-
92
-
93
-
 94
94 -
 95
95 -
 96
96 -
 97
97 -
 98
98 -
 99
99 -
 100
100 -
 101
101 -
 102
102 -
 103
103 -
 104
104 -
105
-
106
-
107
-
108
-
109
-
110
-
111
-
112
-
113
-
114
-
115
-
116
-
117
-
118
-
119
-
120
-
121
-
122
-
123
-
124
-
125
-
126
-
127
-
128
-
129
-
130
-
131
-
132
-
133
-
134
-
135
-
136
-
137
-
138
-
139
-
140
-
141
-
142
-
143
-
144
-
145
-
146
-
147
-
148
-
149
-
150
-
151
-
152
-
153
-
154
-
155
-
156
-
157
-
158
-
159
-
160
-
161
-
162
 |
 |