JVC TK-AM200U TK-AM200 Dome CCTV Camera Instruction Manual (748KB) - Page 27
JVC TK-AM200U - Active Movement Color Dome Camera Manual
 |
View all JVC TK-AM200U manuals
Add to My Manuals
Save this manual to your list of manuals |
Page 27 highlights
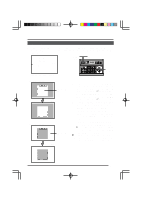
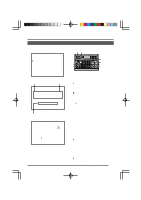
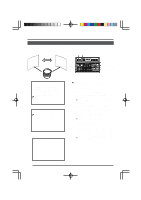
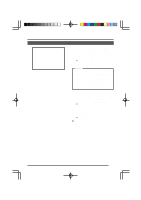
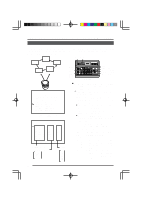
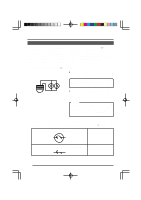
Changing Camera Settings Using the RM-P2580 AUTO PAN Setting AUTO PAN is a function that automatically swings the camera horizontally in a panning movement. Select this setting to observe the range between two points. (Set for each camera.) MENU SET button button REMOTE CONTROL UNIT RM-P2580 CAMERA POWER WER SET ALARM KEY LOCK AUTO F-1 F-2 F-3 POSITION at age Im art st n sitio po Slowly Imag e retu at r posi n tion SETUP MENU ZOOM (TELE) button ZOOM (WIDE) button LENS SPEED CAMERA/POSITION PAN/TILT POSITION 1 OPEN 2 5 8 0 /HOME 3 6 9 ENTER CAMERA CLOSE IRIS 4 7 CLEAR OPTION 1 OPTION 2 NEAR FOCUS AF FAR AUTO PAN AUTO PATROL WIDE ZOOM TELE Numeric key CAMERA button PAN/TILT control lever ENTER button RM-P2580 SE TUP C A M E R A MO D E S E L E C T . . C AME R A V I D EO A D J U S T . . V I DEO A D J FOR POS I . . TEXT ED I T . . A U TO P A T RO L S E T . . AU TO PAN SE T . . P A N I C A L A RM S E T . . F A C T OR Y S E T T I NGS . . Use the CAMERA button → Numeric key → ENTER button to select the camera to be set for auto pan. 1. Select the AUTO PAN SET.. item on the camera's SETUP screen, and then press the SET button. ● The AUTO PAN SET screen is displayed on the monitor. Use the PAN/TILT control lever to align the cursor (>) with the START POSITION SET. When the SET button is pressed, the START POSITION SET screen is displayed. ● Adjust the angle of view at the start position using the PAN/TILT control lever and ZOOM button. When the MENU button is pressed, "DATA SAVED" is displayed on the screen for about 3 seconds before the AUTO PAN SET screen returns. ● The set angle of view at the start position is saved. CAMERA SETUP screen 2. AU T O P AN S E T S T AR T POS I T I ON SE T . . RE TURN POS I T I ON S E T . . 3. AUTO PAN SET screen ST ART P OS I T I ON SE T START POSITION SET screen 28
-
 1
1 -
2
-
3
-
4
-
5
-
6
-
7
-
8
-
9
-
10
-
11
-
12
-
13
-
14
-
15
-
16
-
17
-
18
-
19
-
20
-
21
-
 22
22 -
 23
23 -
 24
24 -
 25
25 -
 26
26 -
 27
27 -
 28
28 -
 29
29 -
 30
30 -
 31
31 -
 32
32 -
33
-
34
-
35
 |
 |
