JVC TK-AM200U TK-AM200 Dome CCTV Camera Instruction Manual (748KB) - Page 28

JVC TK-AM200U - Active Movement Color Dome Camera Manual

Page 28 highlights

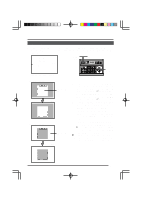
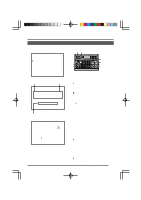
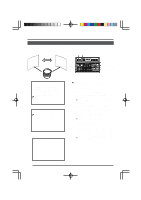
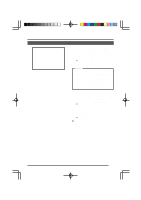
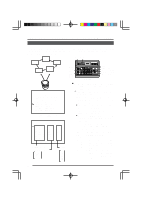
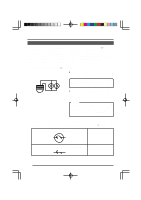
4. R E T U RN P OS I T I ON SE T Use the PAN/TILT control lever to align the cursor (>) with the RETURN POSITION SET item. When the SET button is pressed, the RETURN POSITION SET screen is displayed. ● Adjust the angle of view at the return position using the PAN/TILT control lever. Memo: RETURN POSITION SET screen • Movement in the up and down direction (tilt) and lens operation are not possible at the stop (return) position. • Correct setting data will not be memorized if the SET button or MENU button is pressed while the camera is moving. Be sure to confirm that the camera has stopped before pressing the SET or MENU button. 5. When the MENU button is pressed, "DATA SAVED" is displayed on the screen for about 3 seconds before the AUTO PAN SET screen returns. ● The set angle of view at the return position is saved. When both the start position and the return position have been set, press the MENU button. ● The camera's SETUP screen returns. 6. To activate the auto pan operation of the camera, press the AUTO PAN button on the RM-P2580. 29

  • 1
  • 2
  • 3
  • 4
  • 5
  • 6
  • 7
  • 8
  • 9
  • 10
  • 11
  • 12
  • 13
  • 14
  • 15
  • 16
  • 17
  • 18
  • 19
  • 20
  • 21
  • 22
  • 23
  • 24
  • 25
  • 26
  • 27
  • 28
  • 29
  • 30
  • 31
  • 32
  • 33
  • 34
  • 35

28
AUTO PAN Setting
n
Use the CAMERA button
Numeric key
ENTER button to select the camera to
be set for auto pan.
1.
Select the AUTO PAN SET.. item on the
camera’s SETUP screen, and then press
the SET button.
The AUTO PAN SET screen is dis-
played on the monitor.
2.
Use the PAN/TILT control lever to align
the cursor (>) with the START POSI-
TION SET. When the SET button is
pressed, the START POSITION SET
screen is displayed.
Adjust the angle of view at the start
position using the PAN/TILT control le-
ver and ZOOM button.
3.
When the MENU button is pressed,
“DATA SAVED” is displayed on the
screen for about 3 seconds before the
AUTO PAN SET screen returns.
The set angle of view at the start posi-
tion is saved.
Changing Camera Settings Using the RM-P2580
I
m
a
g
e
a
t
s
t
a
r
t
p
o
s
i
t
i
o
n
I
m
a
g
e
a
t
r
e
t
u
r
n
p
o
s
i
t
i
o
n
Slowly
SETUP
SETUP
MENU
MENU
SET
SP ED
IRIS
AF
FOCUS
ZOOM
OPEN
OPEN
FAR
FAR
TELE
CLEAR
CLEAR
/HOME
/HOME
7
4
1
8
0
5
2
9
6
3
ENTER
ENTER
AUTO
PAN
OPTION
OPTION
1
OPTION
OPTION
2
CAMERA
POSI-
POSI-
TION
TION
AUTO
PATROL
CLOSE
CLOSE
NEAR
NEAR
WIDE
WIDE
AUTO
AUTO
F-1
F-2
F-3
PAN/TILT
LENS
CAMERA/POSITION
CAMERA
CAMERA
POSITION
POSITION
REMOTE CONTROL UNIT
REMOTE CONTROL UNIT
RM-P2580
ALARM
POWER
WER
KEY LOCK
KEY LOCK
S E T U P
C AME
A
MOD E
S E L E C T . .
R
C AME
A
V I D EO
A D J U S T . .
R
V I D E
A D J
F O R
P OS I . .
O
T E X T
E D I T . .
A U T O
P A T RO L
S E T . .
A U T O
P A N
S E T . .
P A N I
A L A RM
S E T . .
C
F A C T
R Y
S E T T I NG S . .
O
U T O
A
P A N
S E T
S T A R
P O
S E T . .
T
S I
I O N
T
R E T U
N
P O
S E T . .
R
I T I O N
S
T
P O
T A R
S
S I T I ON
S E T
CAMERA SETUP screen
AUTO PAN SET screen
START POSITION SET screen
MENU
button
SET
button
Numeric key
PAN/TILT control lever
CAMERA button
ENTER button
ZOOM
(TELE)
button
ZOOM
(WIDE)
button
AUTO PAN is a function that automatically swings the camera horizontally in a panning
movement. Select this setting to observe the range between two points. (Set for each
camera.)
RM-P2580