Kenmore 7808 Use and Care Guide
Kenmore 7808 - Elite Oasis ST 7.6 cu. Ft. Capacity Gas Dryer Manual
 |
View all Kenmore 7808 manuals
Add to My Manuals
Save this manual to your list of manuals |
Kenmore 7808 manual content summary:
- Kenmore 7808 | Use and Care Guide - Page 1
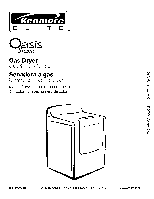
IT ® qasis am Gas Dryer Secadora a gas Models/Modelos 110.7708_, 7709_ = color number/nOmero de color W10180628A Sears Roebuck and Co., Hoffman Estates, IL 60179 U.S.A. www.sears.com - Kenmore 7808 | Use and Care Guide - Page 2
Changing the Drum Light 21 TROUBLESHOOTING 22 PROTECTION AGREEMENTS 23 SERVICE NUMBERS BACK COVER KENMORE ELITE® APPLIANCE WARRANTY ONE YEAR LIMITED WARRANTY When installed, operated and maintained according to all instructions supplied with the product, if this appliance fails due to a defect - Kenmore 7808 | Use and Care Guide - Page 3
DRYER SAFETY Your safety and the safety of others are very important. We have provided many important safety messages in this manual and on your appliance. Always read and obey all safety messages. This is the safety alert symbol. This symbol alerts you to potential hazards that can kill or hurt - Kenmore 7808 | Use and Care Guide - Page 4
the dryer. Close supervision of children is necessary when the dryer is used near children. • Before the dryer is removed from service or discarded any part of the dryer or attempt any servicing unless specifically recommended in this Use and Care Guide or in published user-repair instructions that - Kenmore 7808 | Use and Care Guide - Page 5
outlet located within 2 ft (61 cm) of either side of the dryer. See "Electrical Requirements." • A sturdy floor to support the total weight (dryer and load) of 200 Ibs (90.7 kg). The combined weight of a companion appliance should also be considered. • Cold water faucets located within 4 ft - Kenmore 7808 | Use and Care Guide - Page 6
be made to convert the appliance from the gas specified on the model/serial rating plate for use with a different gas without consulting your gas company. For information on ordering an LP conversion kit, please refer to the "Assistance or Service" section. Ask for Part Number 49572. Gas Supply Line - Kenmore 7808 | Use and Care Guide - Page 7
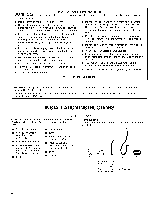
manual shutoff valve must be installed within six (6) feet (1.8 m) of the dryer dryer must be connected to the gas supply line with a listed flexible gas connector that complies with the standard for connectors for gas appliances flexible heavy metal vent. • Review Vent system chart. Modify existing - Kenmore 7808 | Use and Care Guide - Page 8
woodwork, furniture, paint, wallpaper, carpets, etc. • Housecleaning problems and health problems. _2 o_ Good Better Clamps Use clamps to seal all dealer. Failure to follow these instructions can result in death, fire, electrical shock, or serious injury. This dryer can be converted to exhaust - Kenmore 7808 | Use and Care Guide - Page 9
Part Number 8212504 • Rear exhaust installation to left side: Part Numbers 8544761 and 8212504 • Bottom exhaust installation: Part Number 8212503 • Over-the-top installation: Part : Performance of rear exhaust to either side of the dryer is equivalent to adding one elbow. To determine maximum exhaust - Kenmore 7808 | Use and Care Guide - Page 10
IOME ® (1-800-469-4663). £J'iskeGas Con se - Kenmore 7808 | Use and Care Guide - Page 11
_:_-- _ _>Tj:* _:_-:S. The dryer must be connected to the cold water faucet using the new inlet hoses. Do not use old hoses. 1. Turn cold water faucet off and remove washer inlet hose. 2. Remove old rubber washer from inlet hose and replace with new rubber washer provided. If space permits, attach - Kenmore 7808 | Use and Care Guide - Page 12
opening from where they were removed. NOTE: Door strike and plugs must be on the same side of the dryer door opening. Reinstall the door 1. Remove the 4 screws and 2 hinges from the dryer door. 2. Replace the 4 screws in the same holes. J 3. Remove the 4 screws from the opposite side of the door - Kenmore 7808 | Use and Care Guide - Page 13
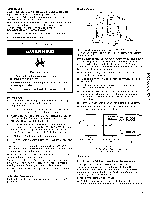
Dryer." 7f Electrical Shock Hazard A_ Plug into a grounded 3 prong outlet. Do not remove ground prong. Do not use an adapter. Do not use an extension cord. Failure to follow these instructions system in the dryer. Over time, the buildup of lime scale may clog different parts of the water - Kenmore 7808 | Use and Care Guide - Page 14
dryer. Do not dry anything that has ever had anything flammable on it (even after washing). Failure to follow these instructions can result in death, explosion, or fire. Fire Hazard No washer these instructions can result in death or fire. This manual covers several different models. Your dryer may - Kenmore 7808 | Use and Care Guide - Page 15
tips • Follow care label directions when they are available• • If desired, add a fabric softener sheet. Follow package instructions. • To reduce wrinkling, remove the load from the dryer as soon as tumbling stops. This is especially important for permanent press, knits and synthetic fabrics. 15 - Kenmore 7808 | Use and Care Guide - Page 16
charts (in the "Cycles" section) for a guide to drying various loads. Drying temperature and dryness wet item is not detected after approximately 5 minutes, the dryer goes directly into Cool Down and the Cool Down and Down light illuminates during the cool down part of the cycle. Laundry cools for - Kenmore 7808 | Use and Care Guide - Page 17
High Touch Up Helps to smooth out wrinkles in loads left in the dryer for an extended period. Medium High Default Time (Minutes) 15 20 Timed Modifiers and Options." NOTE: Timed Cycles may also be used with the dryer rack. See "Dryer Rack." Timed Dry Use this cycle to complete drying if items are - Kenmore 7808 | Use and Care Guide - Page 18
Cycles. Drum Light Select Drum Light to turn on the light inside the dryer drum. During a cycle, if Drum Light is selected, the drum light turns the Normal cycle. NOTE: If you do not select WRINKLE GUARD ®,the dryer stops after cool down. Cycle Signal The Cycle Signal produces an audible sound - Kenmore 7808 | Use and Care Guide - Page 19
Volume NOTE: When WRINKLE GUARD ® is selected, a tone sounds every 5 minutes until the clothes are removed, or WRINKLE GUARD ®ends. The dryer rack was shipped in the dryer drum. Use the dryer rack for items that you do not want to tumble dry, such as sweaters. Use Timed Dry to select the desired - Kenmore 7808 | Use and Care Guide - Page 20
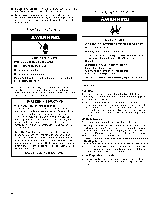
detergent. Scrub lint screen with the brush to remove residue buildup• Explosion Hazard Keep flammable materials and vapors, such as gasoline, away from dryer. Place dryer at least 18 inches (46 cm) above the floor for a garage installation. Failure to do so can result in death, explosion, or fire - Kenmore 7808 | Use and Care Guide - Page 21
. 7. Make sure leveling legs are secure in dryer base. 8. Use masking tape to secure dryer door. Reinstalling the dryer Follow the "Installation Instructions" to locate, level and connect the dryer. The dryer light automatically turns on inside the dryer drum when you open the door. To change - Kenmore 7808 | Use and Care Guide - Page 22
TROUBLESHOOTING First try the solutions suggested here and possibly avoid the cost of a service call... ye_ Ope at o s Dryer will not run Has a household fuse blown, or has a circuit breaker tripped? Replace the fuse or reset the circuit breaker. If the problem See "Installation Instructions." Are - Kenmore 7808 | Use and Care Guide - Page 23
top and bottom of the door. The rear of the dryer requires 5" (12.7 cm) of airspace. See "installation Instructions." • Has the Air Dry modifier been selected? Select Congratulations on making a smart purchase. Your new Kenmore '_product is designed and manufactured for years of dependable - Kenmore 7808 | Use and Care Guide - Page 24
support from a Sears representative on all products. Think of us as a "talking owner's manual refrigerator or freezer. Rental reimbursement if repair of your covered product takes longer than promised. v' 10% discount off the regular price of any non-covered repair service and related installed parts - Kenmore 7808 | Use and Care Guide - Page 25
GARANT|A DE LOS ELECTRODOMESTICOS KENMORE ELITE® GARANT|A LIMITADA DE UN ANO Cuando este electrodom6stico los demas es muy importante. Hemos incluido muchos mensajes importantes de seguridad en este manual yen su electrodom6stico. todos los mensajes de seguridad. Este es el sfmbolo de advertencia - Kenmore 7808 | Use and Care Guide - Page 26
de repararla a menos que esto se recomiende especificamente en el Manual del propietario o en instrucciones de reparacion publicadas para el las _.reas adyacentes a esta apertura sin pelusa, polvo o tierra. • La parte interior de la secadora y el ducto de escape se deben limpiar peri6dieamente. Esta - Kenmore 7808 | Use and Care Guide - Page 27
IMPORTANTE: La instalaci6n de gas debe hacerse de acuerdo con los c6digos locales, o si no los hay, con el C6digo Nacional de Gas Combustible (National Fuel Gas Code), ANSI Z223.1/NFPA 54. La secadora debe estar conectada a tierra de acuerdo con los c6digos locales, o si no los hay, con el C6digo - Kenmore 7808 | Use and Care Guide - Page 28
medidas de espacio para esta secadora. Esta secadora ha sido puesta a prueba para espacios de 0" (0 cm) en los costados yen la parte posterior. El espacio recomendado debe ser considerado por los siguientes motivos: • Debe considerarse el espacio adicional para facilitar la instalaci6n y el servicio - Kenmore 7808 | Use and Care Guide - Page 29
tuberias que resistan la acci6n del gas LR No use cinta TEFLON% • Debe incluir una v_lvula de cierre: Debe instalarse una vAIvula de cierre individual manual a una distancia de no mAs de 6 pies (1,8 m) de la secadora de acuerdo con el C6digo Nacional de Gas Combustible (National Fuel Gas Code), ANSI - Kenmore 7808 | Use and Care Guide - Page 30
El tubo de gas de la secadora • El tubo de gas que sale por la parte posterior de su secadora tiene una conexi6n de rosca macho de 3/8". • Se debe usar un ducto de escape de metal pesado de 4" (10,2 cm) y abrazaderas. - Kenmore 7808 | Use and Care Guide - Page 31
p6ngase en contacto con su distribuidor local para hacer convertir su secadora. Esta secadora tambi6n puede ventilarse al exterior por su parte posterior derecha o izquierda. Se necesitan juegos opcionales para este tipo de instalaciones de ventilaci6n. Consulte las instrucciones del fabricante para - Kenmore 7808 | Use and Care Guide - Page 32
la secadora. Coloque el car_6n debajo de todo el borde posterior de la secadora. 2. Sujete con firmeza el cuerpo de la secadora (no la parte superior o el panel de la consola). Coloque la secadora cuidadosamente sobre el cart6n. Vea la ilustraci6n. 3. Examine las patas niveladoras. Localice la marca - Kenmore 7808 | Use and Care Guide - Page 33
sellador compuesto para las roscas de todos los accesorios macho no abocinados. Si se usa tuberia flexible de metal, asegOrese que no hay partes retorcidas. A. Accesonos macho abocinados B. Aooesorios macho no abocinados NOTA: Para las conexiones de gas LP, debe usar un pegamento de uni6n de tubos - Kenmore 7808 | Use and Care Guide - Page 34
la izquierda, si Io desea. 1. Coloque una toalla o un patio suave en la parte superior de la secadora o de la superficie de trabajo, para proteger la superficie. . Coloque la puer_a sobre una superficie plana y protegida con la parte interior de la puerta mirando hacia arriba. Quite los 2 tornillos - Kenmore 7808 | Use and Care Guide - Page 35
5. Quite los 4 tapones de pl#.stico ubicados fuera de la abertura de la puerta de la secadora. [I II --}p,-_ Vuelva a instalar la puerta 1. Quite los 4 tornillos y las 2 bisagras de la puerta de la secadora. 2. Vuelva a colocar los 4 tornillos en los mismos orificios. It 6. Instale los 4 tapones - Kenmore 7808 | Use and Care Guide - Page 36
de sarro a traves del sistema de agua en la secadora. Conforme pasa el tiempo, la acumulaci6n de dep6sitos calcareos puede obstruir diferentes partes del sistema de agua, Io cual reducir& el rendimiento del producto. La acumulaci6n excesiva de sarro puede causar la necesidad de reemplazar ciertas - Kenmore 7808 | Use and Care Guide - Page 37
ciclos y las caracteristicas descritos. Siga estos pasos b&sicos para poner su secadora en march& Por favor consulte las secciones especificas de este manual para obtener informaci6n mAs detallada. 1. Limpie el filtro de pelusa antes de cada carga. Vea "Limpieza del filtro de pelusa". 2. Coloque la - Kenmore 7808 | Use and Care Guide - Page 38
ropa. A medida que avanza el ciclo, el control detecta el nivel de sequedad de la carga y regula automaticamente el tiempo segL_nel nivel de sequedad seleccionado. El ajuste de sequedad prefijado es Normal cuando se selecciona un ciclo de secado autom_.tico. Puede seleccionar un nivel de sequedad - Kenmore 7808 | Use and Care Guide - Page 39
Seleccione el ciclo y el nivel de eecado o la temperatura correctos para eu carga. Si eet& en maraha un ciclo de eecado automAtico (Auto Dry Cycle) la pantalla muestra el tiempo estimado del ciclo, que la secadora determina al detectar automAticamente el nivel de sequedad de la aarga. Siesta - Kenmore 7808 | Use and Care Guide - Page 40
Seleccione el ciclo de secado de acuerdo con el tipo de carga que va a secar. Vea los cuadros de Ajustes prefijados de ciclos automAticos o programados. AUTO DRY CYCLES Cotton / Towels Heavy Duty Normal Bulky/ Bedding Express Dry TIMED CYCLES Tou_h Up Refresh ST_AMCARE Ciclos de secado autom& - Kenmore 7808 | Use and Care Guide - Page 41
Retoque (Touch Up} Este ciclo es mejor para retocar la ropa que se ha dejado en la secadora per mucho tiempo. En este siclo, se roda una peque_a cantidad de agua en el tambor de la secadora despu6s de algunos minutes de rotaci6n con calor. La secadora continuara rotando con calor, seguido per un - Kenmore 7808 | Use and Care Guide - Page 42
Cuando use secado al aire • Revise las cubiertas para ver si las costuras est&n firrnes. • Sacuda y palmotee las almehadas con la mano peri6dicamente durante el ciclo. • Seque el articulo completamente. Las almohadas de gema espuma tardan en secar. NOTA: El modifieador de seeado al aire no est& - Kenmore 7808 | Use and Care Guide - Page 43
el estante de la seeadora: No quite el filtro de pelusa. 1. Abra la puerta de la secadora. 2. Deslice el estante de la secadora sobre la parte inferior de la abertura de la secadora. Deje el alambre posterior sebre el reborde de la parle posterior de la secadera. Empuje hacia abajo el - Kenmore 7808 | Use and Care Guide - Page 44
3. Moje un cepillo de nailon con agua caliente y detergente Ifquido. Refriegue el filtro de pelusa con el cepillo para quitar la acumulaci6n de residuos. Peligro de Explosibn Mantenga los materiales y vapores inflamables, como la gasolina, lejos de la secadora. Coloque la secadora a un mfnimo de 46 - Kenmore 7808 | Use and Care Guide - Page 45
que se escuche un sonido fuerte durante los primeros minutos de funcionamiento. • /.Hay una moneda, boton o sujetapapeles entre el tambor y la parte frontal o trasera de la eecadora? Revise los bordes frontales y traseros del tambor para verificar si hay objetos peque_os. Limpie los bolsillos antes - Kenmore 7808 | Use and Care Guide - Page 46
de Nivel de sequedad para aumentar la sequedad de todos los Ciclos de secado automAtico. Vea "Cambio de ciclos, modificadores y opciones". • /.Hay partes ht_medas o mojadas en las prendas cuando las saca del ciclo de Revitalizado (Refresh)? Es posible que la ropa se seque poco bajo cier_as - Kenmore 7808 | Use and Care Guide - Page 47
iFelicitaciones per su inteligente adquisici6n! Su nuevo producto Kenmore ® estA dise_ado y fabricado para proporcionarle aSos de para todos los productos. Piense en nosotros come si fu6rames un "manual parlante para el propietario". v' Proteccion de sobrevoltaje contra daSos el6ctricos debido - Kenmore 7808 | Use and Care Guide - Page 48
For the replacement parts, accessories and owner's manuals that you need to do-it-yourself. For Sears professional installation of home appliances and items call or go on-line for the location of your nearest Sears Parts & Repair Service Center 1-800-488-1222 (U.S.A.) 1-800-469-4663 Call anytime,
-
 1
1 -
 2
2 -
 3
3 -
 4
4 -
 5
5 -
 6
6 -
 7
7 -
8
-
9
-
10
-
11
-
12
-
13
-
14
-
15
-
16
-
17
-
18
-
19
-
20
-
21
-
22
-
23
-
24
-
25
-
26
-
27
-
28
-
29
-
30
-
31
-
32
-
33
-
34
-
35
-
36
-
37
-
38
-
39
-
40
-
41
-
42
-
43
-
44
-
45
-
46
-
47
-
48
 |
 |
I
T
®
qasis
am
Gas Dryer
Secadora
a gas
Models/Modelos
110.7708_,
7709_
= color number/nOmero de color
W10180628A
Sears Roebuck
and Co.,
Hoffman
Estates,
IL 60179 U.S.A.
www.sears.com