Kyocera TASKalfa 4551ci Printing System (11),(12),(13),(14) Configuration and - Page 15
Preparing for E100 Setup, Levels of access and control, Users and Groups - reviews
 |
View all Kyocera TASKalfa 4551ci manuals
Add to My Manuals
Save this manual to your list of manuals |
Page 15 highlights
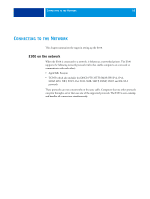
PREPARING FOR E100 SETUP 15 PREPARING FOR E100 SETUP To prepare for printing at your site, you must do some initial E100 configuration (or "Setup") to specify the network environment and the types of printing you do. Before you perform Setup, decide the levels of access to implement, such as passwords and other security features that the E100 offers. Because many of these security features are interconnected, review the information in this chapter to plan for an effective security system, and then perform Setup accordingly. E100 Setup can be accessed two ways: • From the copier touch panel (Application button > Fiery > Info tab > Server tab > Server Setup). Setup from the copier touch panel contains basic network options to quickly get your E100 on the network, ready for printing. For more information about Setup from the copier touch panel, see page 24. • From Configure (a utility available from remote networked windows computers). Configure Setup allows you to use your keyboard to enter Setup options and provides additional Setup options not available from the copier touch panel. For information about accessing Configure, see page 31. Levels of access and control When you configure the E100 during Setup, you implement a particular level of control by configuring these elements: • Users and Groups • Print connections • Access to WebTools Users and Groups With Configure, you create users, assign passwords to users, create groups with particular privileges, and assign users to the groups. Several groups are provided by default, and you can create new groups. All users in a group have the same privileges. In addition to assigning the users that you have created to a group, you can add users from your organization's global address list if you have LDAP services enabled on the E100. The following discussion is an overview designed to help you prepare a security strategy. For more information, including specific procedures, see Configure Help.
-
 1
1 -
2
-
3
-
4
-
5
-
6
-
7
-
8
-
9
-
 10
10 -
 11
11 -
 12
12 -
 13
13 -
 14
14 -
 15
15 -
 16
16 -
 17
17 -
 18
18 -
 19
19 -
 20
20 -
21
-
22
-
23
-
24
-
25
-
26
-
27
-
28
-
29
-
30
-
31
-
32
-
33
-
34
-
35
-
36
-
37
-
38
-
39
-
40
-
41
-
42
-
43
-
44
-
45
-
46
-
47
-
48
-
49
-
50
-
51
-
52
-
53
-
54
-
55
-
56
-
57
-
58
-
59
 |
 |
