Kyocera TASKalfa 500ci Fax System (S) C Operation Guide Rev-2 - Page 46
FAX Operation Basic, OPERATION GUIDE, Character Entry Method on of the Appendix, Sub Address
 |
View all Kyocera TASKalfa 500ci manuals
Add to My Manuals
Save this manual to your list of manuals |
Page 46 highlights
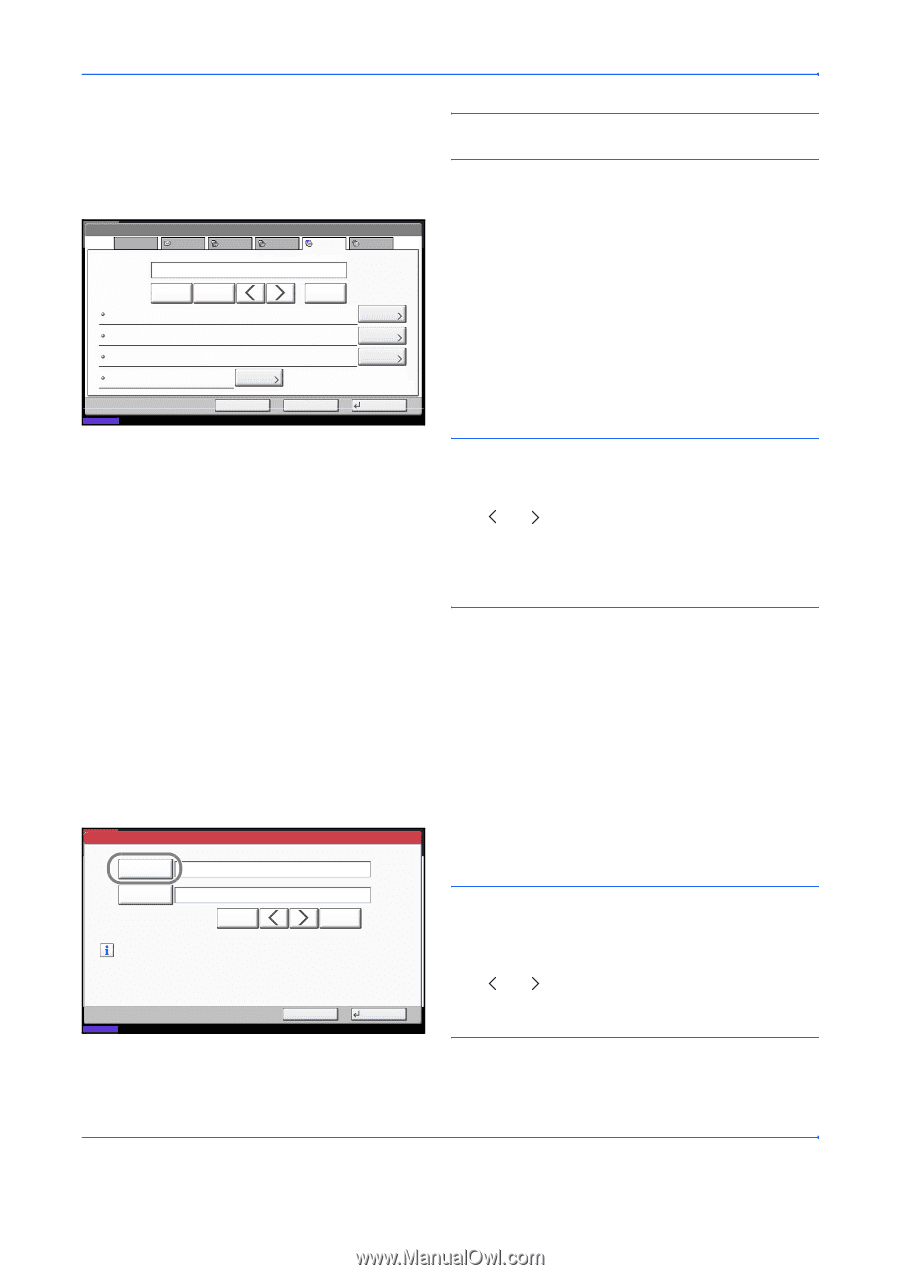
FAX Operation (Basic) Address: Name E-mail SMB FTP FAX i-FAX NOTE: For details on character entry, refer to Character Entry Method on page 2 of the Appendix. 8 Press [FAX]. 9 Use the numeric keys to enter the number of the receiving system. Pause Sub Address Encryption Key No. TX Start Speed ECM Space : : : : Change Status Cancel Backspace Change Change Change Back Register 08/08/2009 10:10 NOTE: Up to 32 digits can be entered as the number of the receiving system. Press [Space] to enter a space. Use [ ] or [ ] to move the cursor. To correct the fax number, press [Backspace] on the touch panel, and delete the digits one by one before reentering the fax number. To delete the number entirely, press the Clear key on the operation panel. FAX No. Entry - Sub Address Sub Address Password 1234567890 Space Set sub address. Enter sub address and password using numeric keys. (Max. 20 digits) Status [Pause] Pressing this key adds about three seconds of waiting time during dialing. For example, when dialing the receiving system on an external line, you can use this method to insert a pause before resuming dialing after you dial a specific number. 10 Press [Change] of Sub Address. When you do not use sub address communication, go to step 14. 11 Press [Sub Address] and enter the sub address using the numeric keys. Backspace Cancel OK 08/08/2009 10:10 NOTE: You can use up to 20 digits including the numbers from 0 to 9, ' (space)', '#' and '*' characters to enter a sub address. Press [Space] to enter a space. Use [ ] or [ ] to move the cursor. Pressing [Backspace] deletes the character to the left of the cursor. 3-18 OPERATION GUIDE
-
 1
1 -
2
-
3
-
4
-
5
-
6
-
7
-
8
-
9
-
10
-
11
-
12
-
13
-
14
-
15
-
16
-
17
-
18
-
19
-
20
-
21
-
22
-
23
-
24
-
25
-
26
-
27
-
28
-
29
-
30
-
31
-
32
-
33
-
34
-
35
-
36
-
37
-
38
-
39
-
40
-
 41
41 -
 42
42 -
 43
43 -
 44
44 -
 45
45 -
 46
46 -
 47
47 -
 48
48 -
 49
49 -
 50
50 -
 51
51 -
52
-
53
-
54
-
55
-
56
-
57
-
58
-
59
-
60
-
61
-
62
-
63
-
64
-
65
-
66
-
67
-
68
-
69
-
70
-
71
-
72
-
73
-
74
-
75
-
76
-
77
-
78
-
79
-
80
-
81
-
82
-
83
-
84
-
85
-
86
-
87
-
88
-
89
-
90
-
91
-
92
-
93
-
94
-
95
-
96
-
97
-
98
-
99
-
100
-
101
-
102
-
103
-
104
-
105
-
106
-
107
-
108
-
109
-
110
-
111
-
112
-
113
-
114
-
115
-
116
-
117
-
118
-
119
-
120
-
121
-
122
-
123
-
124
-
125
-
126
-
127
-
128
-
129
-
130
-
131
-
132
-
133
-
134
-
135
-
136
-
137
-
138
-
139
-
140
-
141
-
142
-
143
-
144
-
145
-
146
-
147
-
148
-
149
-
150
-
151
-
152
-
153
-
154
-
155
-
156
-
157
-
158
-
159
-
160
-
161
-
162
-
163
-
164
-
165
-
166
-
167
-
168
-
169
-
170
-
171
-
172
-
173
-
174
-
175
-
176
-
177
-
178
-
179
-
180
-
181
-
182
-
183
-
184
-
185
-
186
-
187
-
188
-
189
-
190
-
191
-
192
-
193
-
194
-
195
-
196
-
197
-
198
-
199
-
200
-
201
-
202
-
203
-
204
-
205
-
206
-
207
-
208
-
209
-
210
-
211
-
212
-
213
-
214
-
215
-
216
-
217
-
218
-
219
-
220
-
221
-
222
-
223
-
224
 |
 |