LG 42LK550 Owner's Manual - Page 66
Computer requirements for, Nero MediaHome 4, Essentials, Nero MediaHome 4 Essentials, I accept
 |
View all LG 42LK550 manuals
Add to My Manuals
Save this manual to your list of manuals |
Page 66 highlights
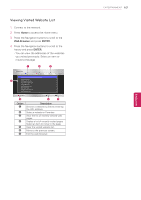
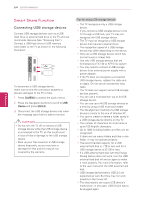
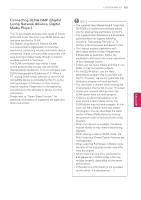
66 ENTERTAINMENT ENEGNLGISH Installing Nero MediaHome 4 Essentials Nero MediaHome 4 Essentials is an easy to use DLNA server software for Windows. Computer requirements for Nero MediaHome 4 Essentials yyWindows® XP (Service Pack 2 or higher), Windows Vista® (no Service Pack required), Windows® XP Media Center Edition 2005 (Service Pack 2 or higher), Windows Server® 2003 (Service Pack 1 or higher) yyWindows® 7 Home Premium, Professional, Enterprise or Ultimate (32 and 64-bit) yyWindows Vista® 64-bit edition (application runs in 32-bit mode) yyWindows® 7 64-bit edition (application runs in 32-bit mode) yyHard drive space: 200 MB hard drive space for a typical installation of Nero MediaHome stand-alone yy1.2 GHz Intel® Pentium® III or AMD Sempron™ 2200+ processors yyMemory: 256 MB RAM yyGraphics card with at least 32 MB video memory, minimum resolution of 800 x 600 pixels, and 16-bit color settings yyWindows® Internet Explorer® 6.0 or higher yyDirectX® 9.0c revision 30 (August 2006) or higher yyNetwork environment: 100 Mb Ethernet, WLAN (IEEE 802.11g), or faster 1 Start up your computer. 2 Close all Microsoft Windows programs and exit any anti-virus software that may be running. 3 Insert the Nero MediaHome 4 Essentials CD- ROM into your computer's CD-ROM drive. 4 Click Nero MediaHome 4 Essentials. The installation wizard will appear. 5 Click the Next button to display the serial number input screen. Click Next to go to the next step. 6 If you accept all conditions, click I accept the License Conditions check box and click Next. Installation is not possible without this agreement. 7 Click Typical and click Next. The installation process is started. 8 If you want to take part in the anonymous collection of data, select the check box and click the Next button. 9 Click the Exit button to complete the installation. Sharing files and folders After installing Nero MediaHome, you must add folders you wish to share. 1 Double-click the Nero MediaHome 4 Essentials icon on the desktop. 2 Click Network icon on the left and define your network name in the Network name field. The Network name you enter will be recognized by your TV. 3 Click Shares icon on the left. 4 Click Local Folders tab on the Shared screen. 5 Click Add icon to open the Browse Folder window. 6 Select the folder containing the files you want to share. The selected folder is added to the list of shared folders. 7 Click Start Server icon to start the server. NOTE yyIf the shared folders or files are not displayed on the TV, click the folder on the Local Folders tab and click Rescan Folder at the More button. yyVisit http://www.nero.com for more information and software tools.
-
 1
1 -
2
-
3
-
4
-
5
-
6
-
7
-
8
-
9
-
10
-
11
-
12
-
13
-
14
-
15
-
16
-
17
-
18
-
19
-
20
-
21
-
22
-
23
-
24
-
25
-
26
-
27
-
28
-
29
-
30
-
31
-
32
-
33
-
34
-
35
-
36
-
37
-
38
-
39
-
40
-
41
-
42
-
43
-
44
-
45
-
46
-
47
-
48
-
49
-
50
-
51
-
52
-
53
-
54
-
55
-
56
-
57
-
58
-
59
-
60
-
 61
61 -
 62
62 -
 63
63 -
 64
64 -
 65
65 -
 66
66 -
 67
67 -
 68
68 -
 69
69 -
 70
70 -
 71
71 -
72
-
73
-
74
-
75
-
76
-
77
-
78
-
79
-
80
-
81
-
82
-
83
-
84
-
85
-
86
-
87
-
88
-
89
-
90
-
91
-
92
-
93
-
94
-
95
-
96
-
97
-
98
-
99
-
100
-
101
-
102
-
103
-
104
-
105
-
106
-
107
-
108
-
109
-
110
-
111
-
112
-
113
-
114
-
115
-
116
-
117
-
118
-
119
-
120
-
121
-
122
-
123
-
124
-
125
-
126
-
127
-
128
-
129
-
130
-
131
-
132
-
133
-
134
-
135
-
136
-
137
-
138
-
139
-
140
-
141
-
142
-
143
-
144
-
145
-
146
-
147
-
148
-
149
-
150
-
151
-
152
-
153
-
154
-
155
-
156
-
157
-
158
-
159
-
160
-
161
-
162
-
163
-
164
-
165
-
166
-
167
-
168
-
169
-
170
-
171
-
172
 |
 |