Lenovo ThinkPad Edge E425 (English) User Guide - Page 63
Using an integrated camera, Compliant with Intel High Definition Audio
 |
View all Lenovo ThinkPad Edge E425 manuals
Add to My Manuals
Save this manual to your list of manuals |
Page 63 highlights
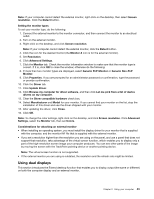
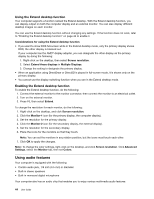
• Compliant with Intel High Definition Audio • Recording and playback of PCM and WAV files in 16-bit or 24-bit format • Playback of a WAV file at a sample rate of 44.1KHz to 192 KHz • Playback of MIDI files through a Wave table synthesizer under Microsoft Windows operating systems • Playback of MP3 files through the Windows Media Player or a software MP3 player • Recording from various sound sources Note: The combo audio jack does not support a conventional microphone. If a conventional headphone is attached to it, the headphone function is supported. If a headset with a 3.5mm 4-pole plug is attached to it, both headphone and microphone functions are supported. The following table shows which functions of the audio devices attached to the jacks on your computer are supported. Table 3. Audio feature list Jack Combo audio jack Headset with a 3.5 mm 4-pole plug Headphone and microphone functions supported Conventional headphone Conventional microphone Headphone function supported Not supported Configuring for sound recording For instructions on configuring the microphone for optimized sound recording, open the SmartAudio window and click Start ➙ Control Panel ➙ Hardware and Sound ➙ SmartAudio. The SmartAudio window opens. Using an integrated camera If your computer has an integrated camera, when you press F5 to open the Communications settings window, the camera will be launched and the green camera-in-use indicator will turn on automatically. In the Communications settings window, you can preview your video image and take a snapshot of your current image. You can also use the integrated camera with other programs that provide features such as photographing, video capturing, and video conferencing. To use the integrated camera with other programs, open one of the programs and start the photographing, video capturing, or videoconferencing function. Then, the camera will start automatically and the green camera-in-use indicator will turn on. For more information about using the camera with a program, refer to the documentation that came with the program. If you do not want the camera to be launched automatically when you press F5 or when you use a program, press F5 to open the Communications settings window and click the Hide my camera image button to disable the camera. Configuring camera settings You can configure the camera settings to meet your needs, such as adjusting the quality of the video output. To configure the camera settings, do the following: 1. Press F5. The Communications settings window opens. 2. Click the Manage Settings button. The Communications Utility window opens. 3. In the Communications Utility window, configure the camera settings depending on your individual needs. Chapter 2. Using your computer 45
-
 1
1 -
2
-
3
-
4
-
5
-
6
-
7
-
8
-
9
-
10
-
11
-
12
-
13
-
14
-
15
-
16
-
17
-
18
-
19
-
20
-
21
-
22
-
23
-
24
-
25
-
26
-
27
-
28
-
29
-
30
-
31
-
32
-
33
-
34
-
35
-
36
-
37
-
38
-
39
-
40
-
41
-
42
-
43
-
44
-
45
-
46
-
47
-
48
-
49
-
50
-
51
-
52
-
53
-
54
-
55
-
56
-
57
-
 58
58 -
 59
59 -
 60
60 -
 61
61 -
 62
62 -
 63
63 -
 64
64 -
 65
65 -
 66
66 -
 67
67 -
 68
68 -
69
-
70
-
71
-
72
-
73
-
74
-
75
-
76
-
77
-
78
-
79
-
80
-
81
-
82
-
83
-
84
-
85
-
86
-
87
-
88
-
89
-
90
-
91
-
92
-
93
-
94
-
95
-
96
-
97
-
98
-
99
-
100
-
101
-
102
-
103
-
104
-
105
-
106
-
107
-
108
-
109
-
110
-
111
-
112
-
113
-
114
-
115
-
116
-
117
-
118
-
119
-
120
-
121
-
122
-
123
-
124
-
125
-
126
-
127
-
128
-
129
-
130
-
131
-
132
-
133
-
134
-
135
-
136
-
137
-
138
-
139
-
140
-
141
-
142
-
143
-
144
-
145
-
146
-
147
-
148
-
149
-
150
-
151
-
152
-
153
-
154
-
155
-
156
-
157
-
158
-
159
-
160
-
161
-
162
-
163
-
164
-
165
-
166
-
167
-
168
 |
 |