Lexmark 12N0009 Finisher Setup and User's Guide - Page 17
Aligning the sides of the finisher
 |
UPC - 734646560092
View all Lexmark 12N0009 manuals
Add to My Manuals
Save this manual to your list of manuals |
Page 17 highlights
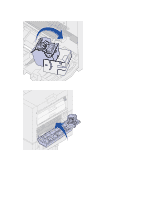
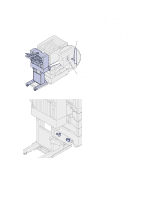
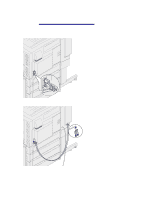
3 Rotate the adjustment knobs as needed to align the holes in the finisher with the pins. To raise the finisher, rotate the adjustment knobs clockwise. To lower the finisher, rotate the adjustment knobs counterclockwise. 4 Roll the finisher toward the printer until the finisher locks to the docking plate pins. You hear a click when the finisher locks into position. If the pins go into the holes but the finisher did not lock to the pins, see "Aligning the sides of the finisher" on page 13. Otherwise, go to "Aligning the top of the finisher" on page 15. Aligning the sides of the finisher Follow these instructions if the distance between the finisher and printer is not the same at the top and bottom. Setup 13
-
 1
1 -
2
-
3
-
4
-
5
-
6
-
7
-
8
-
9
-
10
-
11
-
 12
12 -
 13
13 -
 14
14 -
 15
15 -
 16
16 -
 17
17 -
 18
18 -
 19
19 -
 20
20 -
 21
21 -
 22
22 -
23
-
24
-
25
-
26
-
27
-
28
-
29
-
30
-
31
-
32
-
33
-
34
-
35
-
36
-
37
-
38
-
39
-
40
-
41
-
42
-
43
-
44
-
45
-
46
-
47
-
48
-
49
-
50
-
51
-
52
-
53
-
54
-
55
-
56
-
57
-
58
-
59
-
60
-
61
-
62
-
63
-
64
-
65
-
66
-
67
-
68
-
69
-
70
 |
 |

13
Setup
3
Rotate the adjustment knobs as
needed to align the holes in the
finisher with the pins.
To raise the finisher, rotate the
adjustment knobs clockwise.
To lower the finisher, rotate the
adjustment knobs
counterclockwise.
4
Roll the finisher toward the printer
until the finisher locks to the
docking plate pins.
You hear a
click
when the finisher
locks into position.
If the pins go into the holes but the
finisher did not lock to the pins,
see
“Aligning the sides of the
finisher” on page 13. Otherwise,
go to
“Aligning the top
of the finisher” on page 15.
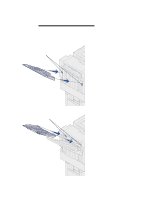
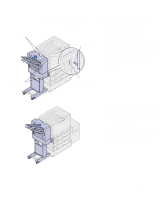
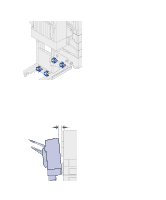
Aligning the sides of the
finisher
Follow these instructions if the distance
between the finisher and printer is not
the same at the top and bottom.